> ## Documentation Index
> Fetch the complete documentation index at: https://nango-marcin-get-deployments-docs.mintlify.site/llms.txt
> Use this file to discover all available pages before exploring further.
# Zuora - How do I link my account?
# Overview
To authenticate with Zuora, you need:
1. **Subdomain** - The Subdomain for your Zuora Base URL associated with your specific Zuora Data Center.
2. **Client ID** - A unique identifier for your client.
3. **Client Secret** - A confidential key used to authenticate the identity of the application (client).
This guide will walk you through obtaining these credentials within Zuora.
### Prerequisites:
* You must have an account with Zuora.
### Instructions:
#### Step 1: Finding your Zuora Subdomain
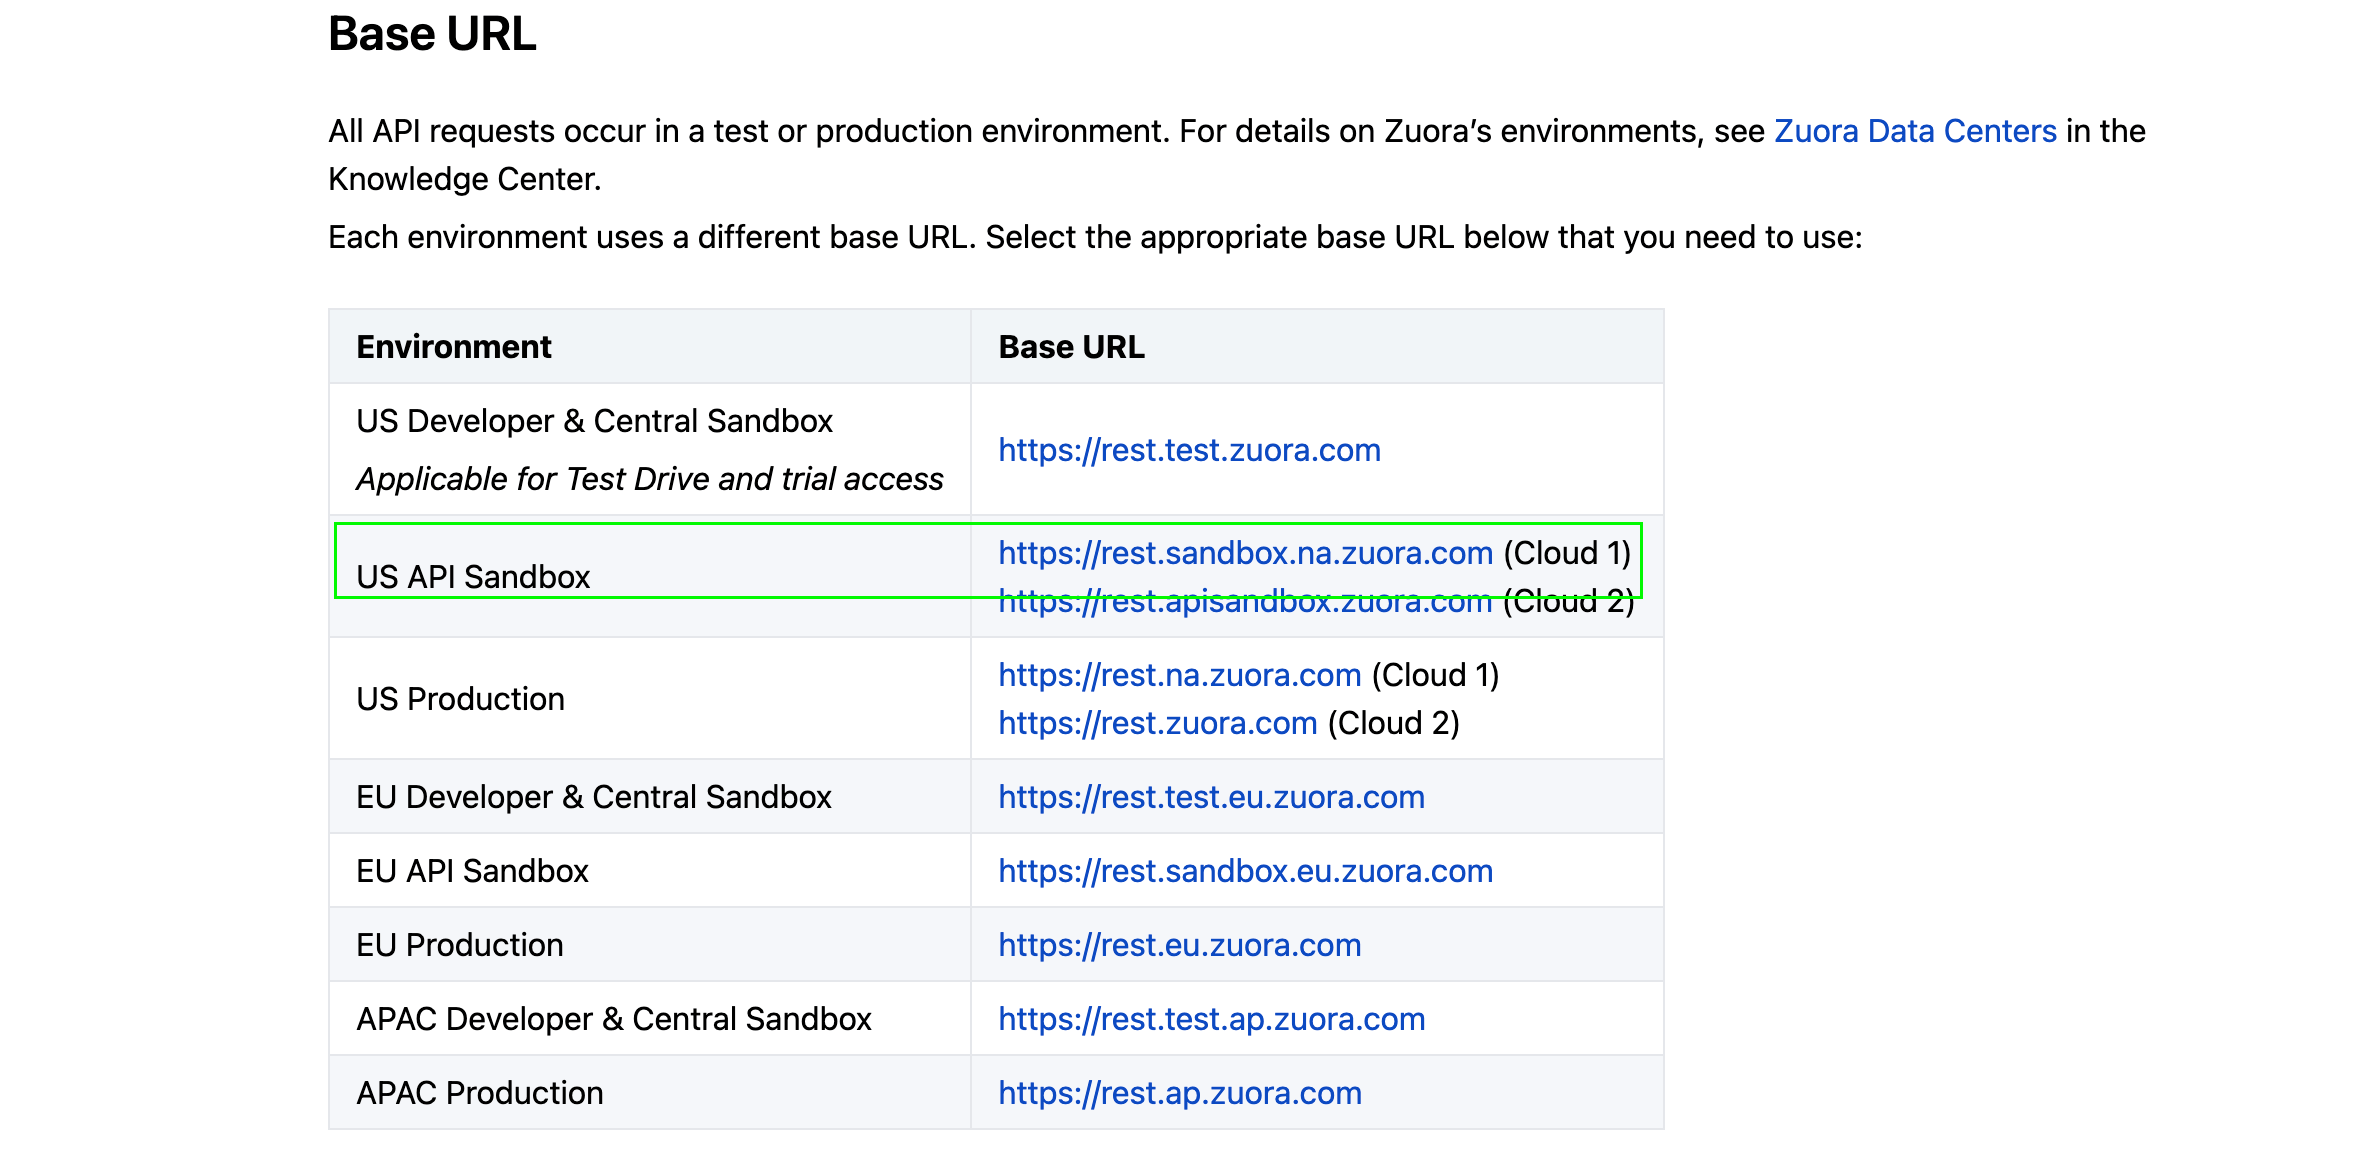
* Each environment uses a different `base URL`. Please visit [Base URL](https://developer.zuora.com/v1-api-reference/introduction/) to find the appropriate Zuora **Subdomain** for your environment. The **Subdomain** is the portion of the Base URL between `https://` and `.zuora.com`.
* In our example below, for **US API Sandbox**, **Cloud 1** the **Base URL** is `https://rest.sandbox.na.zuora.com` and thus we will have `rest.sandbox.na` as our **Subdomain**.
 #### Step 2: Generating your Client Credentials
1. Login to your Zuora account.
2. Go to **Settings > Administration > Manage User Roles** and click **Add New Role**.
3. Name the role (e.g., **API Write Role**) and enable **API Write Access**, then click **Save**.
4. Navigate to **Settings > Administration > Manage Users** and click **Add Single User**.
5. Enter the required details: first name, last name, work email, and a descriptive login name (e.g., `APIWriteAccess@yourcompany.com`).
6. Assign the newly created role (e.g., **API Write Role**) to the **Zuora Platform Role** field.
7. Save the user and set the password using the email sent to the provided work email.
8. After setting the password, go to **Manage Users** and select the created user.
9. Scroll to the **New OAuth Client** section and specify a name and description for the client.
10. Click **Create** to generate the Client ID and Secret. Save these credentials securely, as the secret is only shown once.
#### Step 3: Enter credentials in the Connect UI
Once you have your **Subdomain**, **Client ID** and **Client Secret**:
1. Open the form where you need to authenticate with Zuora.
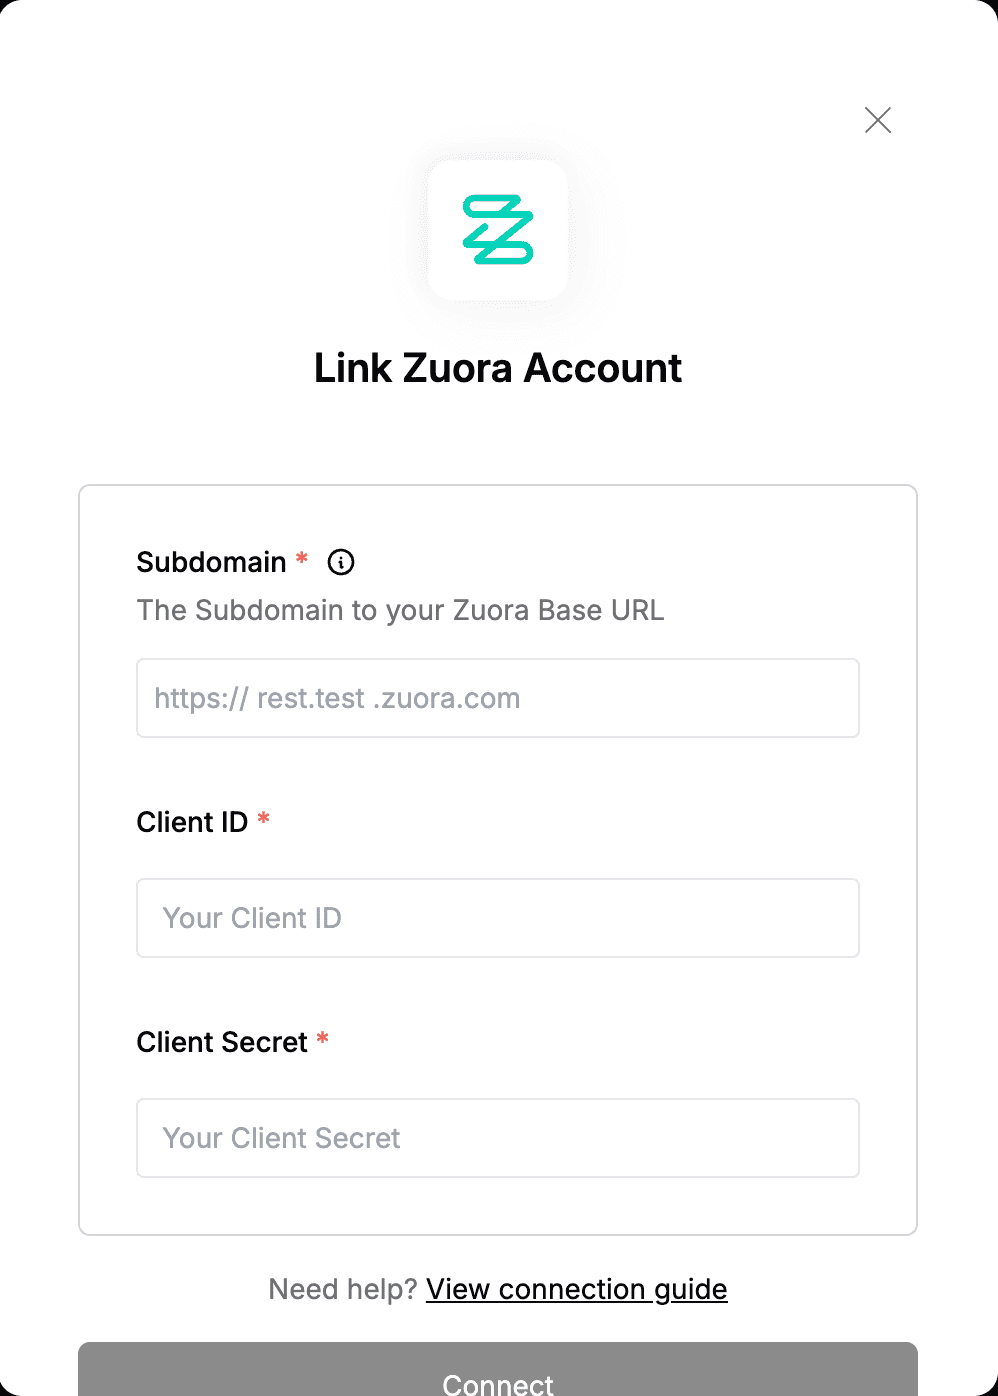
2. Enter your **Subdomain**, **Client ID** and **Client Secret** in their designated fields.
3. Submit the form, and you should be successfully authenticated.
#### Step 2: Generating your Client Credentials
1. Login to your Zuora account.
2. Go to **Settings > Administration > Manage User Roles** and click **Add New Role**.
3. Name the role (e.g., **API Write Role**) and enable **API Write Access**, then click **Save**.
4. Navigate to **Settings > Administration > Manage Users** and click **Add Single User**.
5. Enter the required details: first name, last name, work email, and a descriptive login name (e.g., `APIWriteAccess@yourcompany.com`).
6. Assign the newly created role (e.g., **API Write Role**) to the **Zuora Platform Role** field.
7. Save the user and set the password using the email sent to the provided work email.
8. After setting the password, go to **Manage Users** and select the created user.
9. Scroll to the **New OAuth Client** section and specify a name and description for the client.
10. Click **Create** to generate the Client ID and Secret. Save these credentials securely, as the secret is only shown once.
#### Step 3: Enter credentials in the Connect UI
Once you have your **Subdomain**, **Client ID** and **Client Secret**:
1. Open the form where you need to authenticate with Zuora.
2. Enter your **Subdomain**, **Client ID** and **Client Secret** in their designated fields.
3. Submit the form, and you should be successfully authenticated.
 You are now connected to Zuora.