> ## Documentation Index
> Fetch the complete documentation index at: https://nango-marcin-get-deployments-docs.mintlify.site/llms.txt
> Use this file to discover all available pages before exploring further.
# Xero (Client Credentials) - How do I link my account?
# Overview
To authenticate with Xero (Client Credentials), you will need:
1. **Client ID** - A unique identifier for your application on Checkout.
2. **Client Secret** - A key that grants full access to all your application and configurations.
This guide will walk you through generating your **Client Credentials** within Xero.
### Prerequisites:
* You must have an account with Xero.
### Instructions:
#### Step 1: Generating Your Client Credentials
1. Log in to your [Xero My Apps](https://developer.xero.com/app/manage) developer console.
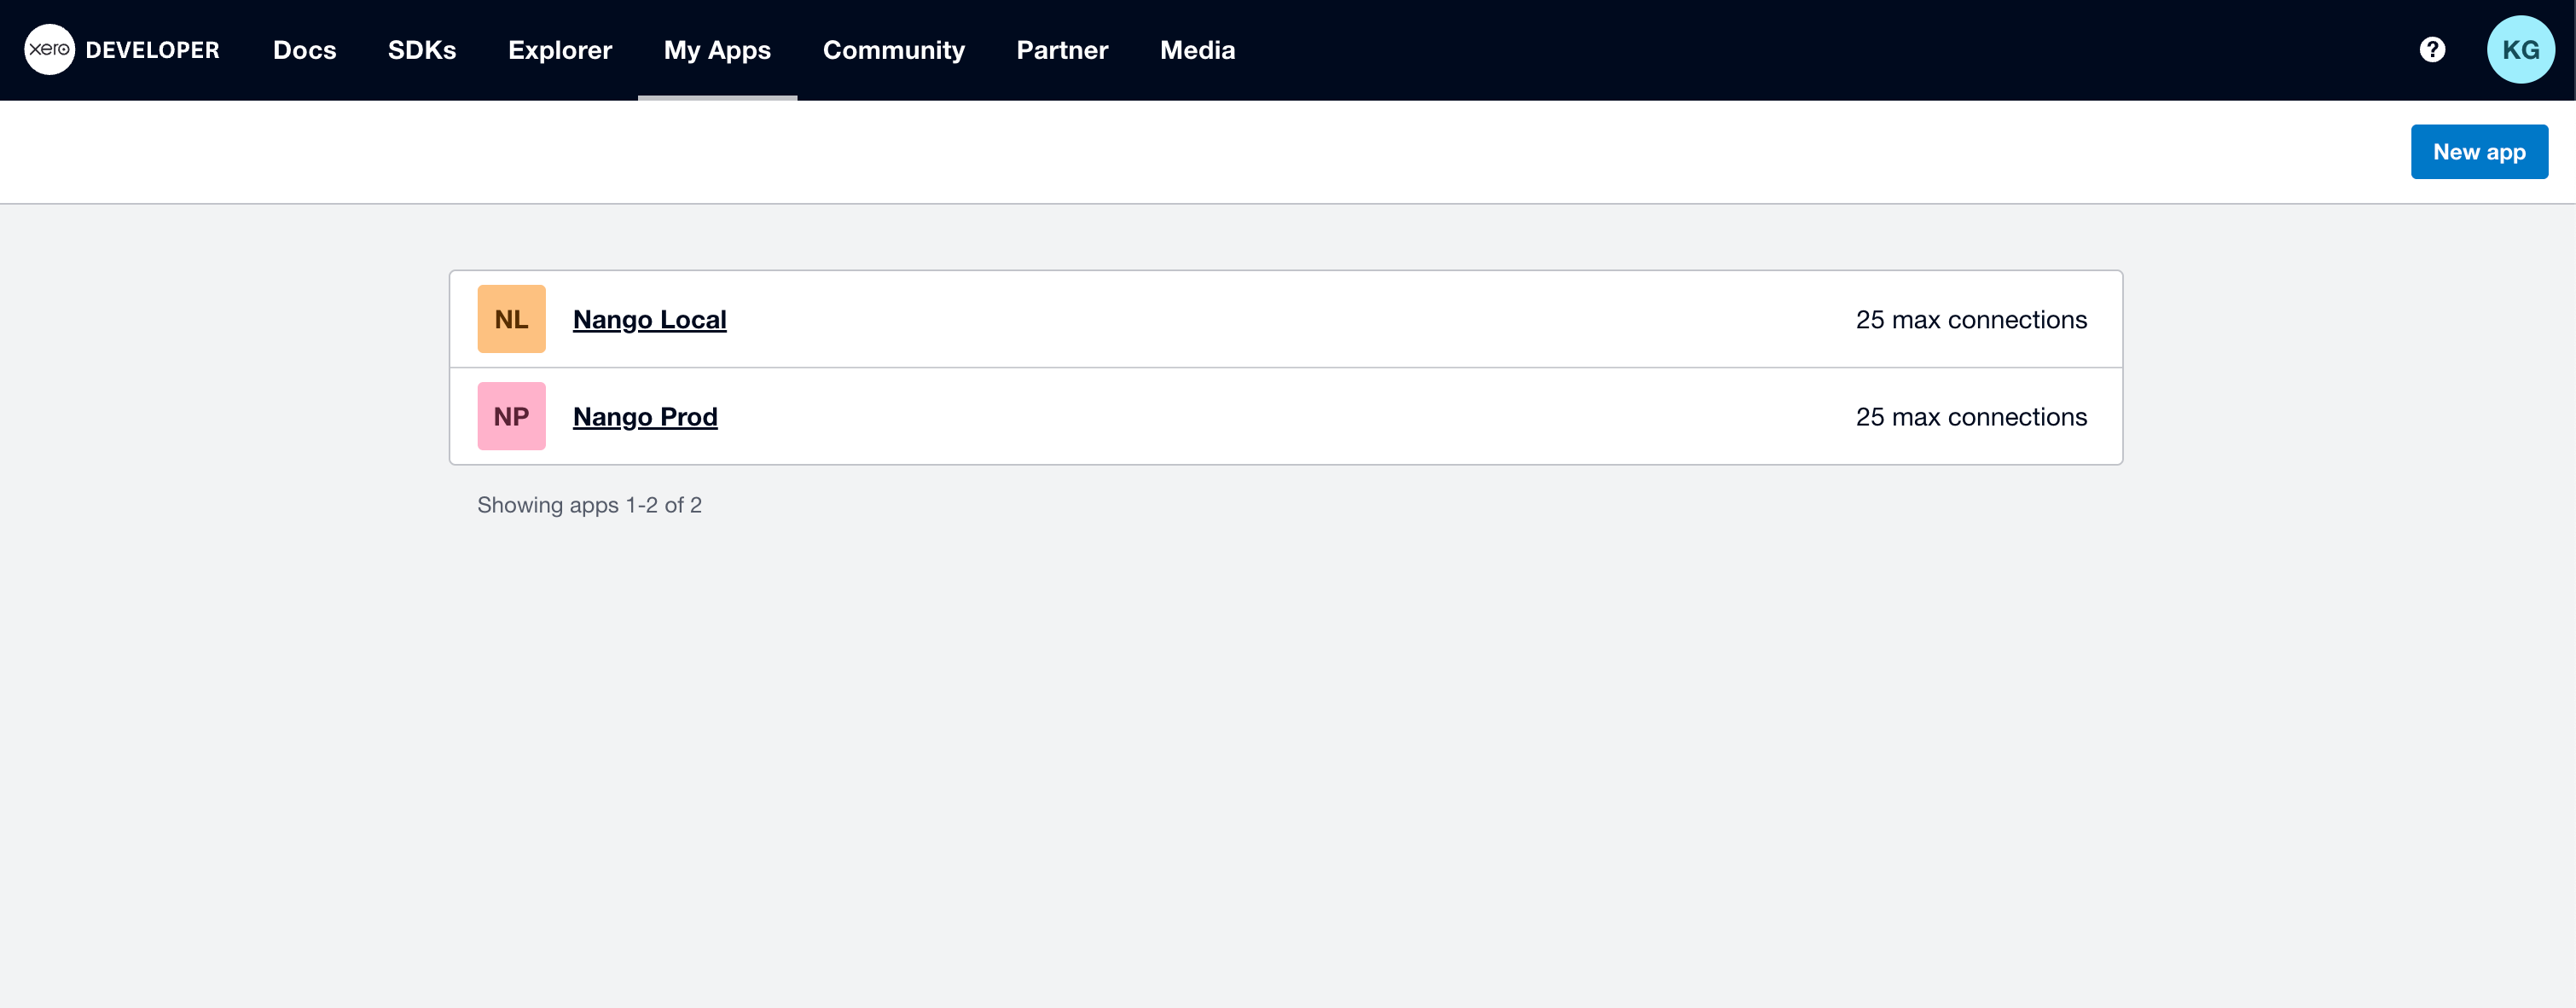 2. Click **New app** in the top right corner.
3. A new app form will appear. Enter a unique **App name**.
2. Click **New app** in the top right corner.
3. A new app form will appear. Enter a unique **App name**.
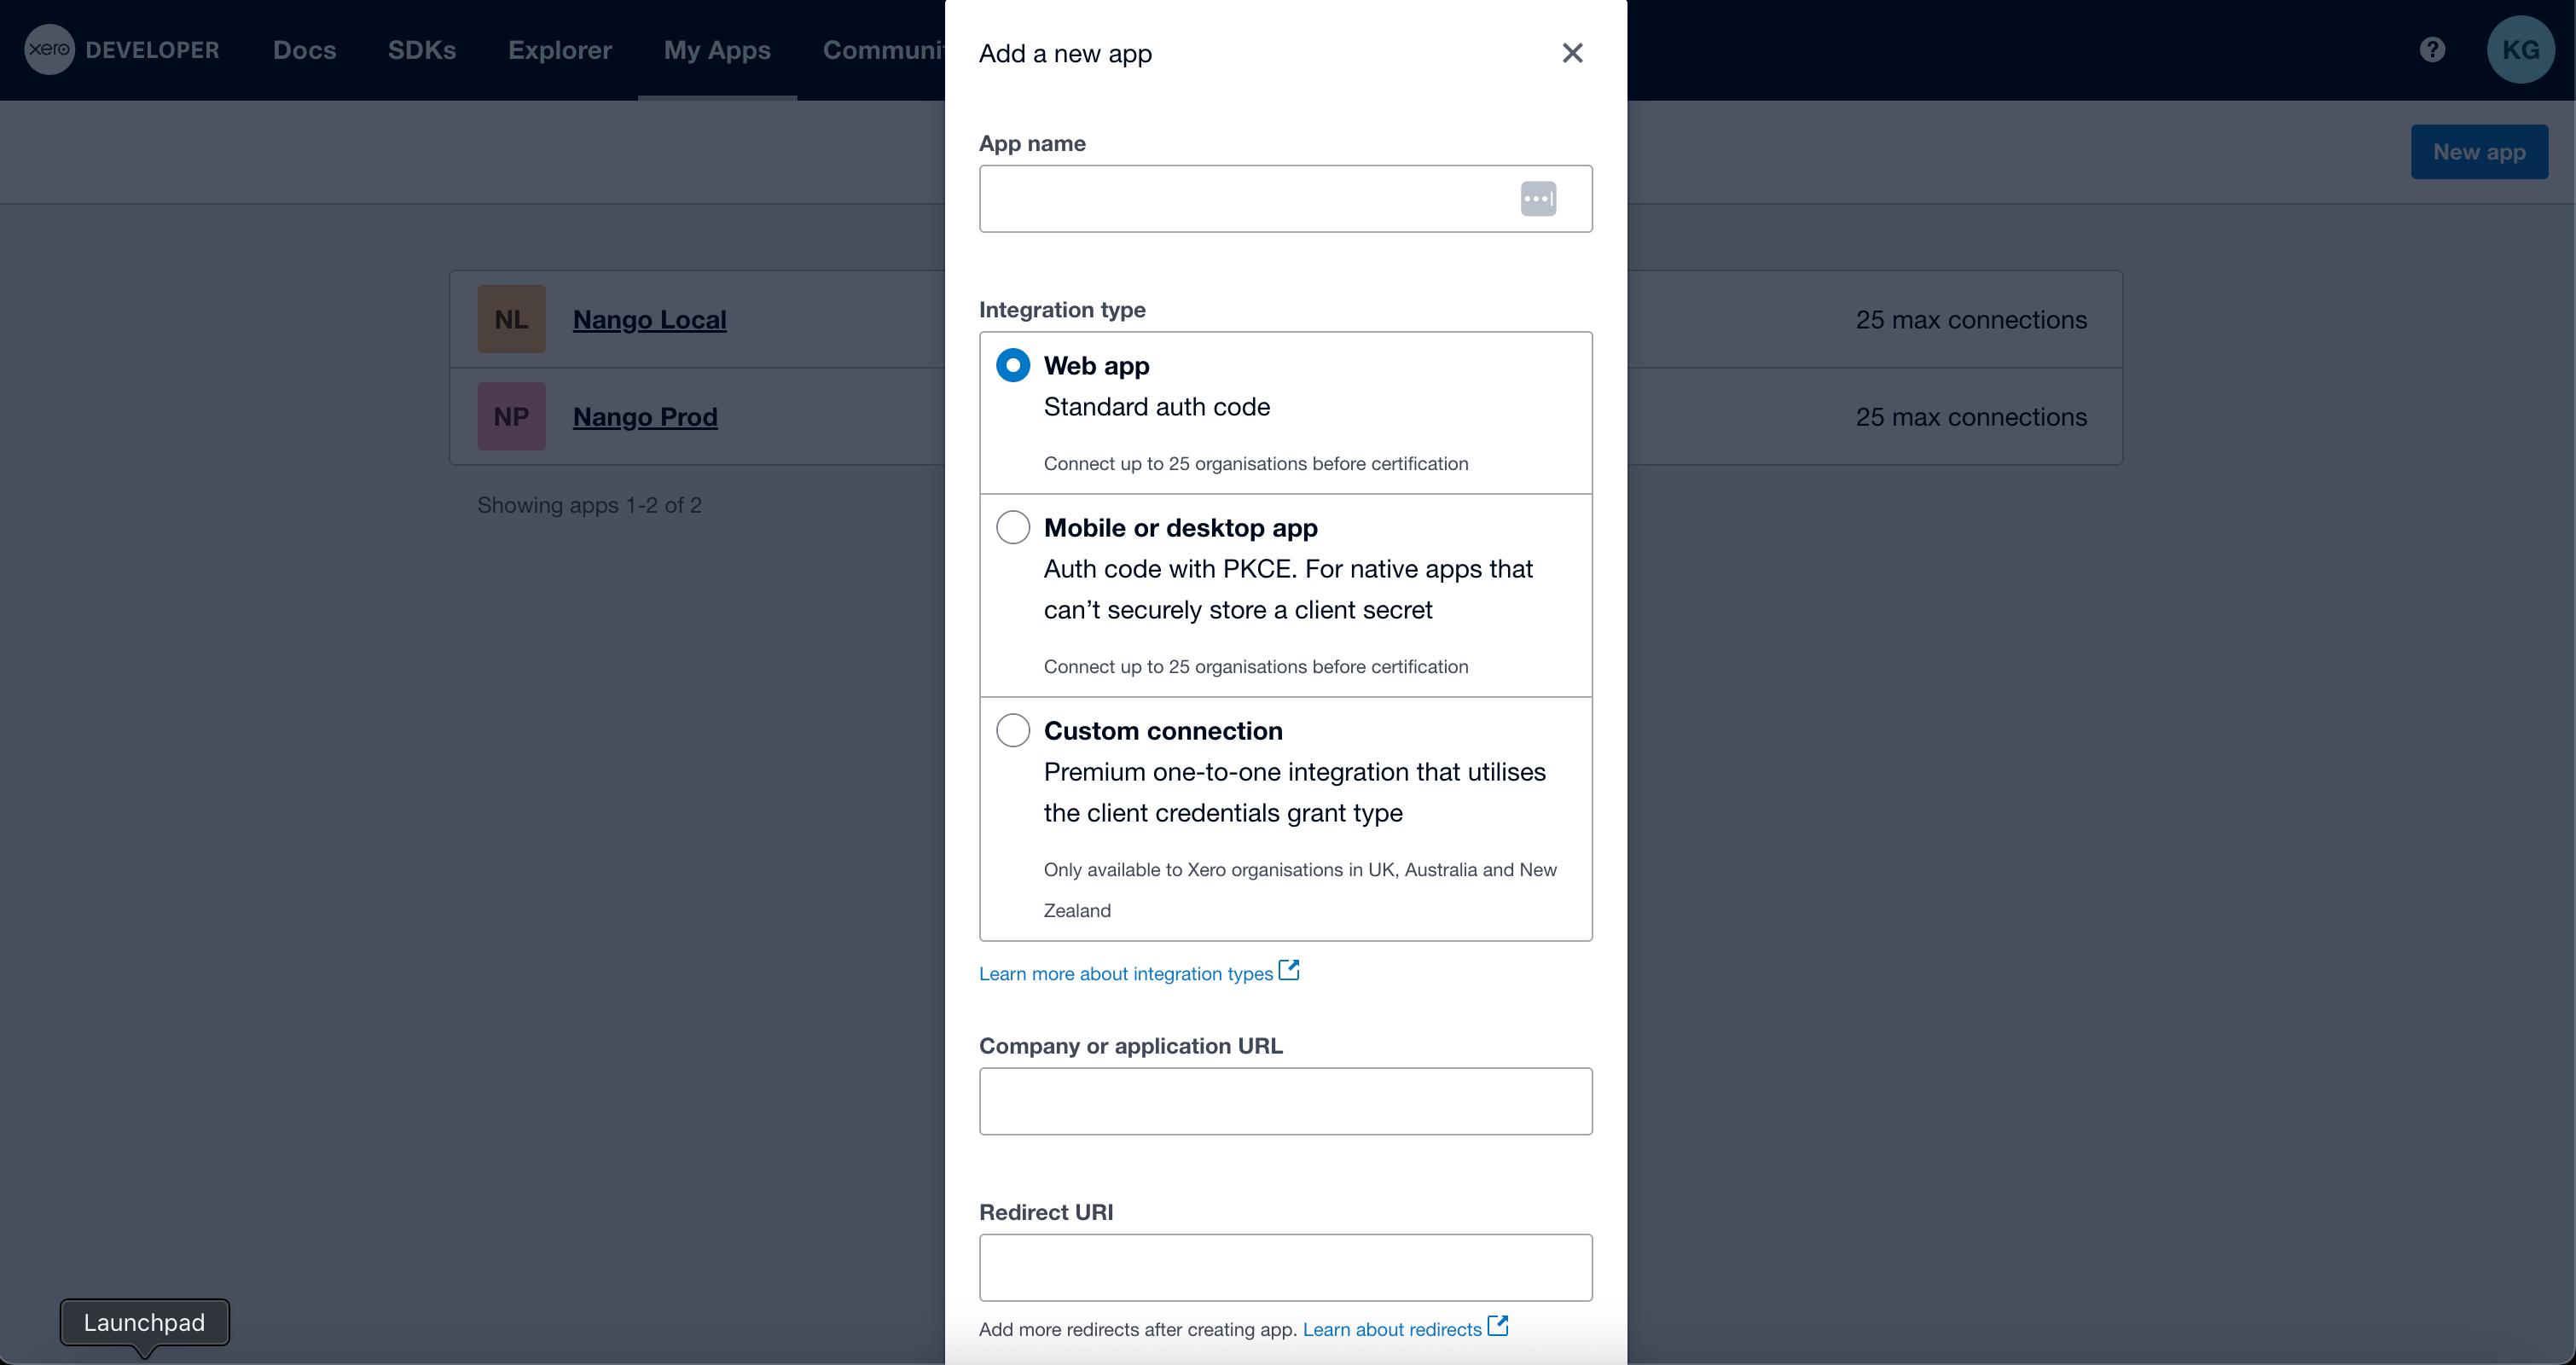 4. Select **Web app** as the integration type.
5. Fill in the **Company or application URL** and **Redirect URI** fields.
Note that the **Redirect URI** is required to create an app in Xero, even though it's not needed for the integration to work.
6. Check the developer's terms checkbox and click **Create App**.
7. You app will be genrated, and you will be redirected to your **App details** page.
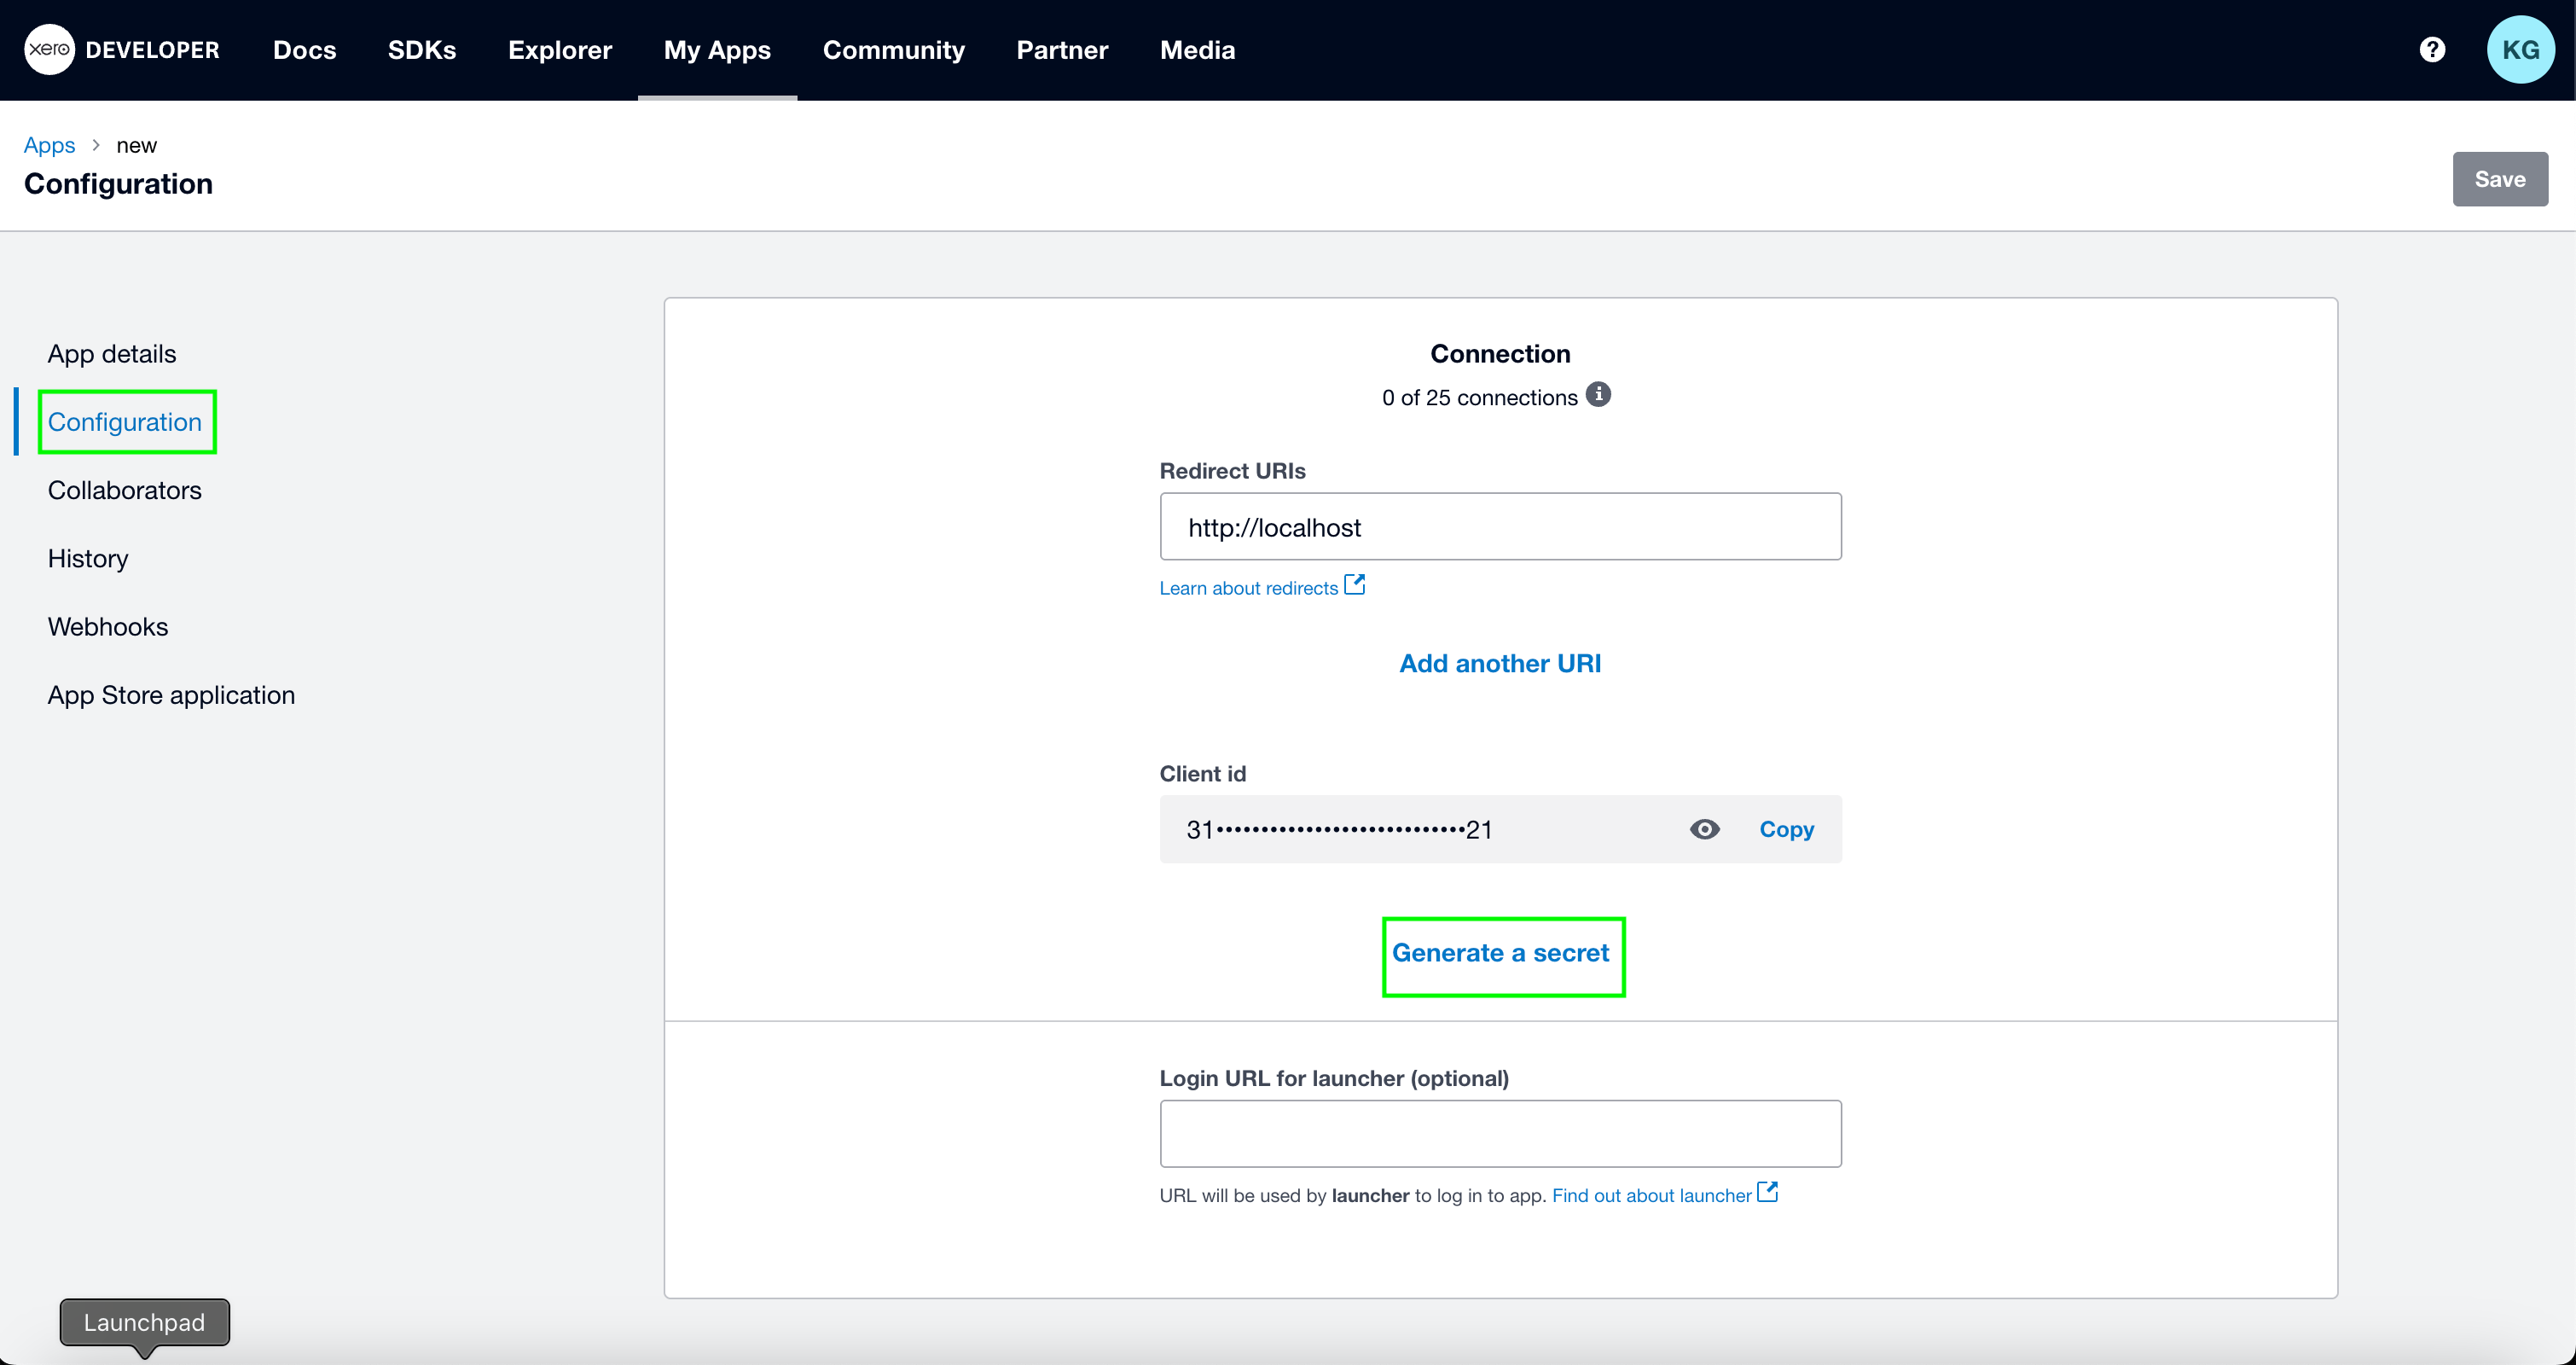
8. Navigate to the **Configuration** tab to retrieve your **Client ID** and **Client Secret**. Click **Generate a Secret** to create a new **Client Secret**.
4. Select **Web app** as the integration type.
5. Fill in the **Company or application URL** and **Redirect URI** fields.
Note that the **Redirect URI** is required to create an app in Xero, even though it's not needed for the integration to work.
6. Check the developer's terms checkbox and click **Create App**.
7. You app will be genrated, and you will be redirected to your **App details** page.
8. Navigate to the **Configuration** tab to retrieve your **Client ID** and **Client Secret**. Click **Generate a Secret** to create a new **Client Secret**.
 #### Step 2: Enter credentials in the Connect UI
Once you have your **Client ID** and **Client Secret**:
1. Open the form where you need to authenticate with Xero (Client Credentials).
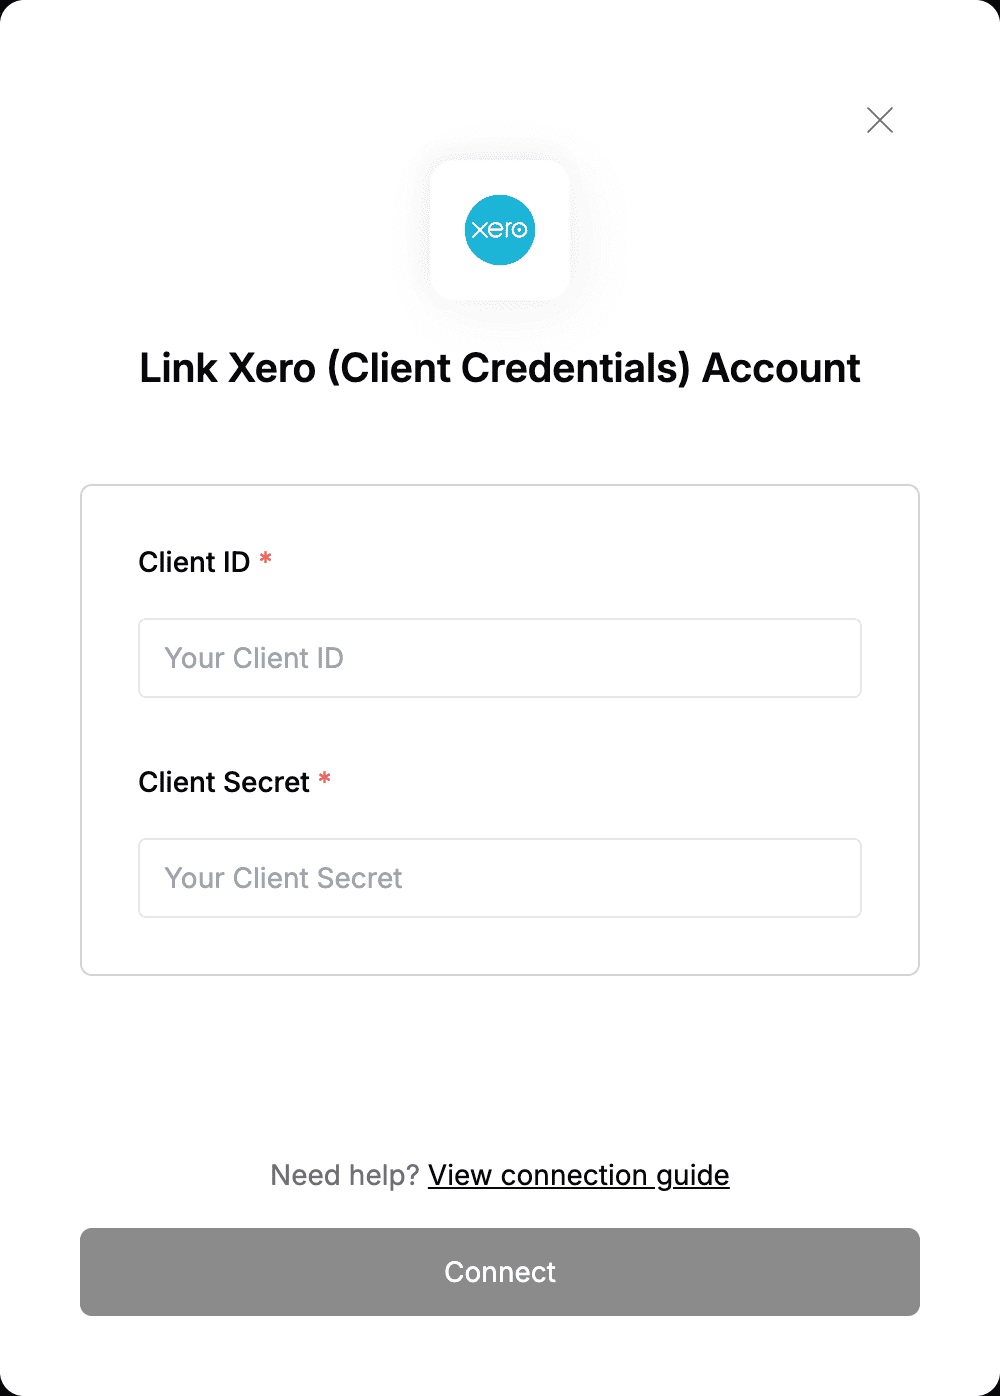
2. Enter your **Client ID** and **Client Secret** in their respective fields.
3. Submit the form, and you should be successfully authenticated.
#### Step 2: Enter credentials in the Connect UI
Once you have your **Client ID** and **Client Secret**:
1. Open the form where you need to authenticate with Xero (Client Credentials).
2. Enter your **Client ID** and **Client Secret** in their respective fields.
3. Submit the form, and you should be successfully authenticated.
 You are now connected to Xero (Client Credentials).