> ## Documentation Index
> Fetch the complete documentation index at: https://nango-marcin-get-deployments-docs.mintlify.site/llms.txt
> Use this file to discover all available pages before exploring further.
# Snowflake (JWT) - How do I link my account?
# Overview
To authenticate with Snowflake (JWT), you need:
1. **Subdomain** - The subdomain for your Snowflake account, typically part of the account URL (e.g., `xy12345` in `xy12345.snowflakecomputing.com`).
2. **Account Identifier** - The unique identifier for your Snowflake account.
3. **User Name** - The Snowflake username used to authenticate with the account.
4. **Private Key** - The private RSA key in PEM format used to sign your JWT for authentication. It corresponds to the public key registered in Snowflake.
This guide will walk you through obtaining and generating these credentials within Snowflake.
### Prerequisites:
* You must have an account with Snowflake (JWT).
### Instructions:
#### Step 1: Finding your Subdomain
1. Log in to your [snowflake account](https://app.snowflake.com/).
2. Click on your account profile in the bottom-left corner, then under **Account**, select the account you wish to connect to.
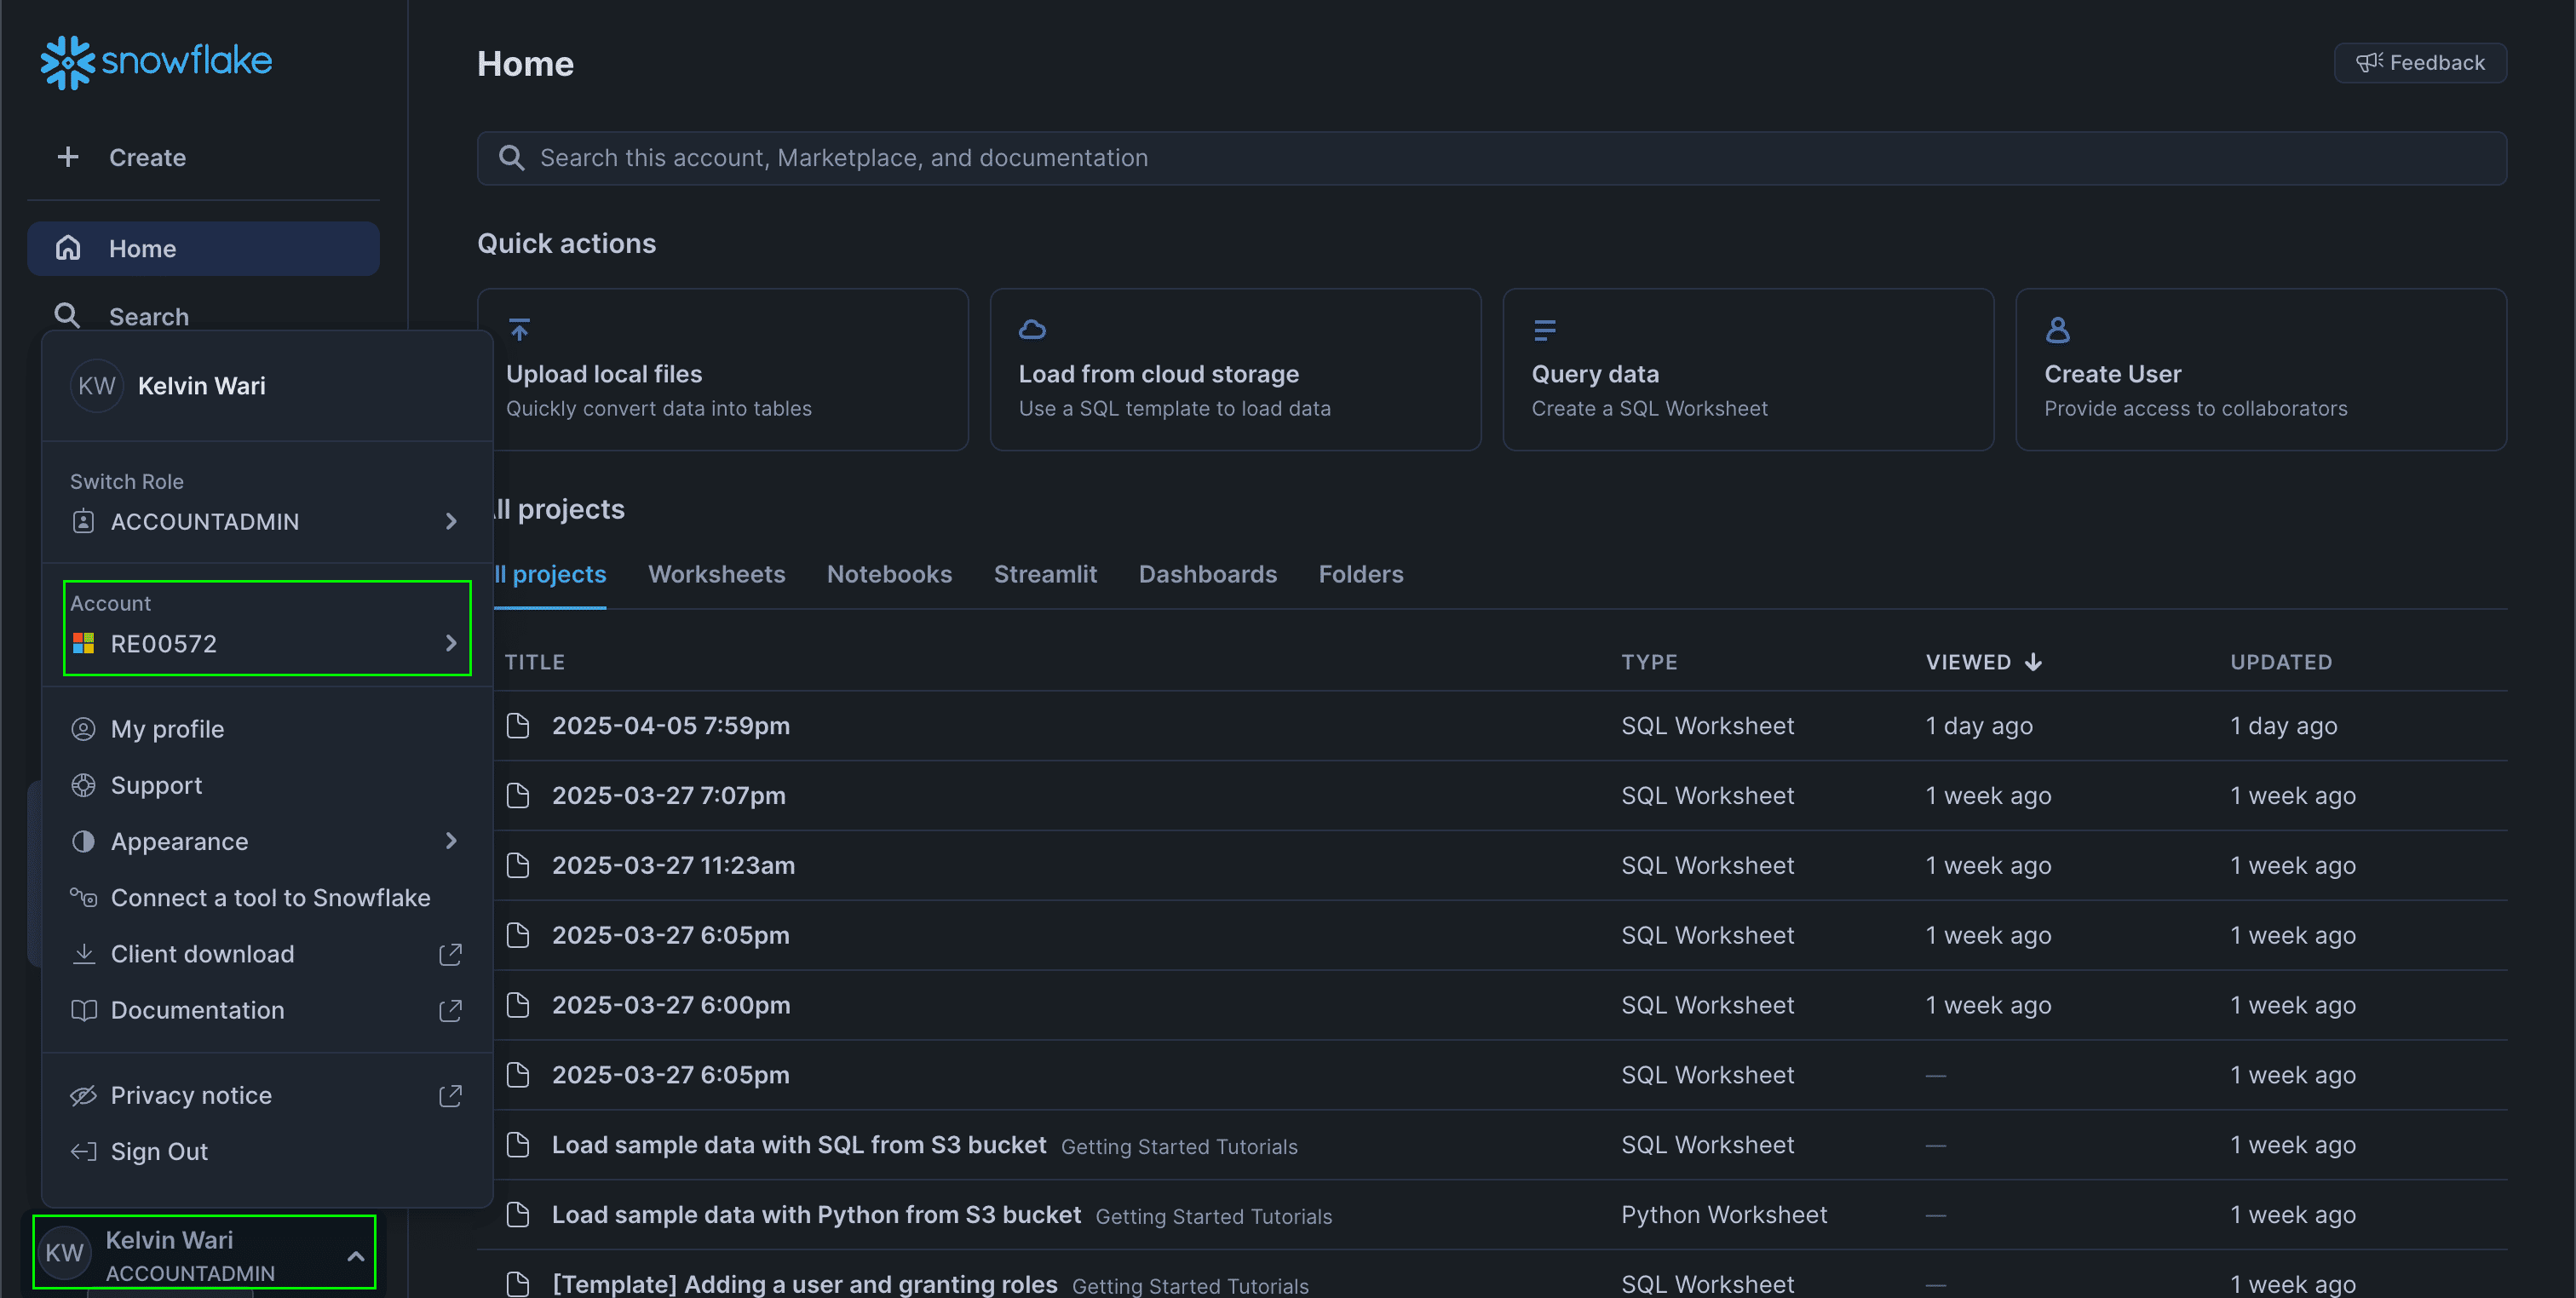 3. Click on **View account details** for the selected account.
4. A pop-up window will appear displaying all your **Account Details**.
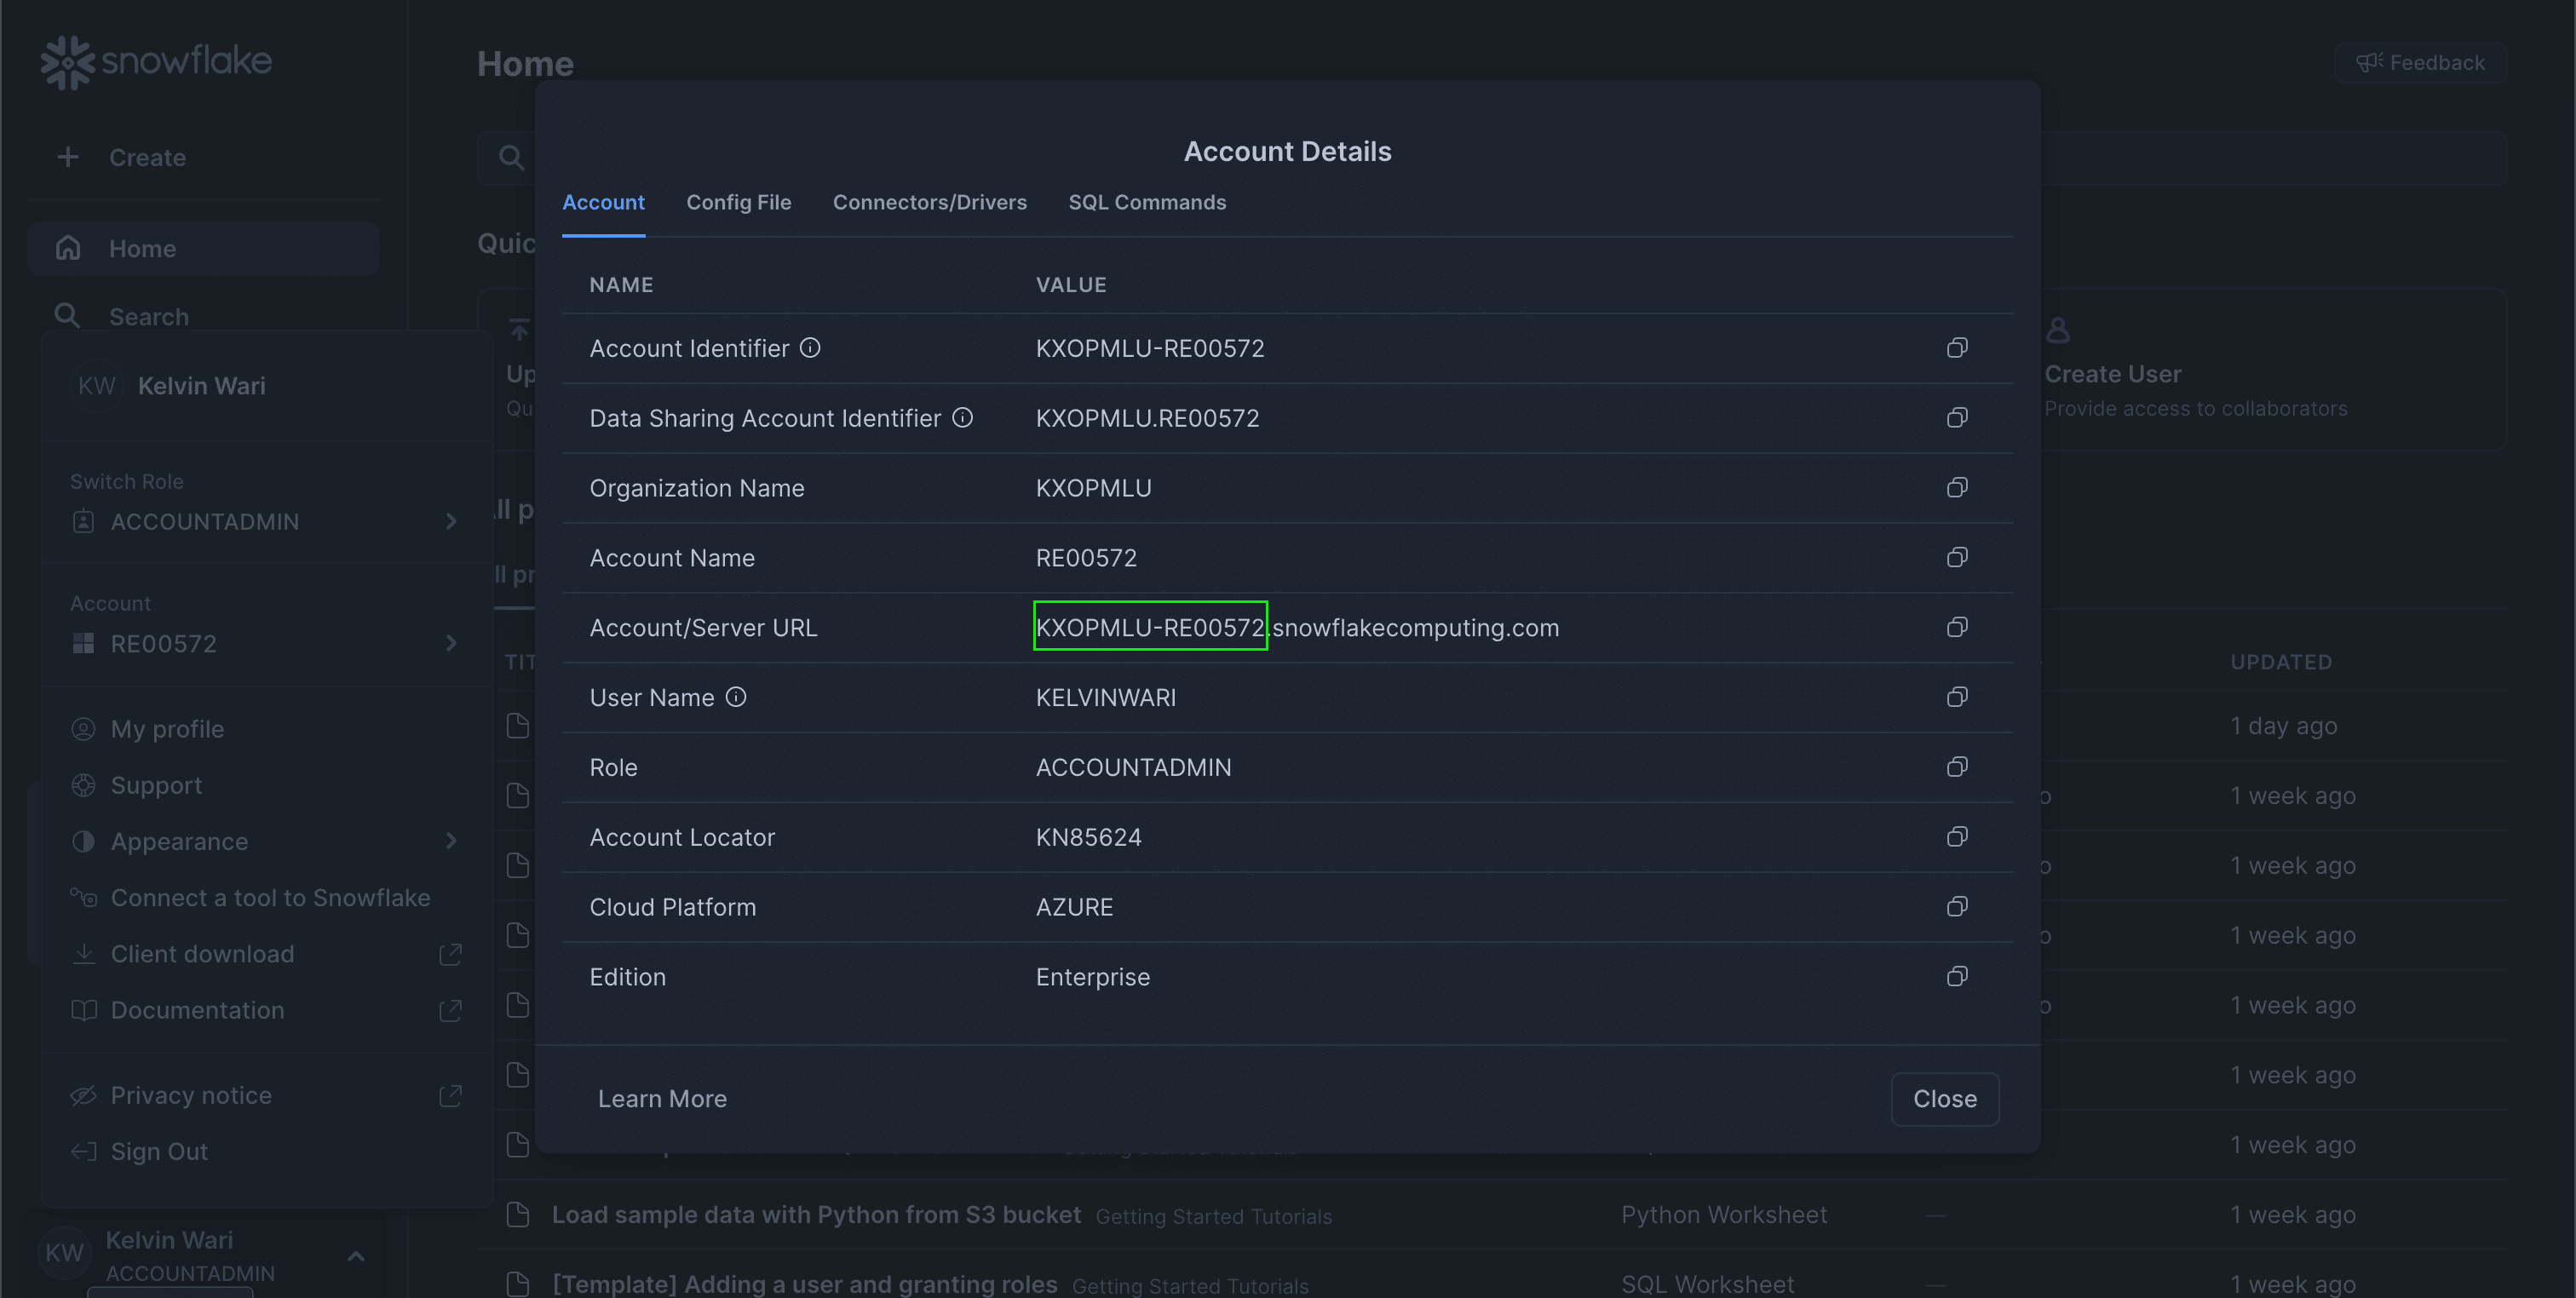
5. Your **Subdomain** is the part before `snowflakecomputing.com` in the **Account/Server URL** field. For example, in `KXOPMLU-RE00572.snowflakecomputing.com`, the subdomain is `KXOPMLU-RE00572`.
3. Click on **View account details** for the selected account.
4. A pop-up window will appear displaying all your **Account Details**.
5. Your **Subdomain** is the part before `snowflakecomputing.com` in the **Account/Server URL** field. For example, in `KXOPMLU-RE00572.snowflakecomputing.com`, the subdomain is `KXOPMLU-RE00572`.
 #### Step 2: Finding your Account Identifier
1. From the same **Account Details** table above, your **Account Identifier** will be displayed within the **Account Identifier** field.
#### Step 2: Finding your Account Identifier
1. From the same **Account Details** table above, your **Account Identifier** will be displayed within the **Account Identifier** field.
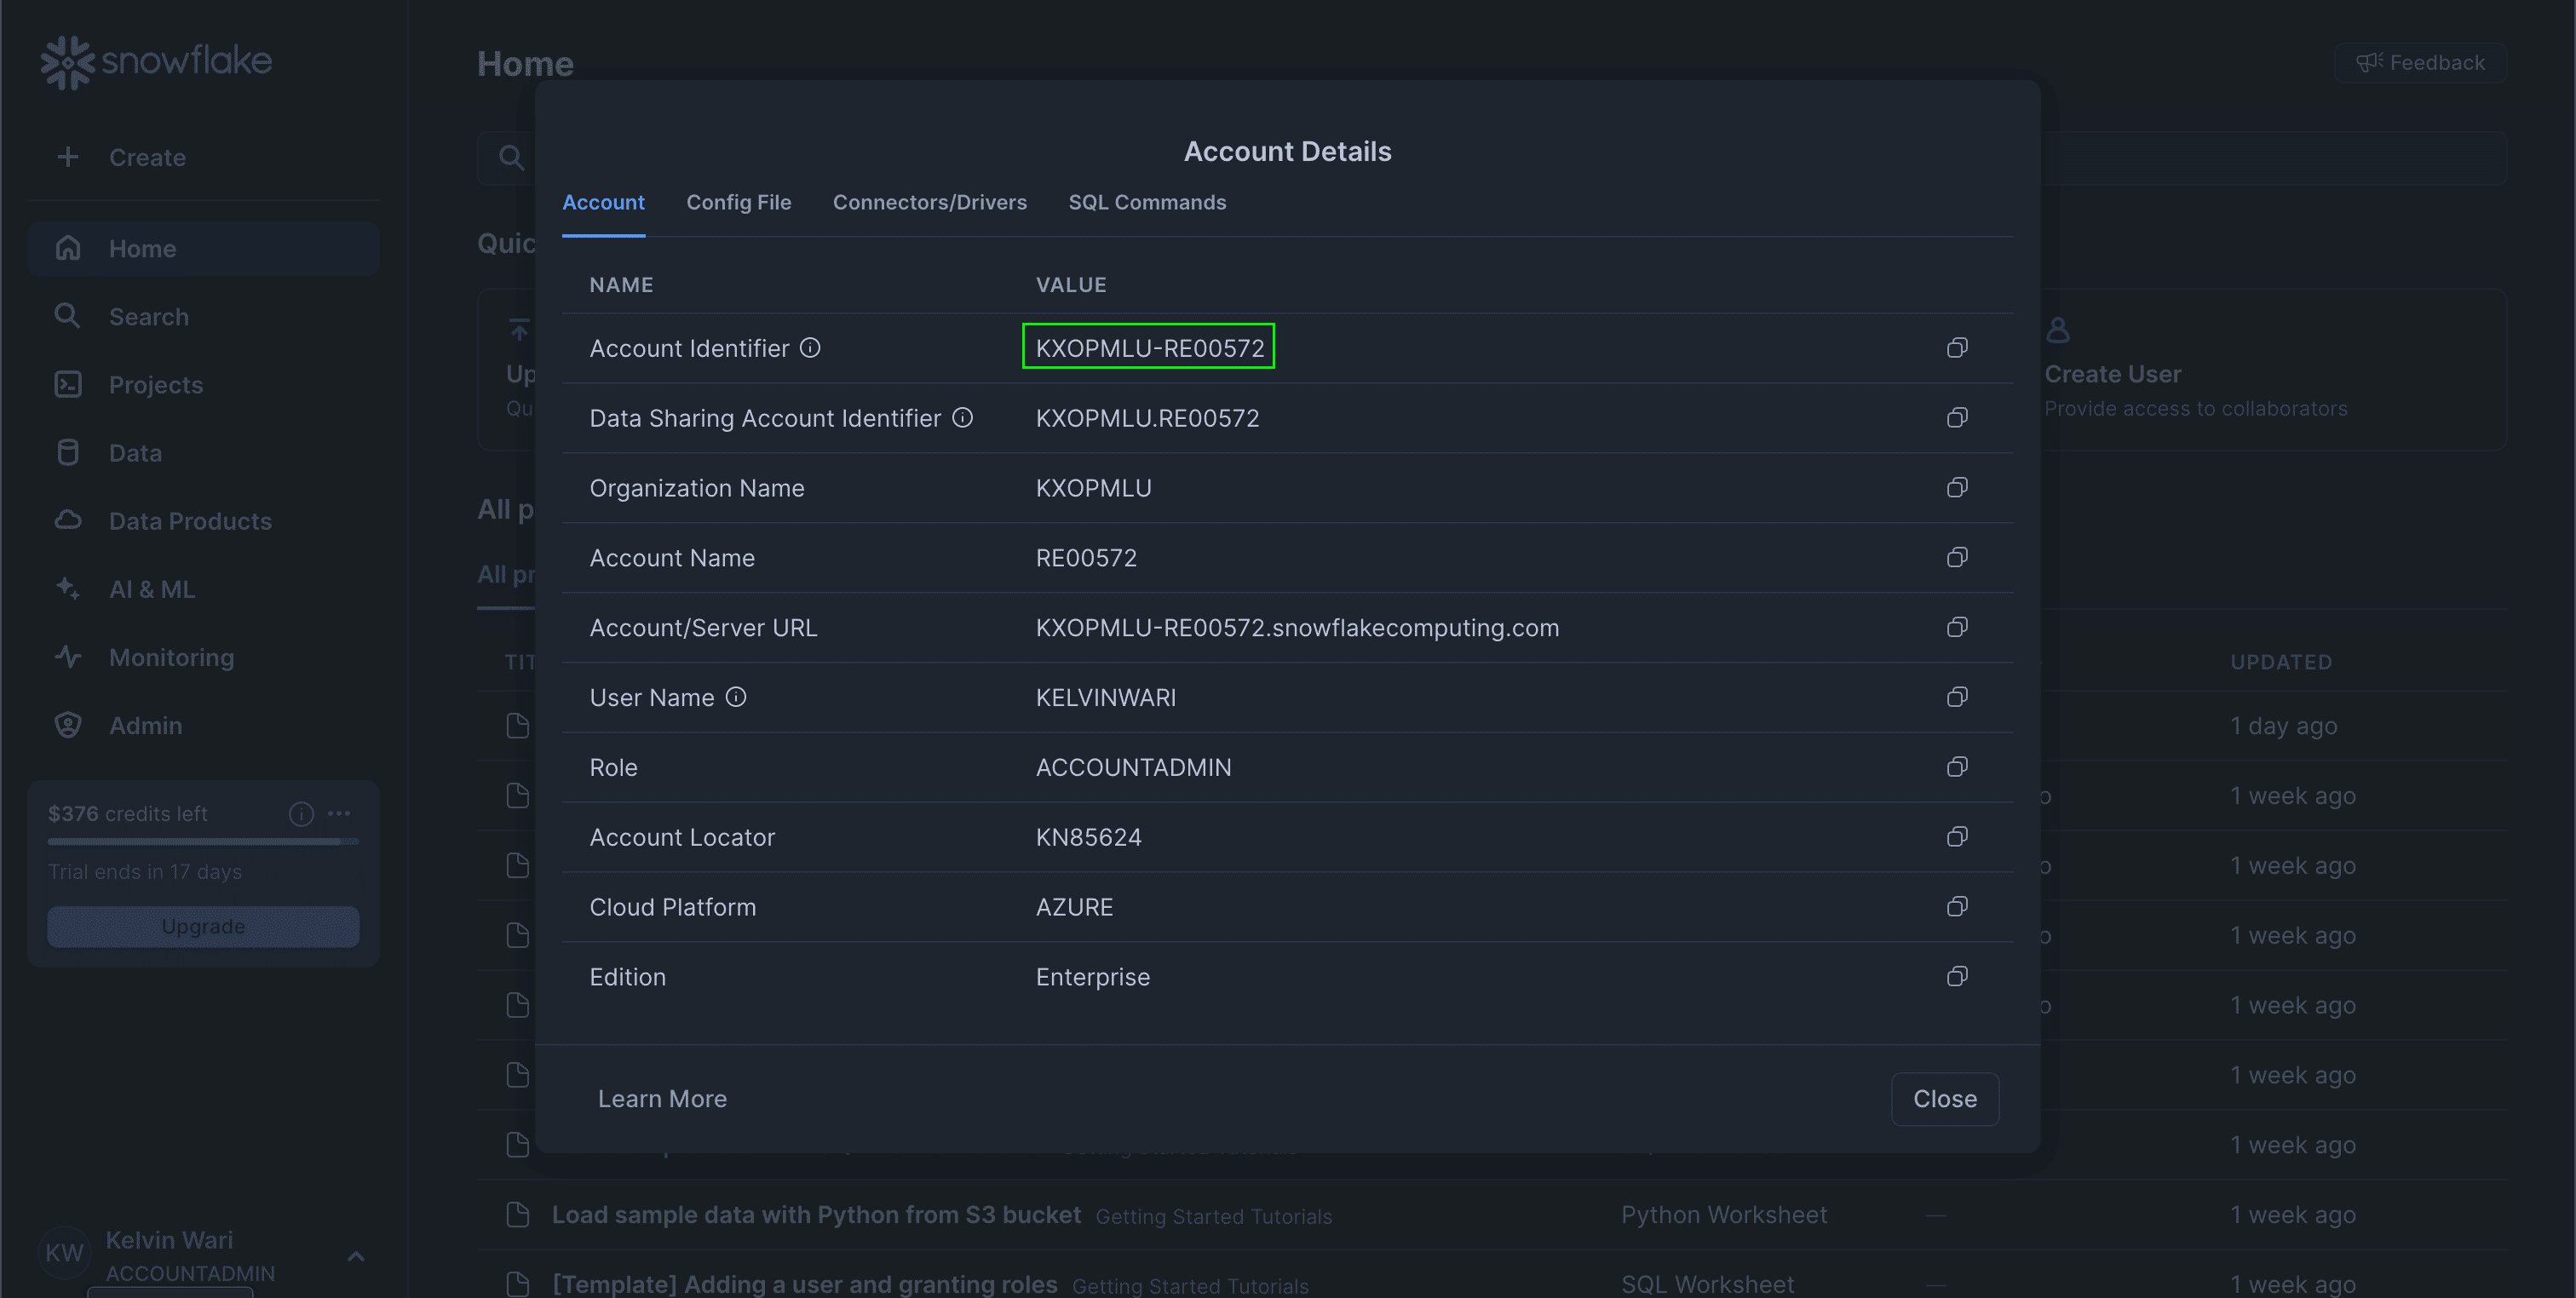 If you are using the account locator, exclude any region information from the account locator to obtain the **Account Identifier**. This value should be provided in uppercase.
#### Step 3: Finding your User Name
1. From the same **Account Details** table above, your **User Name** will be displayed within the **User Name** field.
If you are using the account locator, exclude any region information from the account locator to obtain the **Account Identifier**. This value should be provided in uppercase.
#### Step 3: Finding your User Name
1. From the same **Account Details** table above, your **User Name** will be displayed within the **User Name** field.
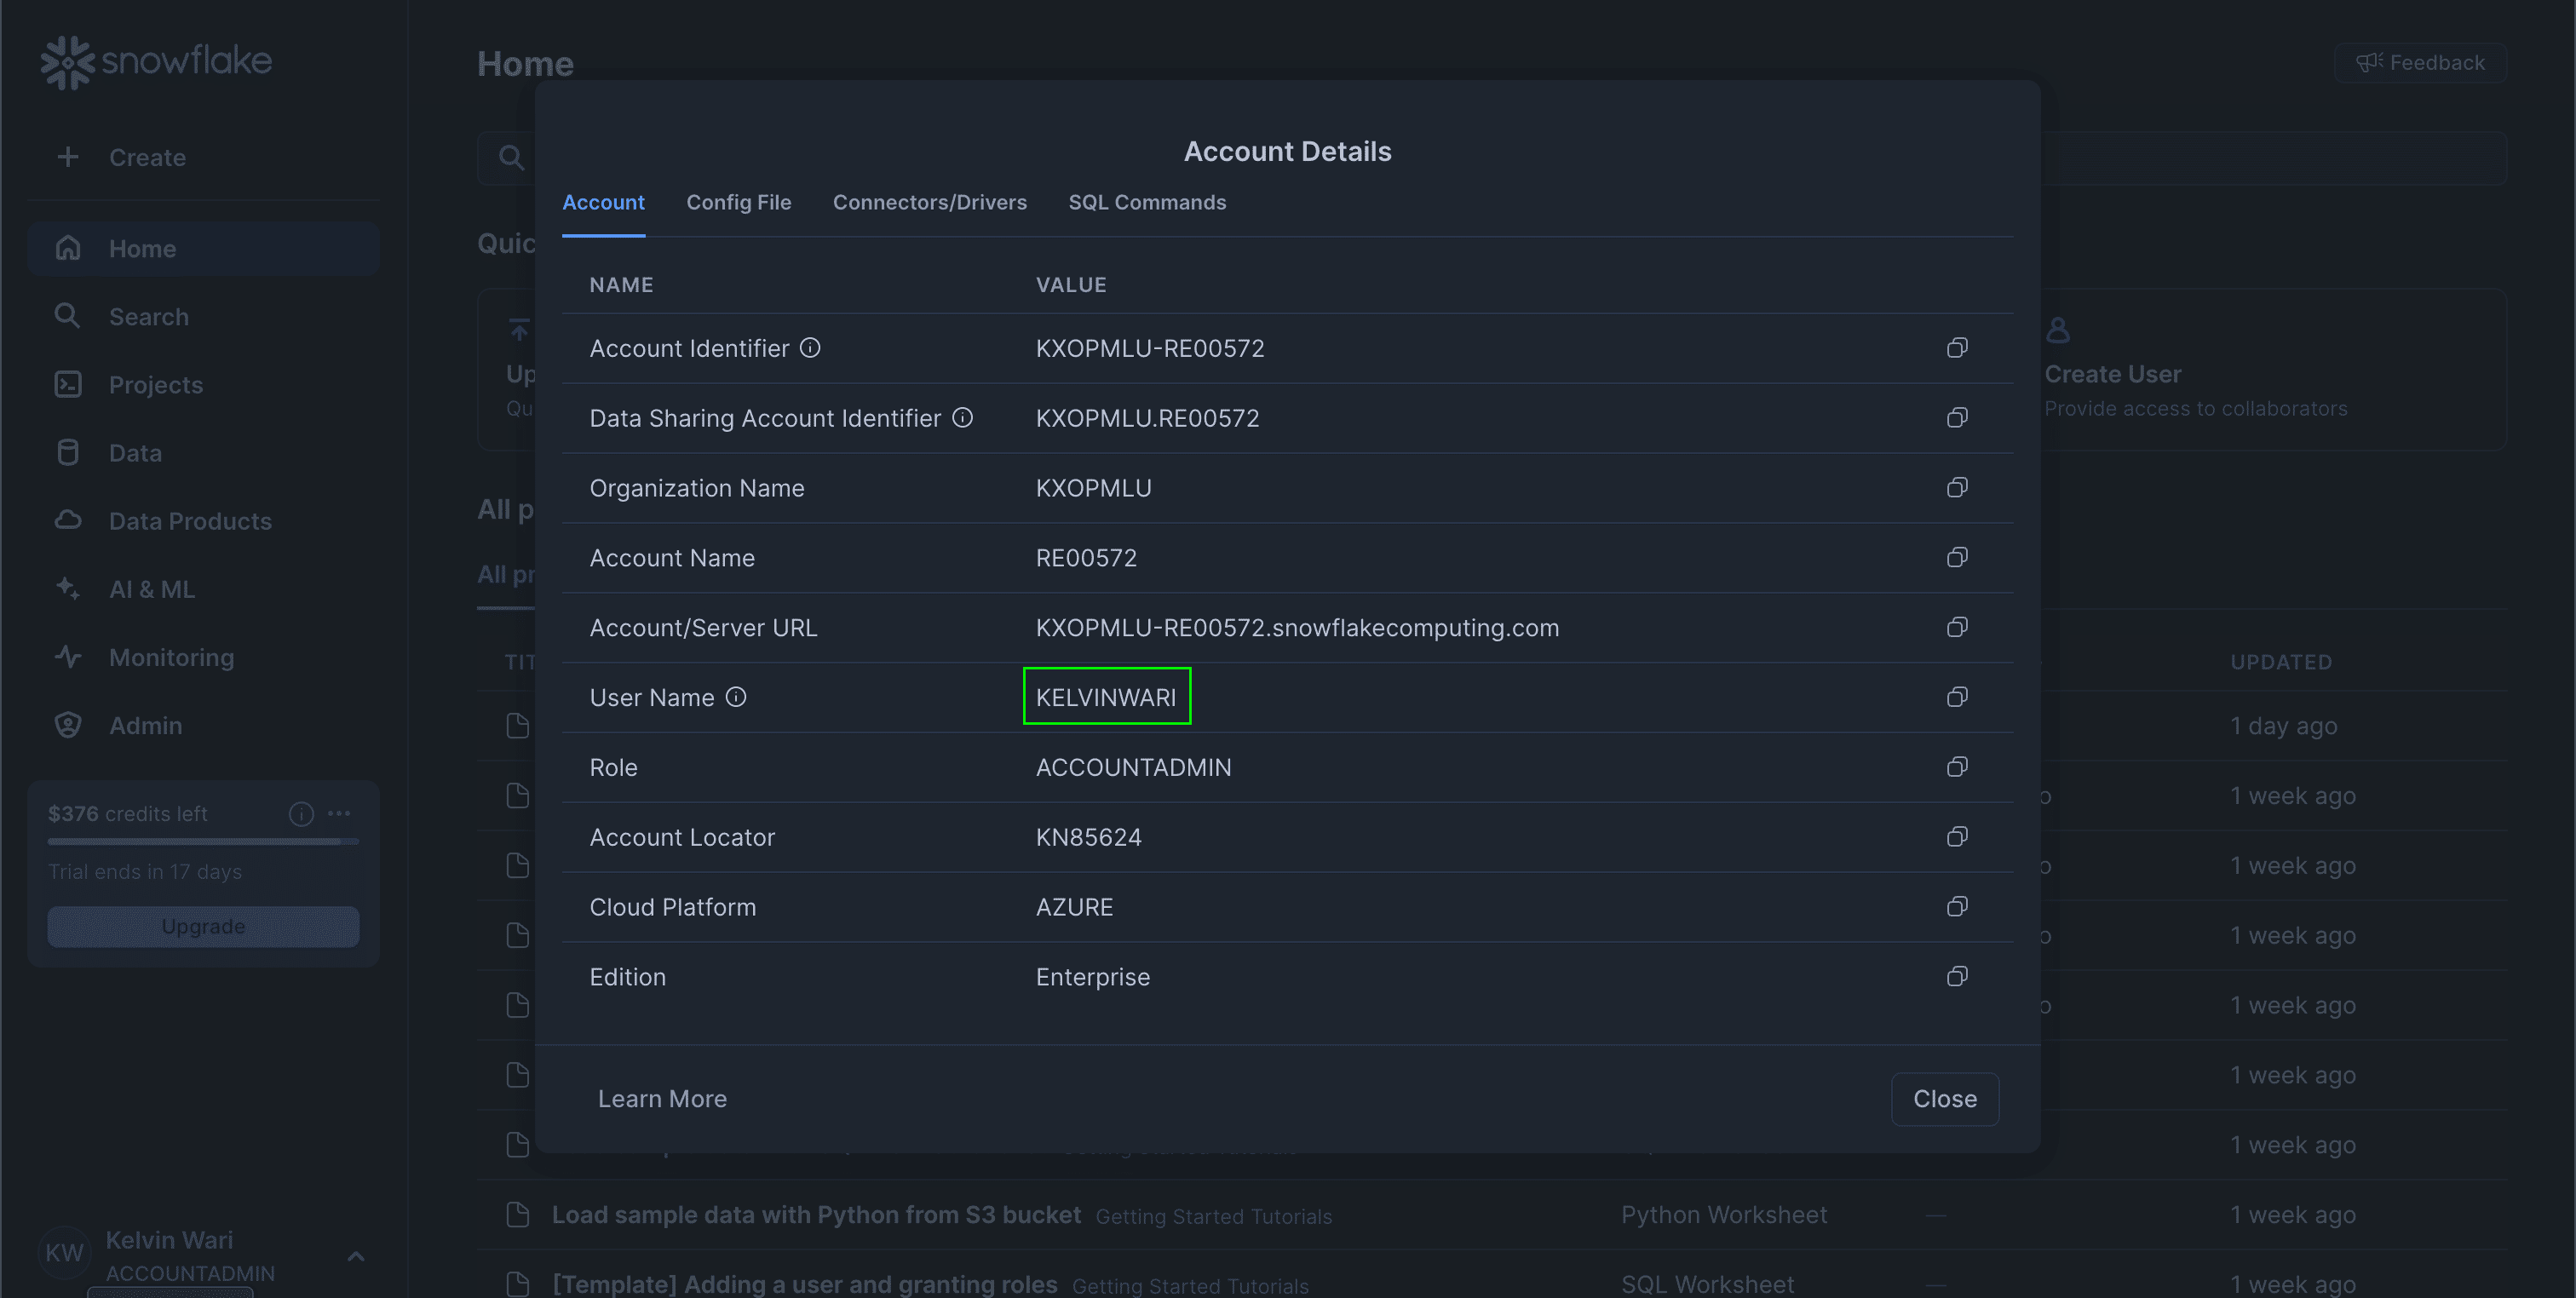 This value should be provided in uppercase.
#### Step 4: Generating your Private Key
1. Generate the RSA private key with the following command:
```
openssl genrsa -out rsa_key.p8 2048
```
2. Extract the corresponding public key:
```
openssl rsa -in rsa_key.p8 -pubout -out rsa_key.pub
```
3. To view the **Private Key**, run the following:
```
cat rsa_key.p8
```
#### Step 5: Uploading your Public Key
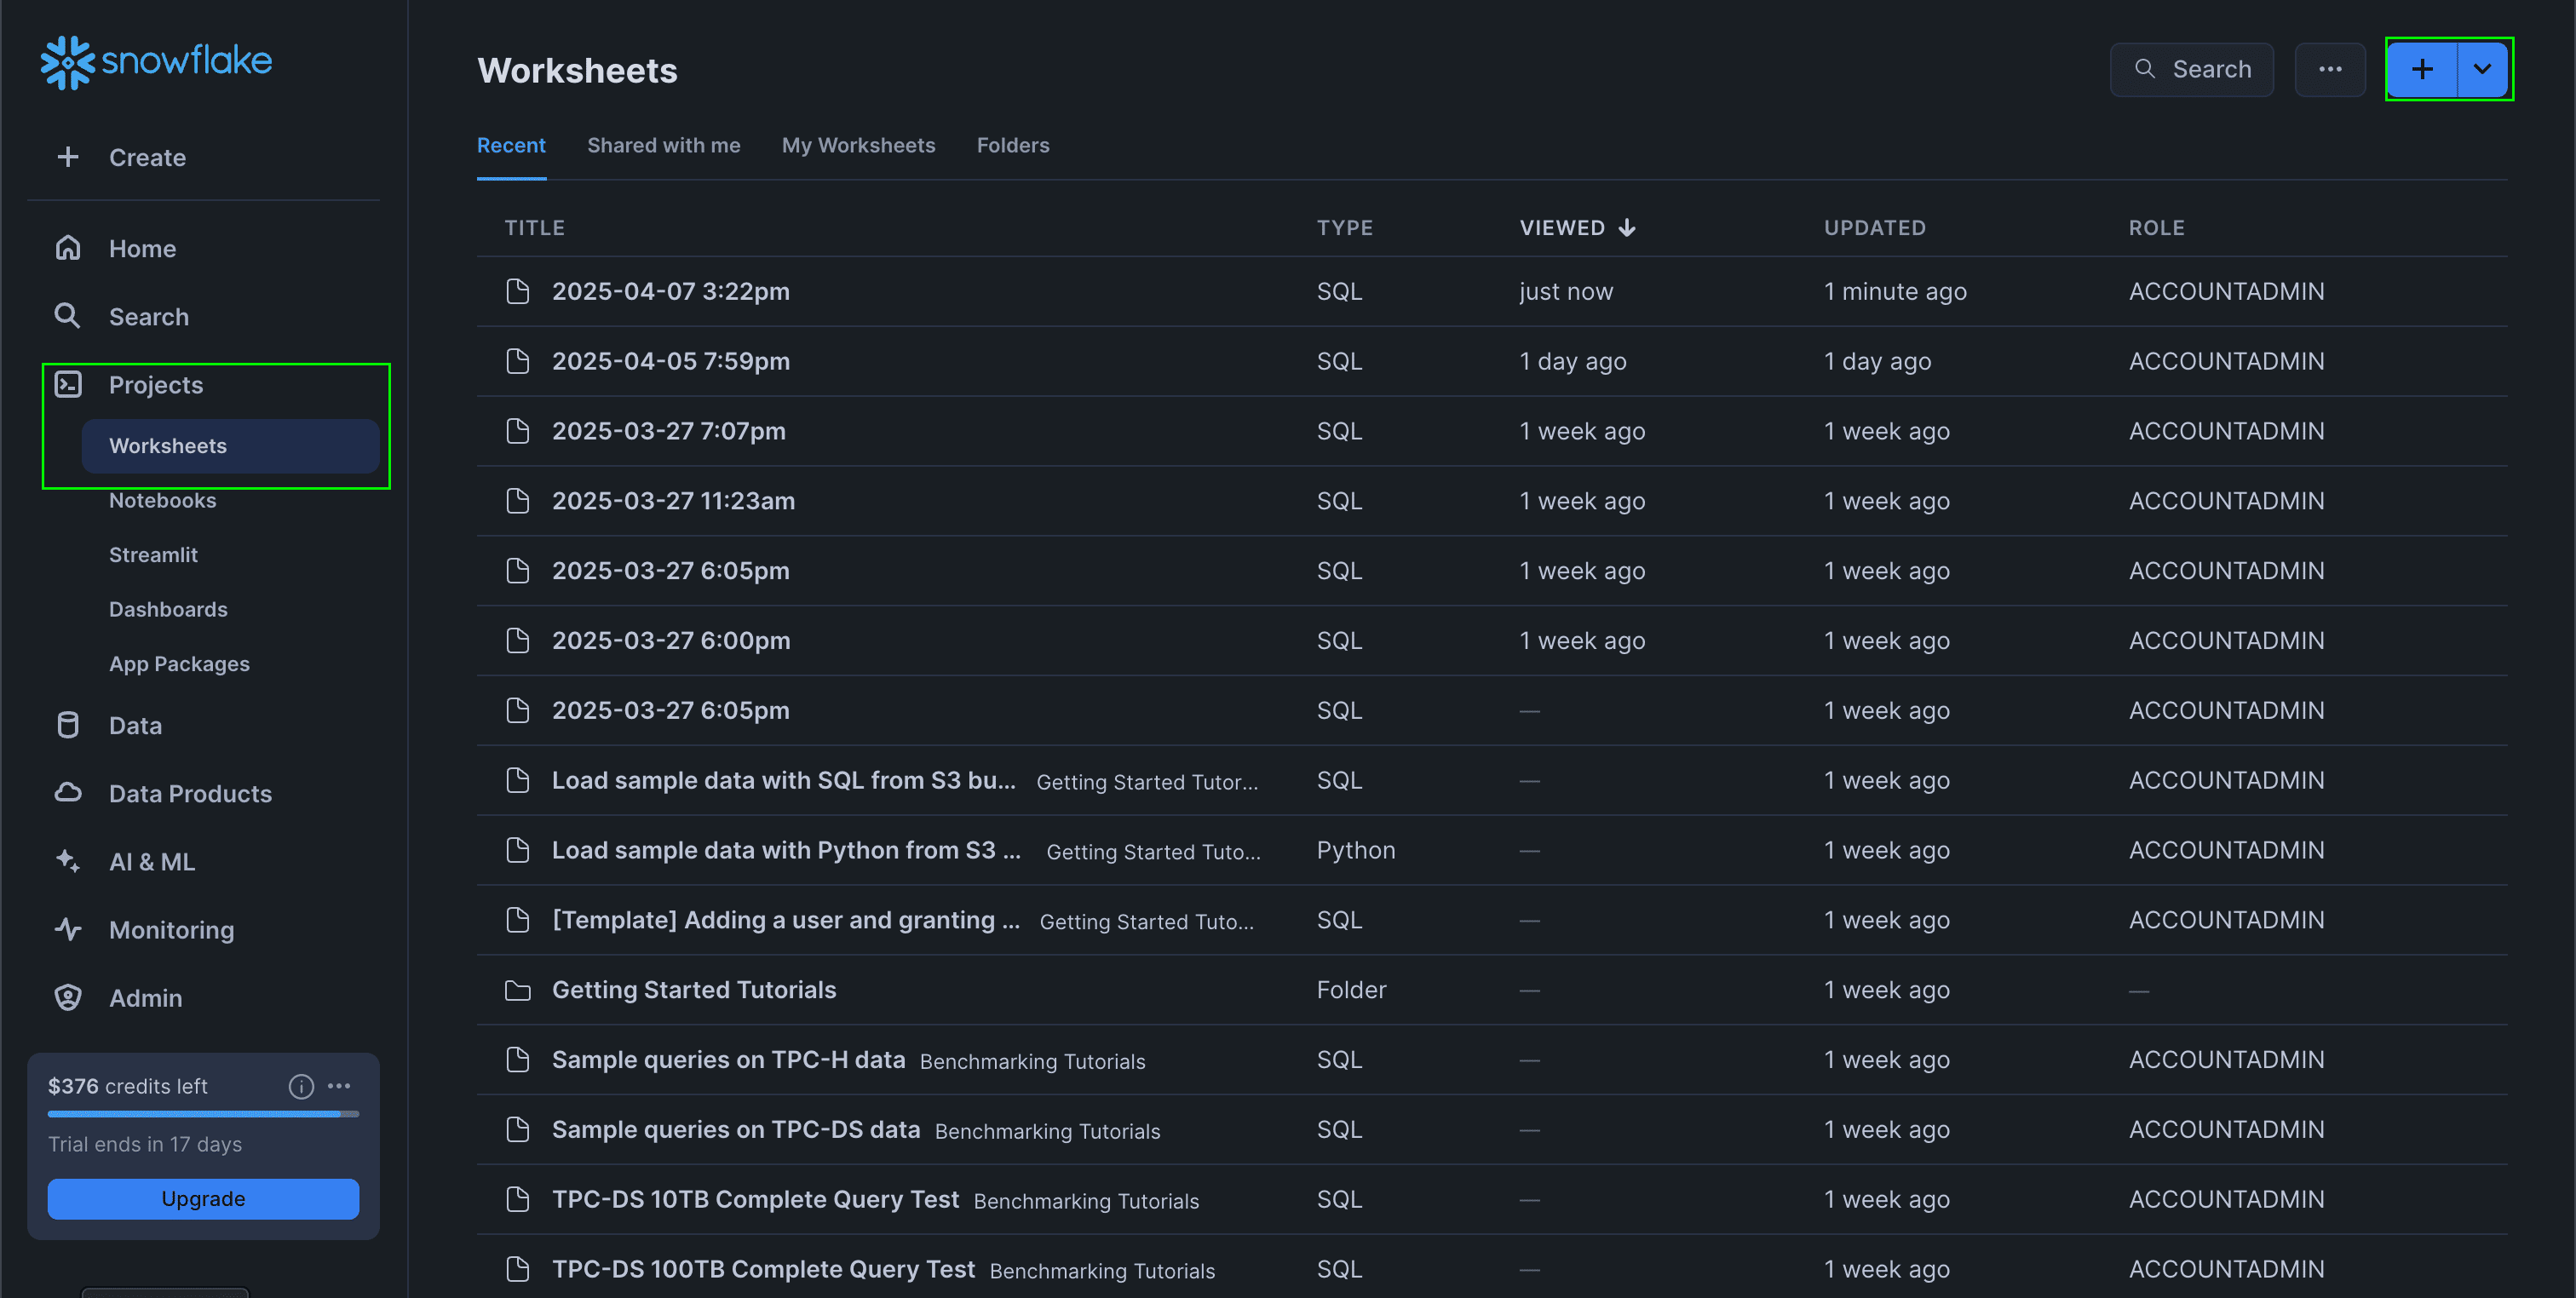
1. From your Snowflake account, navigate to **Projects** > **Worksheets** then click on the **+** button from the top right corner.
This value should be provided in uppercase.
#### Step 4: Generating your Private Key
1. Generate the RSA private key with the following command:
```
openssl genrsa -out rsa_key.p8 2048
```
2. Extract the corresponding public key:
```
openssl rsa -in rsa_key.p8 -pubout -out rsa_key.pub
```
3. To view the **Private Key**, run the following:
```
cat rsa_key.p8
```
#### Step 5: Uploading your Public Key
1. From your Snowflake account, navigate to **Projects** > **Worksheets** then click on the **+** button from the top right corner.
 2. Run the following SQL command to assign the **Public Key** to your user:
```
ALTER USER SET RSA_PUBLIC_KEY = '';
```
`public_key_contents` refers to the public key generated in the previous step. You can use `cat rsa_key.pub` to view contents.
Once you have your **Subdomain**, **Account Identifier**, **User Name** and **Private Key**:
1. Open the form where you need to authenticate with Snowflake (JWT).
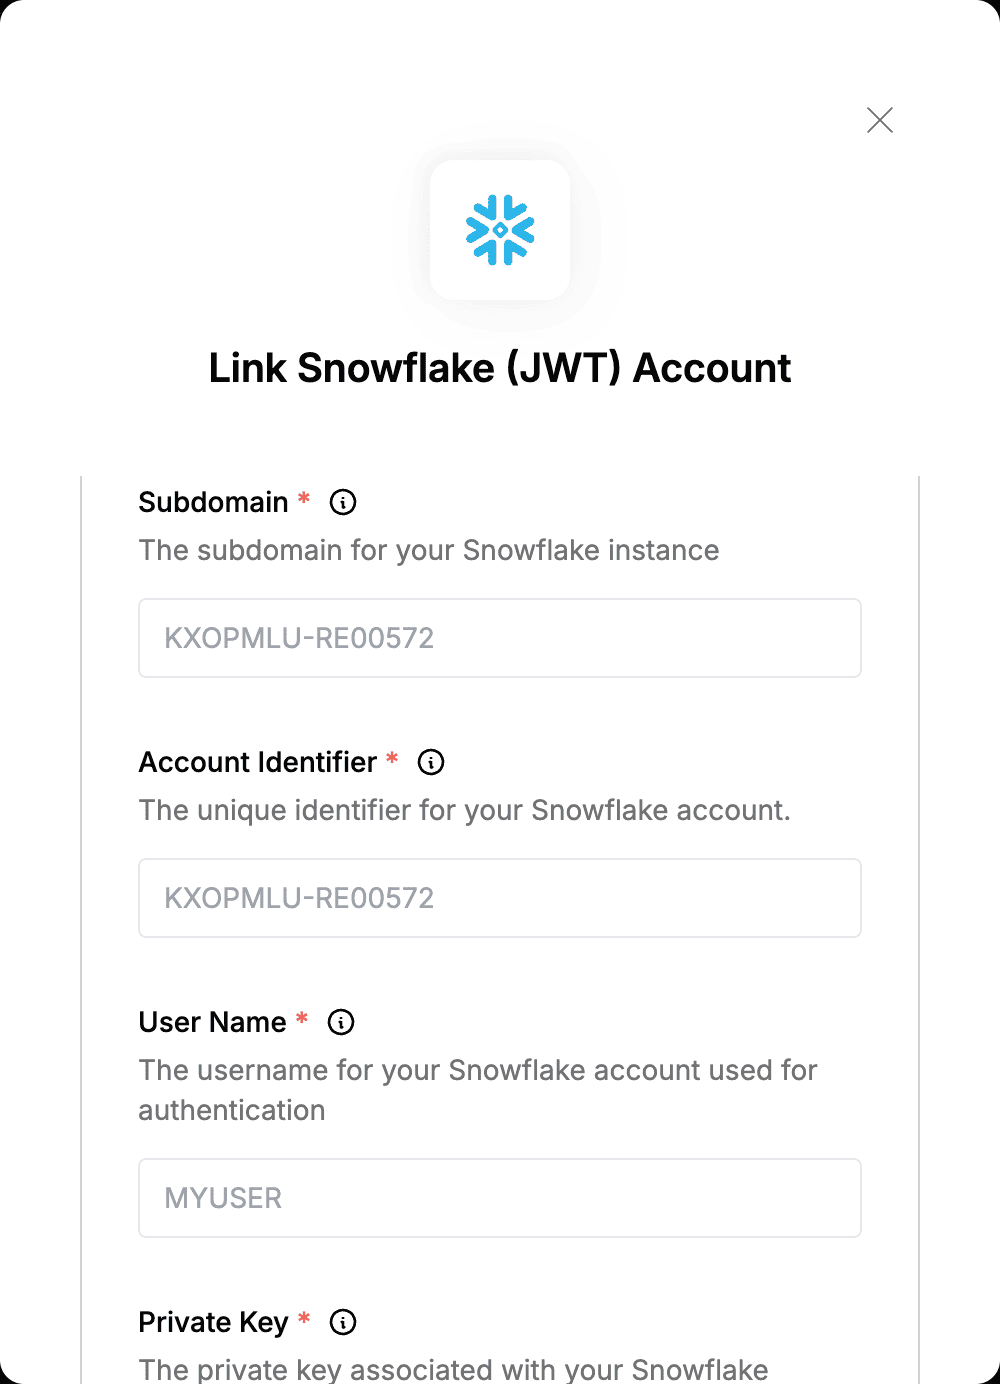
2. Enter your **Subdomain**, **Account Identifier**, **User Name** and **Private Key** in their designated fields.
3. Submit the form, and you should be successfully authenticated.
2. Run the following SQL command to assign the **Public Key** to your user:
```
ALTER USER SET RSA_PUBLIC_KEY = '';
```
`public_key_contents` refers to the public key generated in the previous step. You can use `cat rsa_key.pub` to view contents.
Once you have your **Subdomain**, **Account Identifier**, **User Name** and **Private Key**:
1. Open the form where you need to authenticate with Snowflake (JWT).
2. Enter your **Subdomain**, **Account Identifier**, **User Name** and **Private Key** in their designated fields.
3. Submit the form, and you should be successfully authenticated.
 You are now connected to Snowflake (JWT).