> ## Documentation Index
> Fetch the complete documentation index at: https://nango-marcin-get-deployments-docs.mintlify.site/llms.txt
> Use this file to discover all available pages before exploring further.
# Quickbase - How do I link my account?
# Overview
To authenticate with Quickbase, you will need:
1. **Realm Hostname** - The quickbase domain associated with your account
2. **User Token** - A token that grants Nango permission to interact with Quickbase's APIs resources and services.
This guide will walk you through Creating and Using User Token from Quickbase.
### Prerequisites:
* You must have an account with [Quickbase](https://www.quickbase.com/).
### Instructions:
#### Step 1: Finding Your Realm Hostname
* Your Realm Hostname is your realm name + .quickbase.com
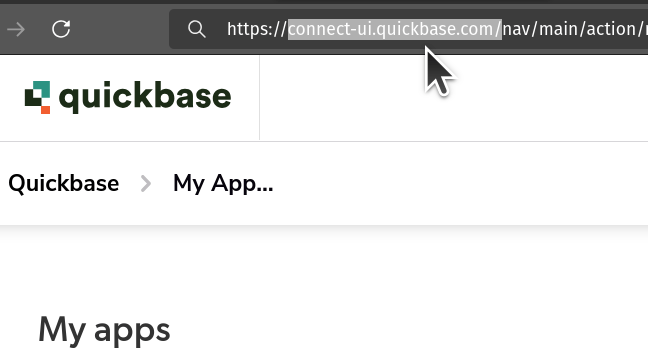
* If your account is part of a Realm, you can login to Quickbase and access the realm hostname from the address bar eg. *demo.quickbase.com*
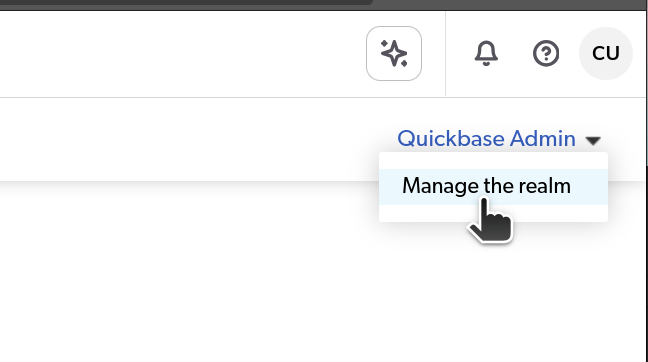
 * Alternatively, as Realm Admin, Access the Admin Console from the My Apps page by clicking `Quickbase Admin`, then `Manage the Realm`.
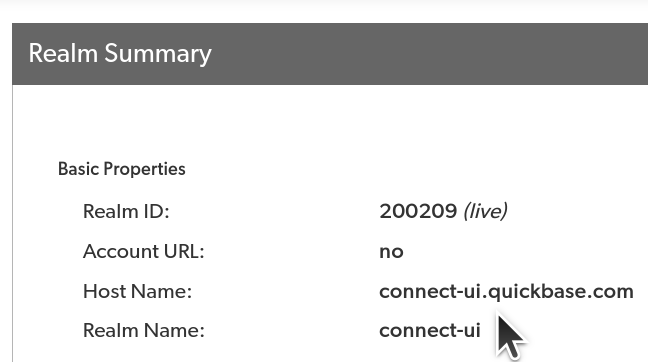
* From the Admin Console, you can access a list on options including Realm summary: where you can View realm details.
* Alternatively, as Realm Admin, Access the Admin Console from the My Apps page by clicking `Quickbase Admin`, then `Manage the Realm`.
* From the Admin Console, you can access a list on options including Realm summary: where you can View realm details.
 #### Step 2: Finding Your User Token
1. **Log in** to your Quickbase account.
2. Select and click on your Profile then scroll to the **My User Information** section.
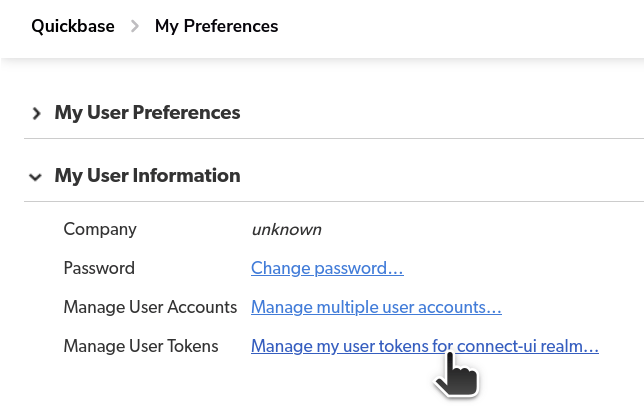
3. Click on the **Manage User Tokens** URL, where you can choose an existing **Token**.
#### Step 2: Finding Your User Token
1. **Log in** to your Quickbase account.
2. Select and click on your Profile then scroll to the **My User Information** section.
3. Click on the **Manage User Tokens** URL, where you can choose an existing **Token**.
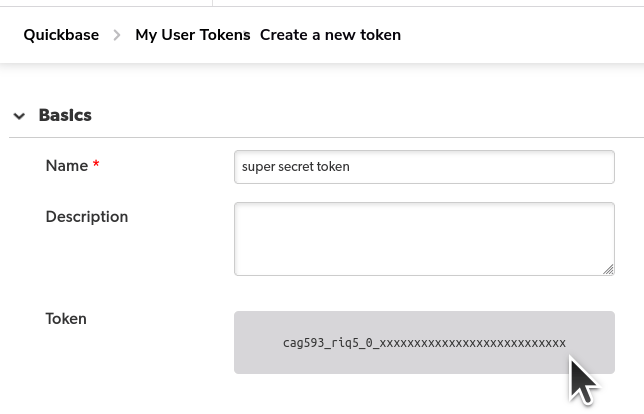
 4. To create a new token, click on **New User Token** and enter a unique **name** and **Save**.
5. Copy the token and store it securely.
4. To create a new token, click on **New User Token** and enter a unique **name** and **Save**.
5. Copy the token and store it securely.
 #### Step 3: Enter credentials in the Connect UI
Once you have the **Realm Hostname** and **Token**:
1. Open the form where you need to authenticate with Quickbase.
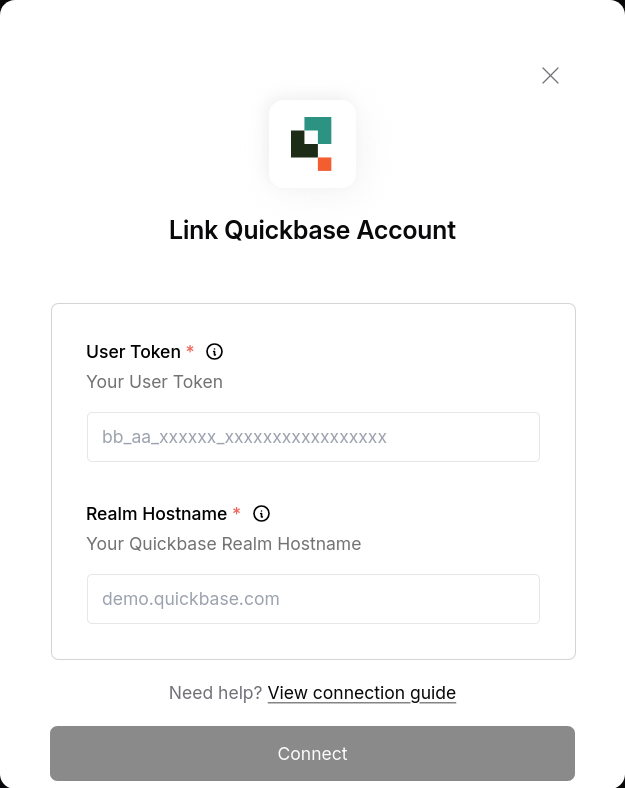
2. Enter the **Realm Hostname** and **Token** in the designated fields.
3. Submit the form, and you should be successfully authenticated.
#### Step 3: Enter credentials in the Connect UI
Once you have the **Realm Hostname** and **Token**:
1. Open the form where you need to authenticate with Quickbase.
2. Enter the **Realm Hostname** and **Token** in the designated fields.
3. Submit the form, and you should be successfully authenticated.
 You are now connected to Quickbase.