> ## Documentation Index
> Fetch the complete documentation index at: https://nango-marcin-get-deployments-docs.mintlify.site/llms.txt
> Use this file to discover all available pages before exploring further.
# AWS (SCIM) - How do I link my account?
# Overview
To authenticate with AWS SCIM, you need two key pieces of information:
1. **SCIM API Token** - A token generated from your AWS IAM Identity Center to authenticate SCIM requests.
2. **SCIM Endpoint** - The base domain for SCIM API requests.
This guide will walk you through the steps to generate and use this token to connect your AWS account.
***
### Prerequisites:
* You must have an AWS account.
* SCIM is supported only for IAM Identity Center users and not for IAM users.
* The logged-in user must have the necessary admin privileges to generate the SCIM API token in IAM Identity Provider.
***
## Step 1: Configure the external identity Provider
1. Log into your AWS account
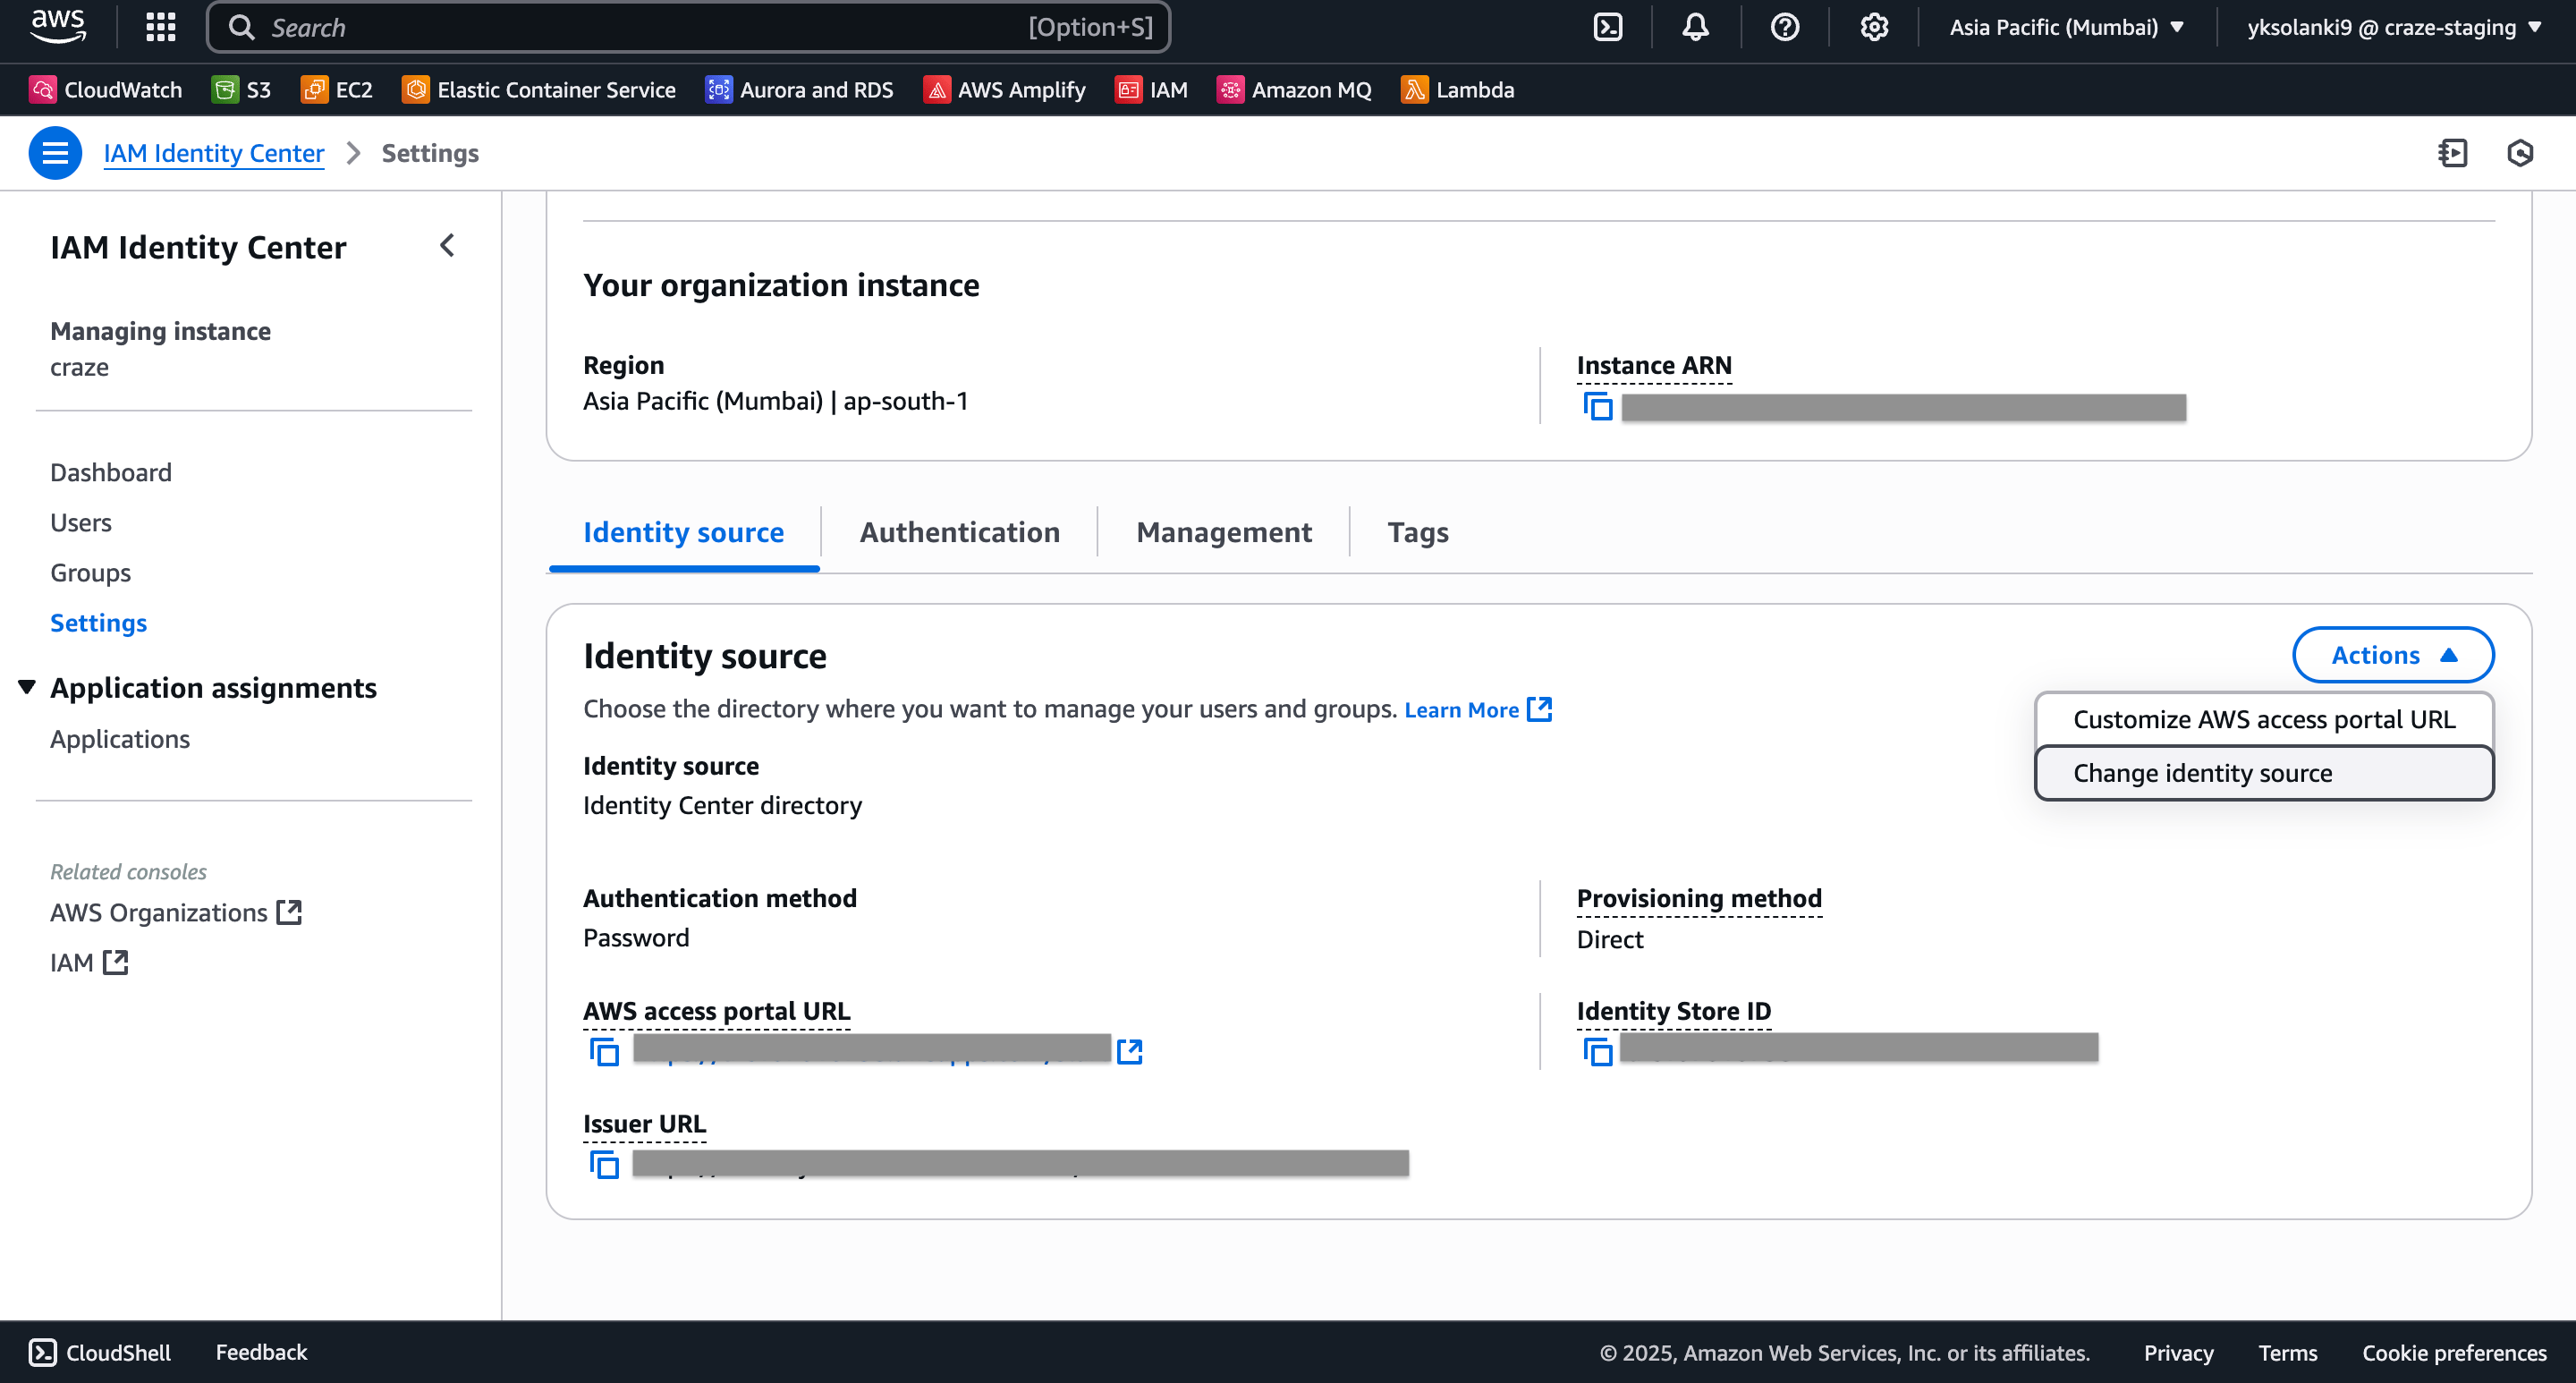
2. Go to **IAM Identity Center > Settings**
3. In the **Identity Source** tab, click on **Actions > Change identity source**
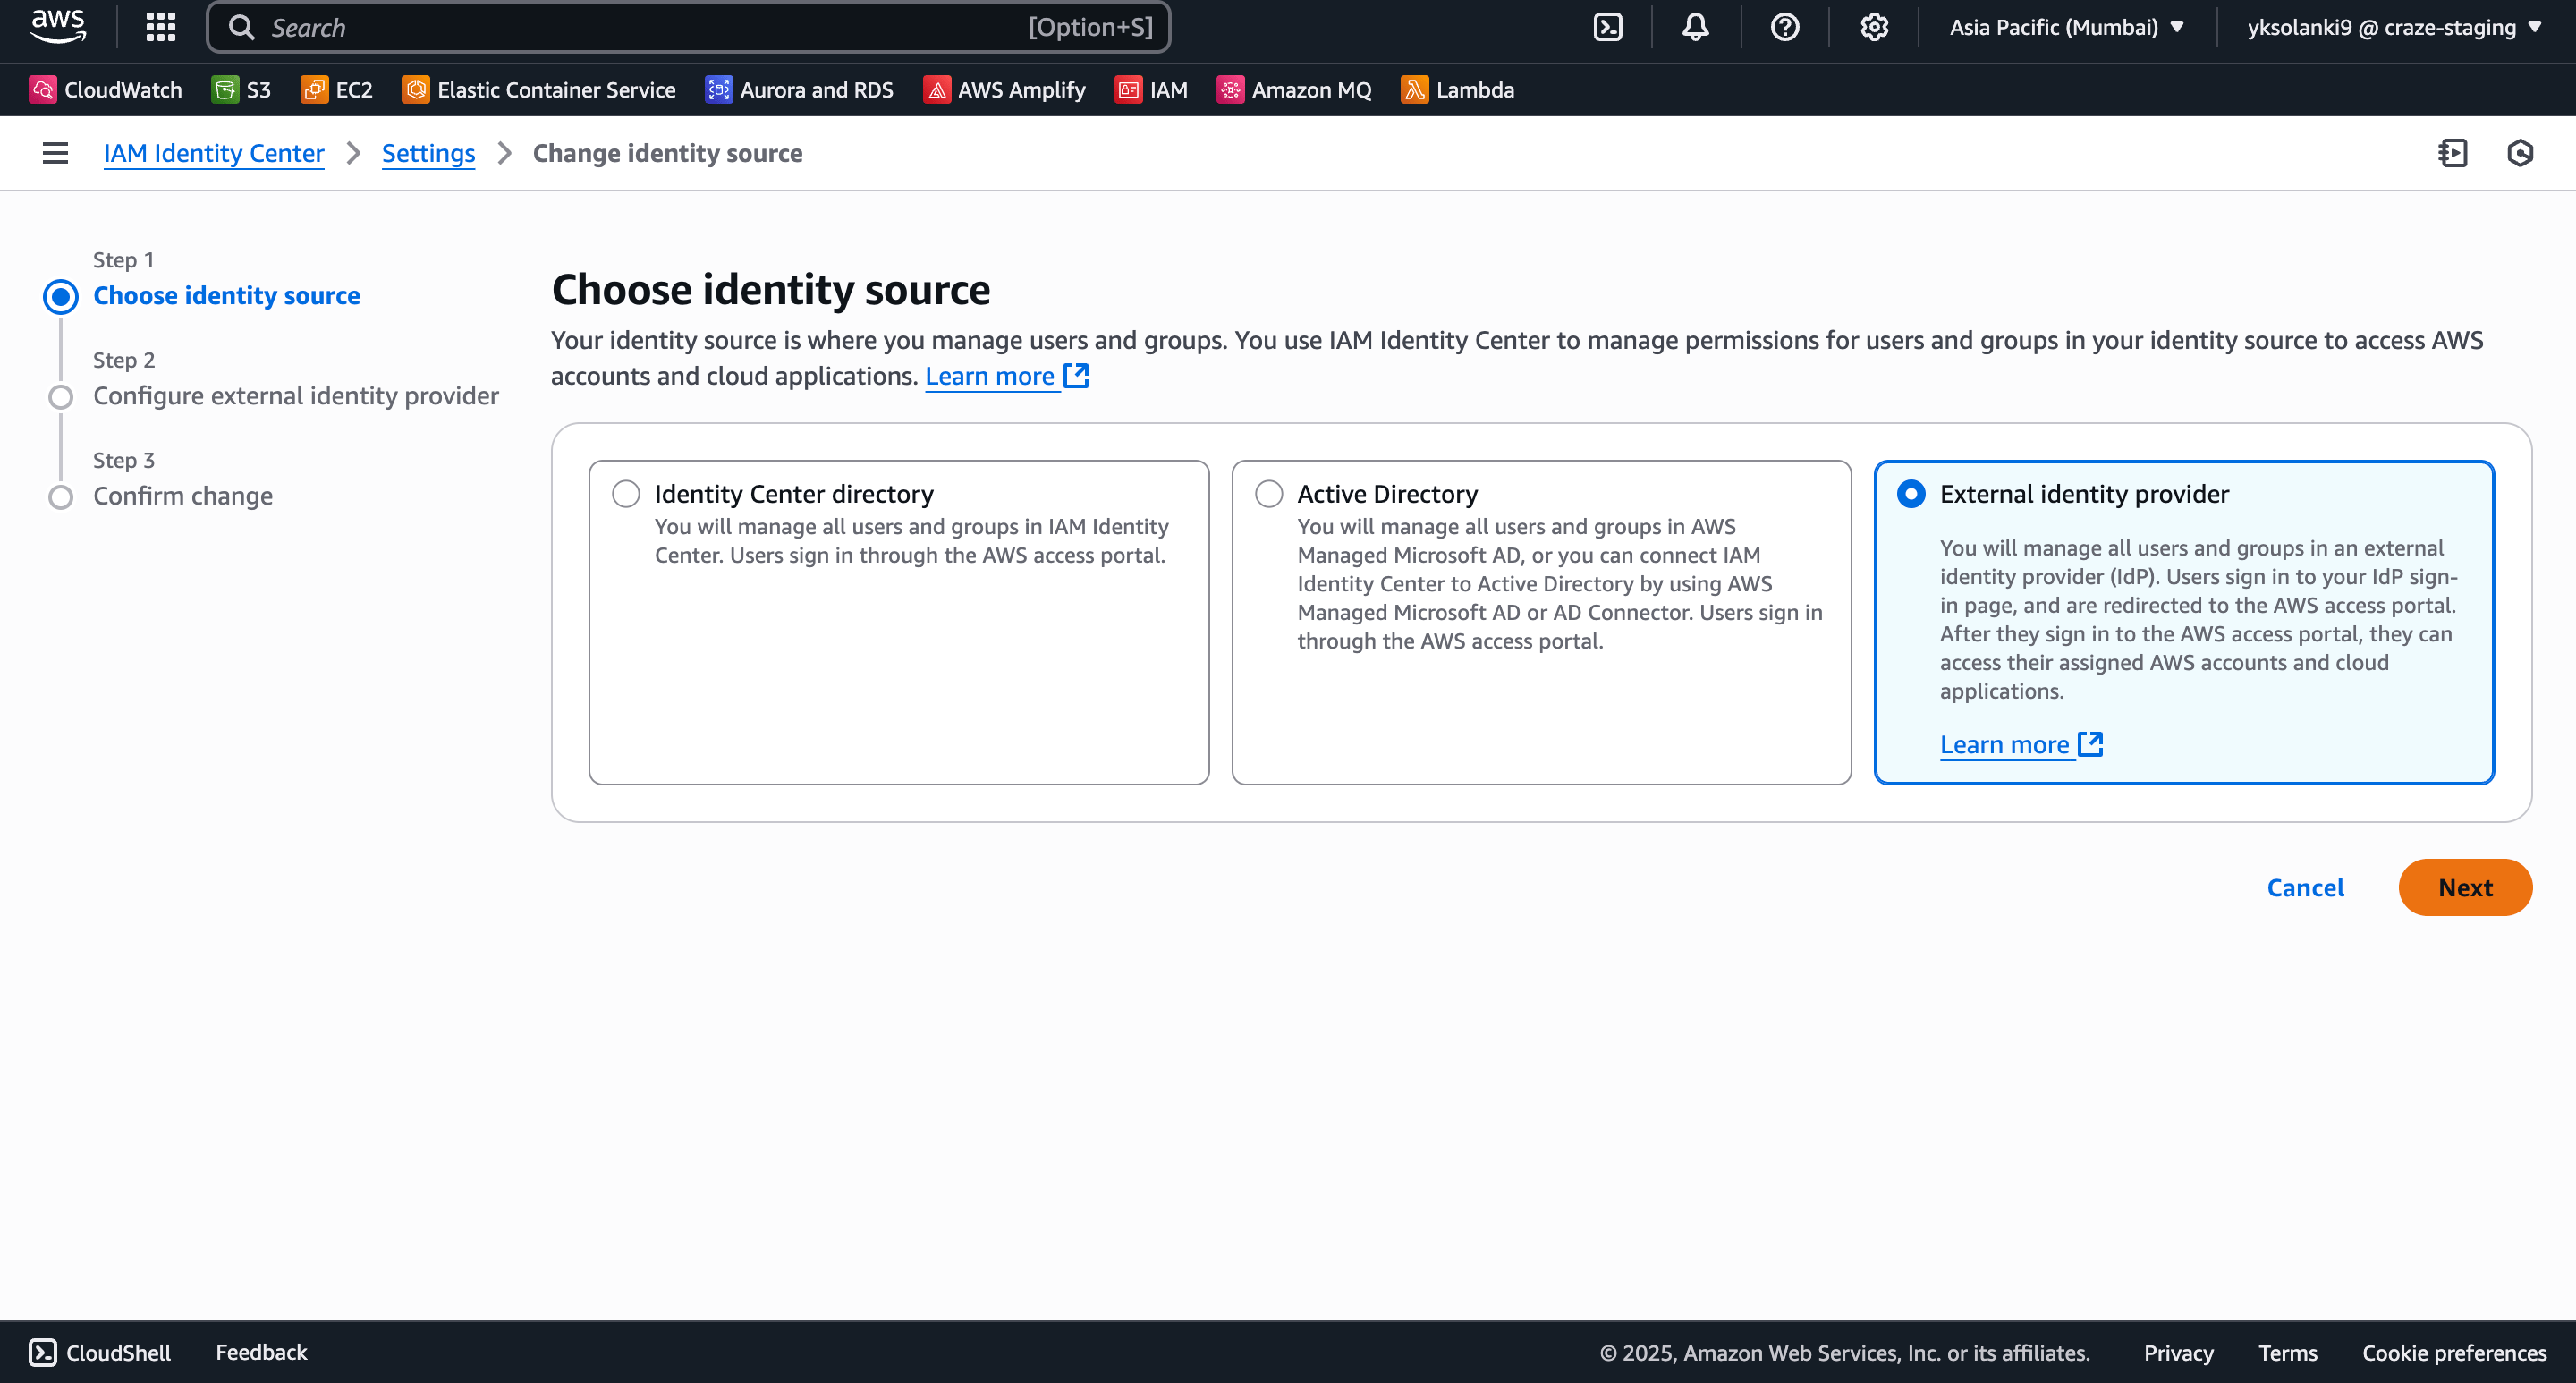
4. Choose **External identity provider** as your identity source
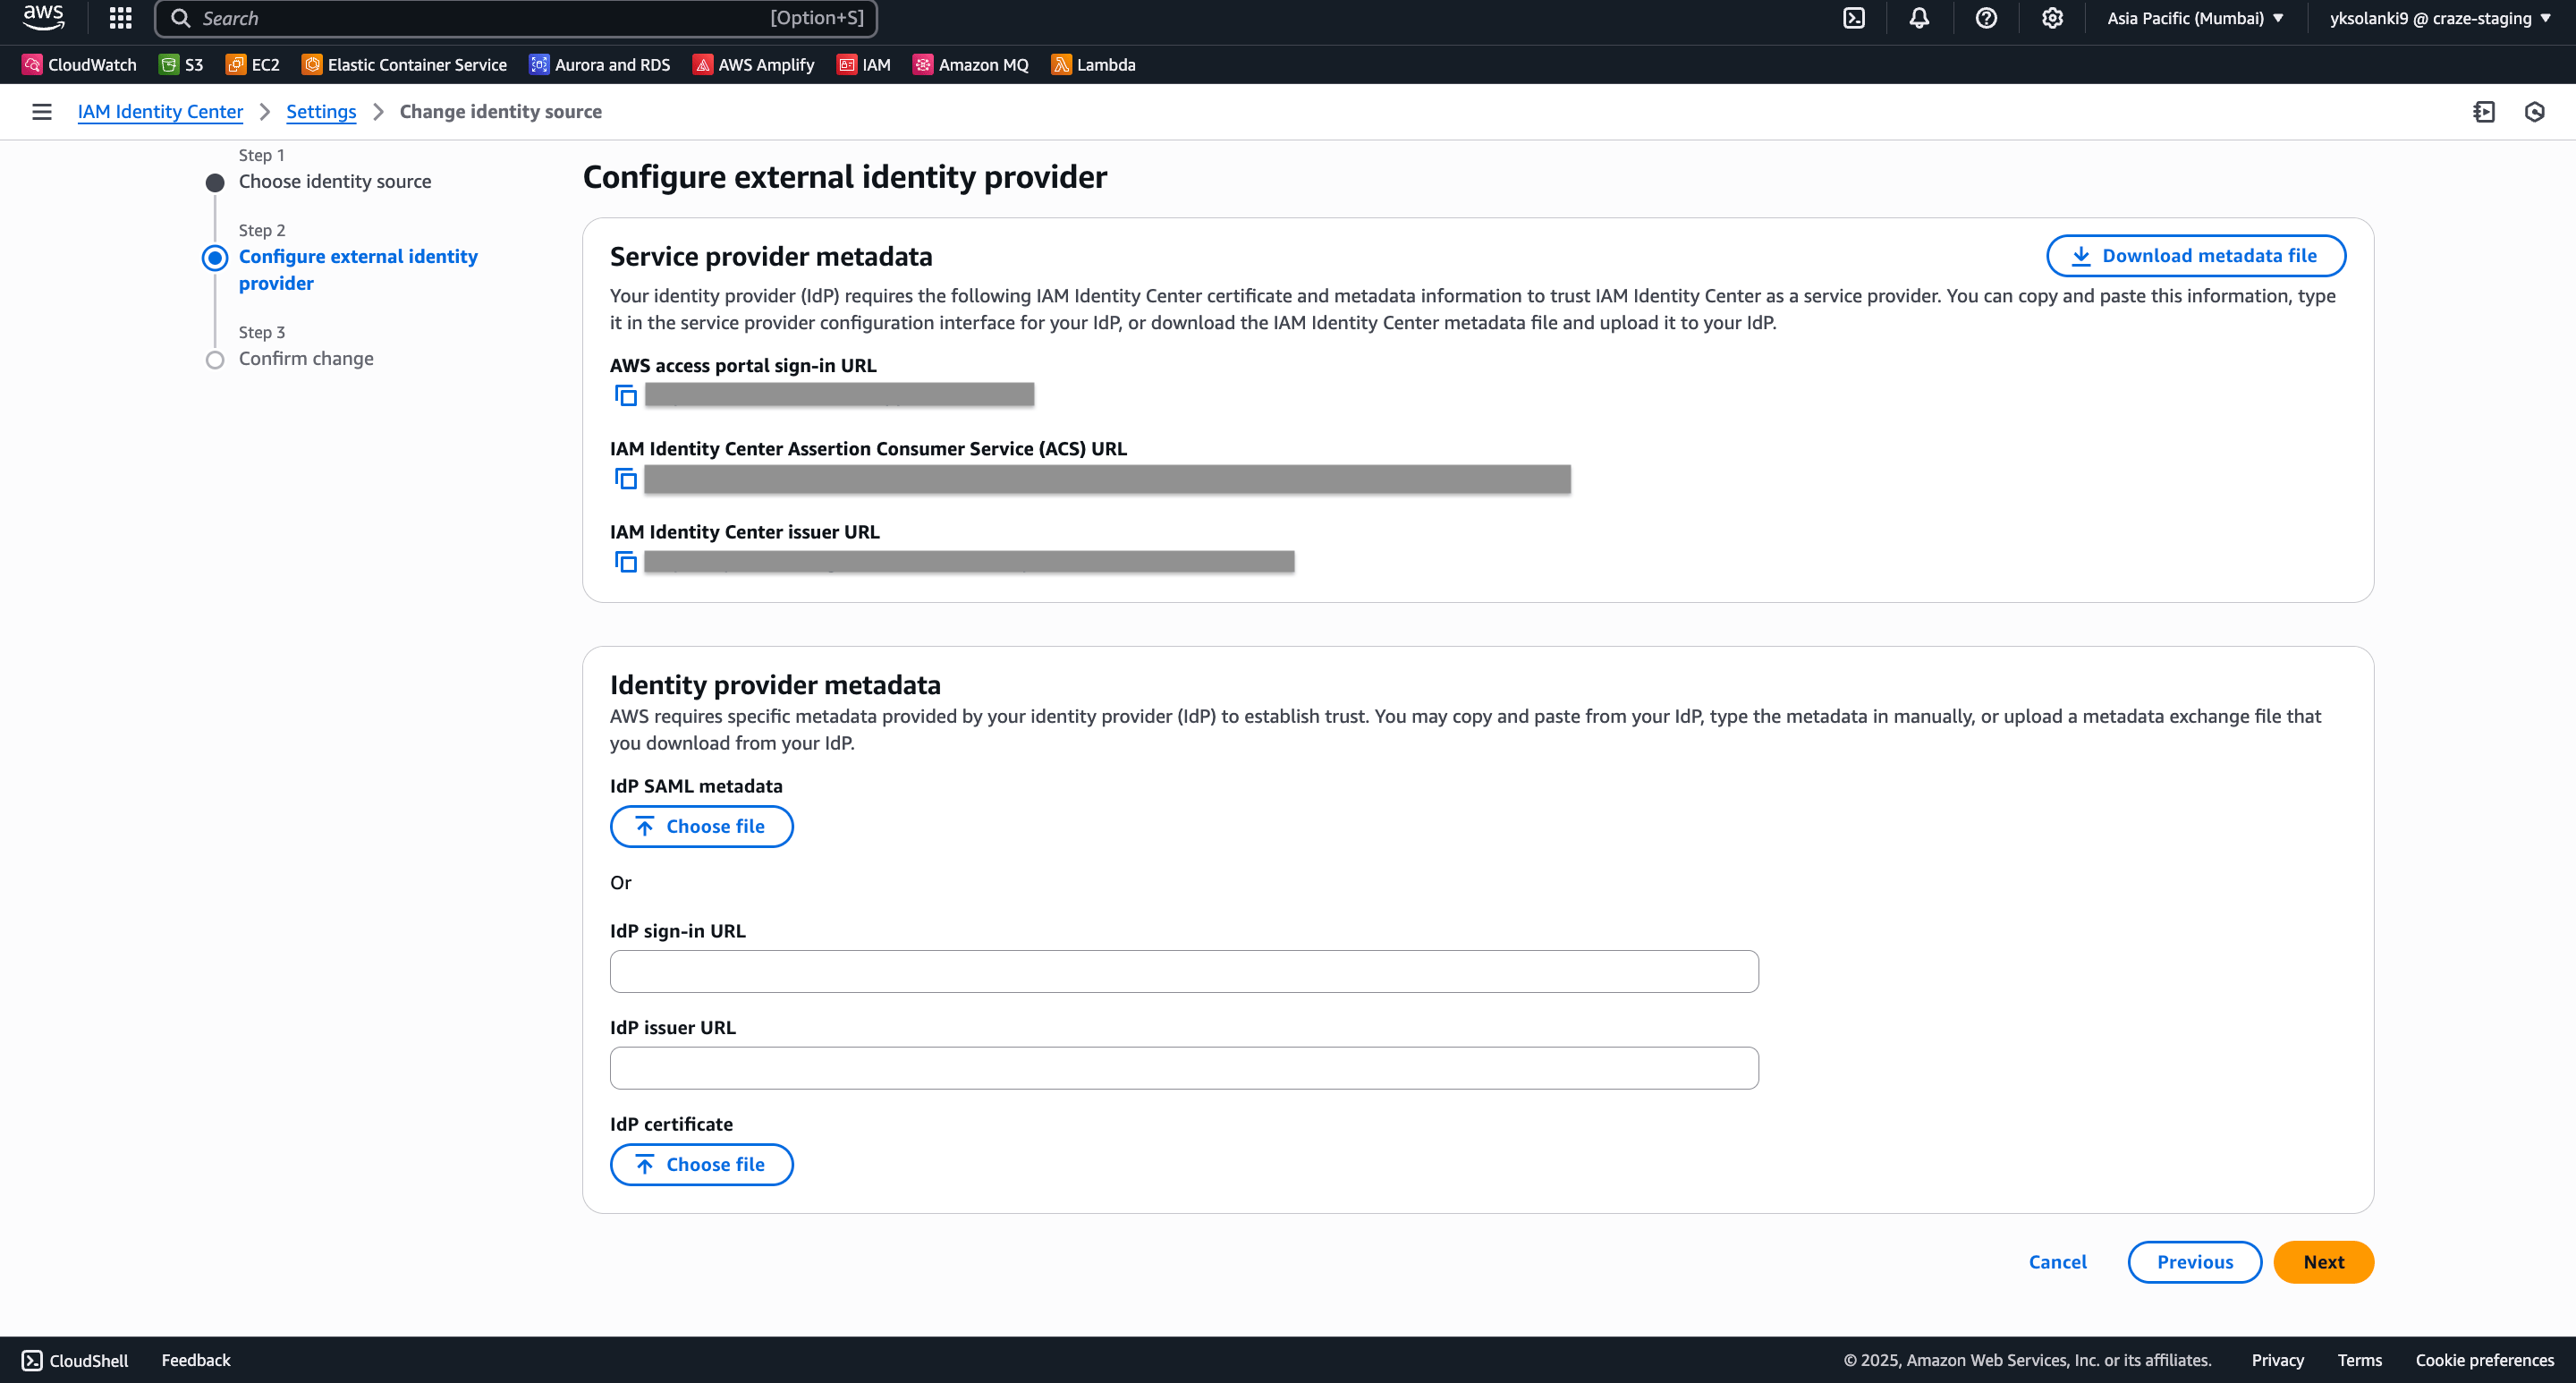
5. On the next screen, configure the external identity provider
6. Review and save the changes
 ## Step 2: Setting up Automatic Provisioning
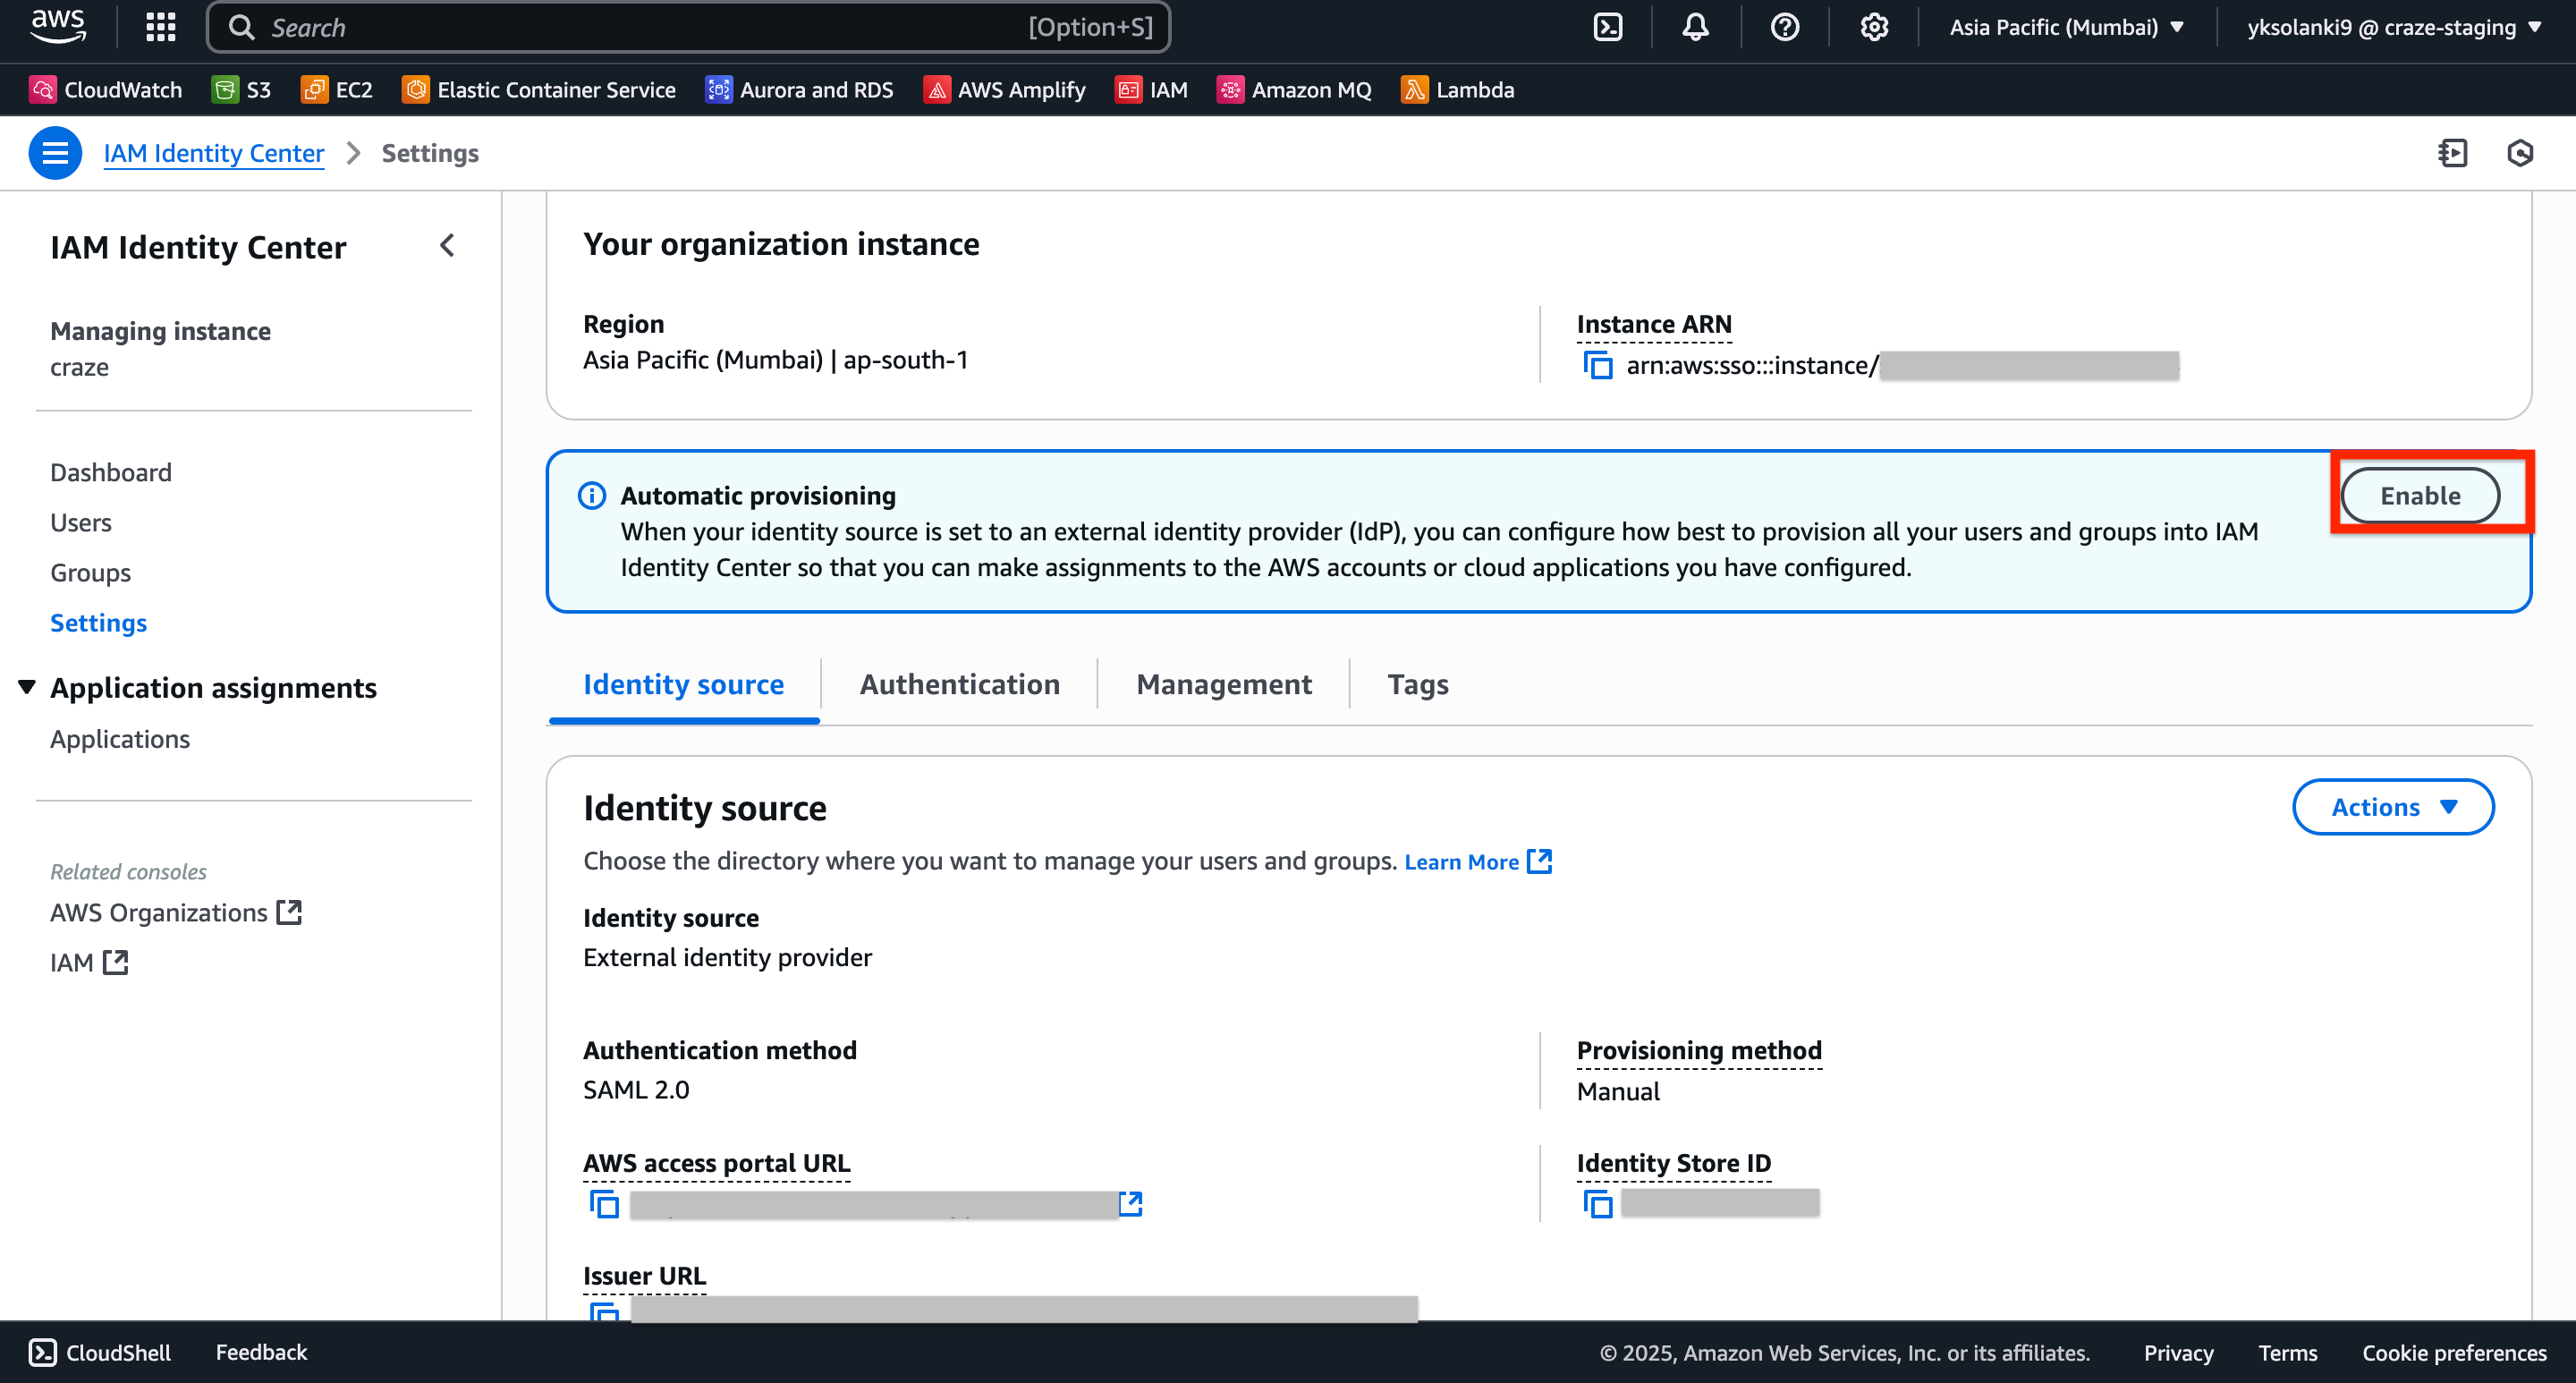
1. Once you've setup SAML, you'll see an **Automatic Provisioning** card on Settings page
2. Click on **Enable** in the left sidebar to enable SCIM
3. The SCIM configuration will be shown, copy the **SCIM Endpoint** and **Access Token** to connect to AWS.
## Step 2: Setting up Automatic Provisioning
1. Once you've setup SAML, you'll see an **Automatic Provisioning** card on Settings page
2. Click on **Enable** in the left sidebar to enable SCIM
3. The SCIM configuration will be shown, copy the **SCIM Endpoint** and **Access Token** to connect to AWS.
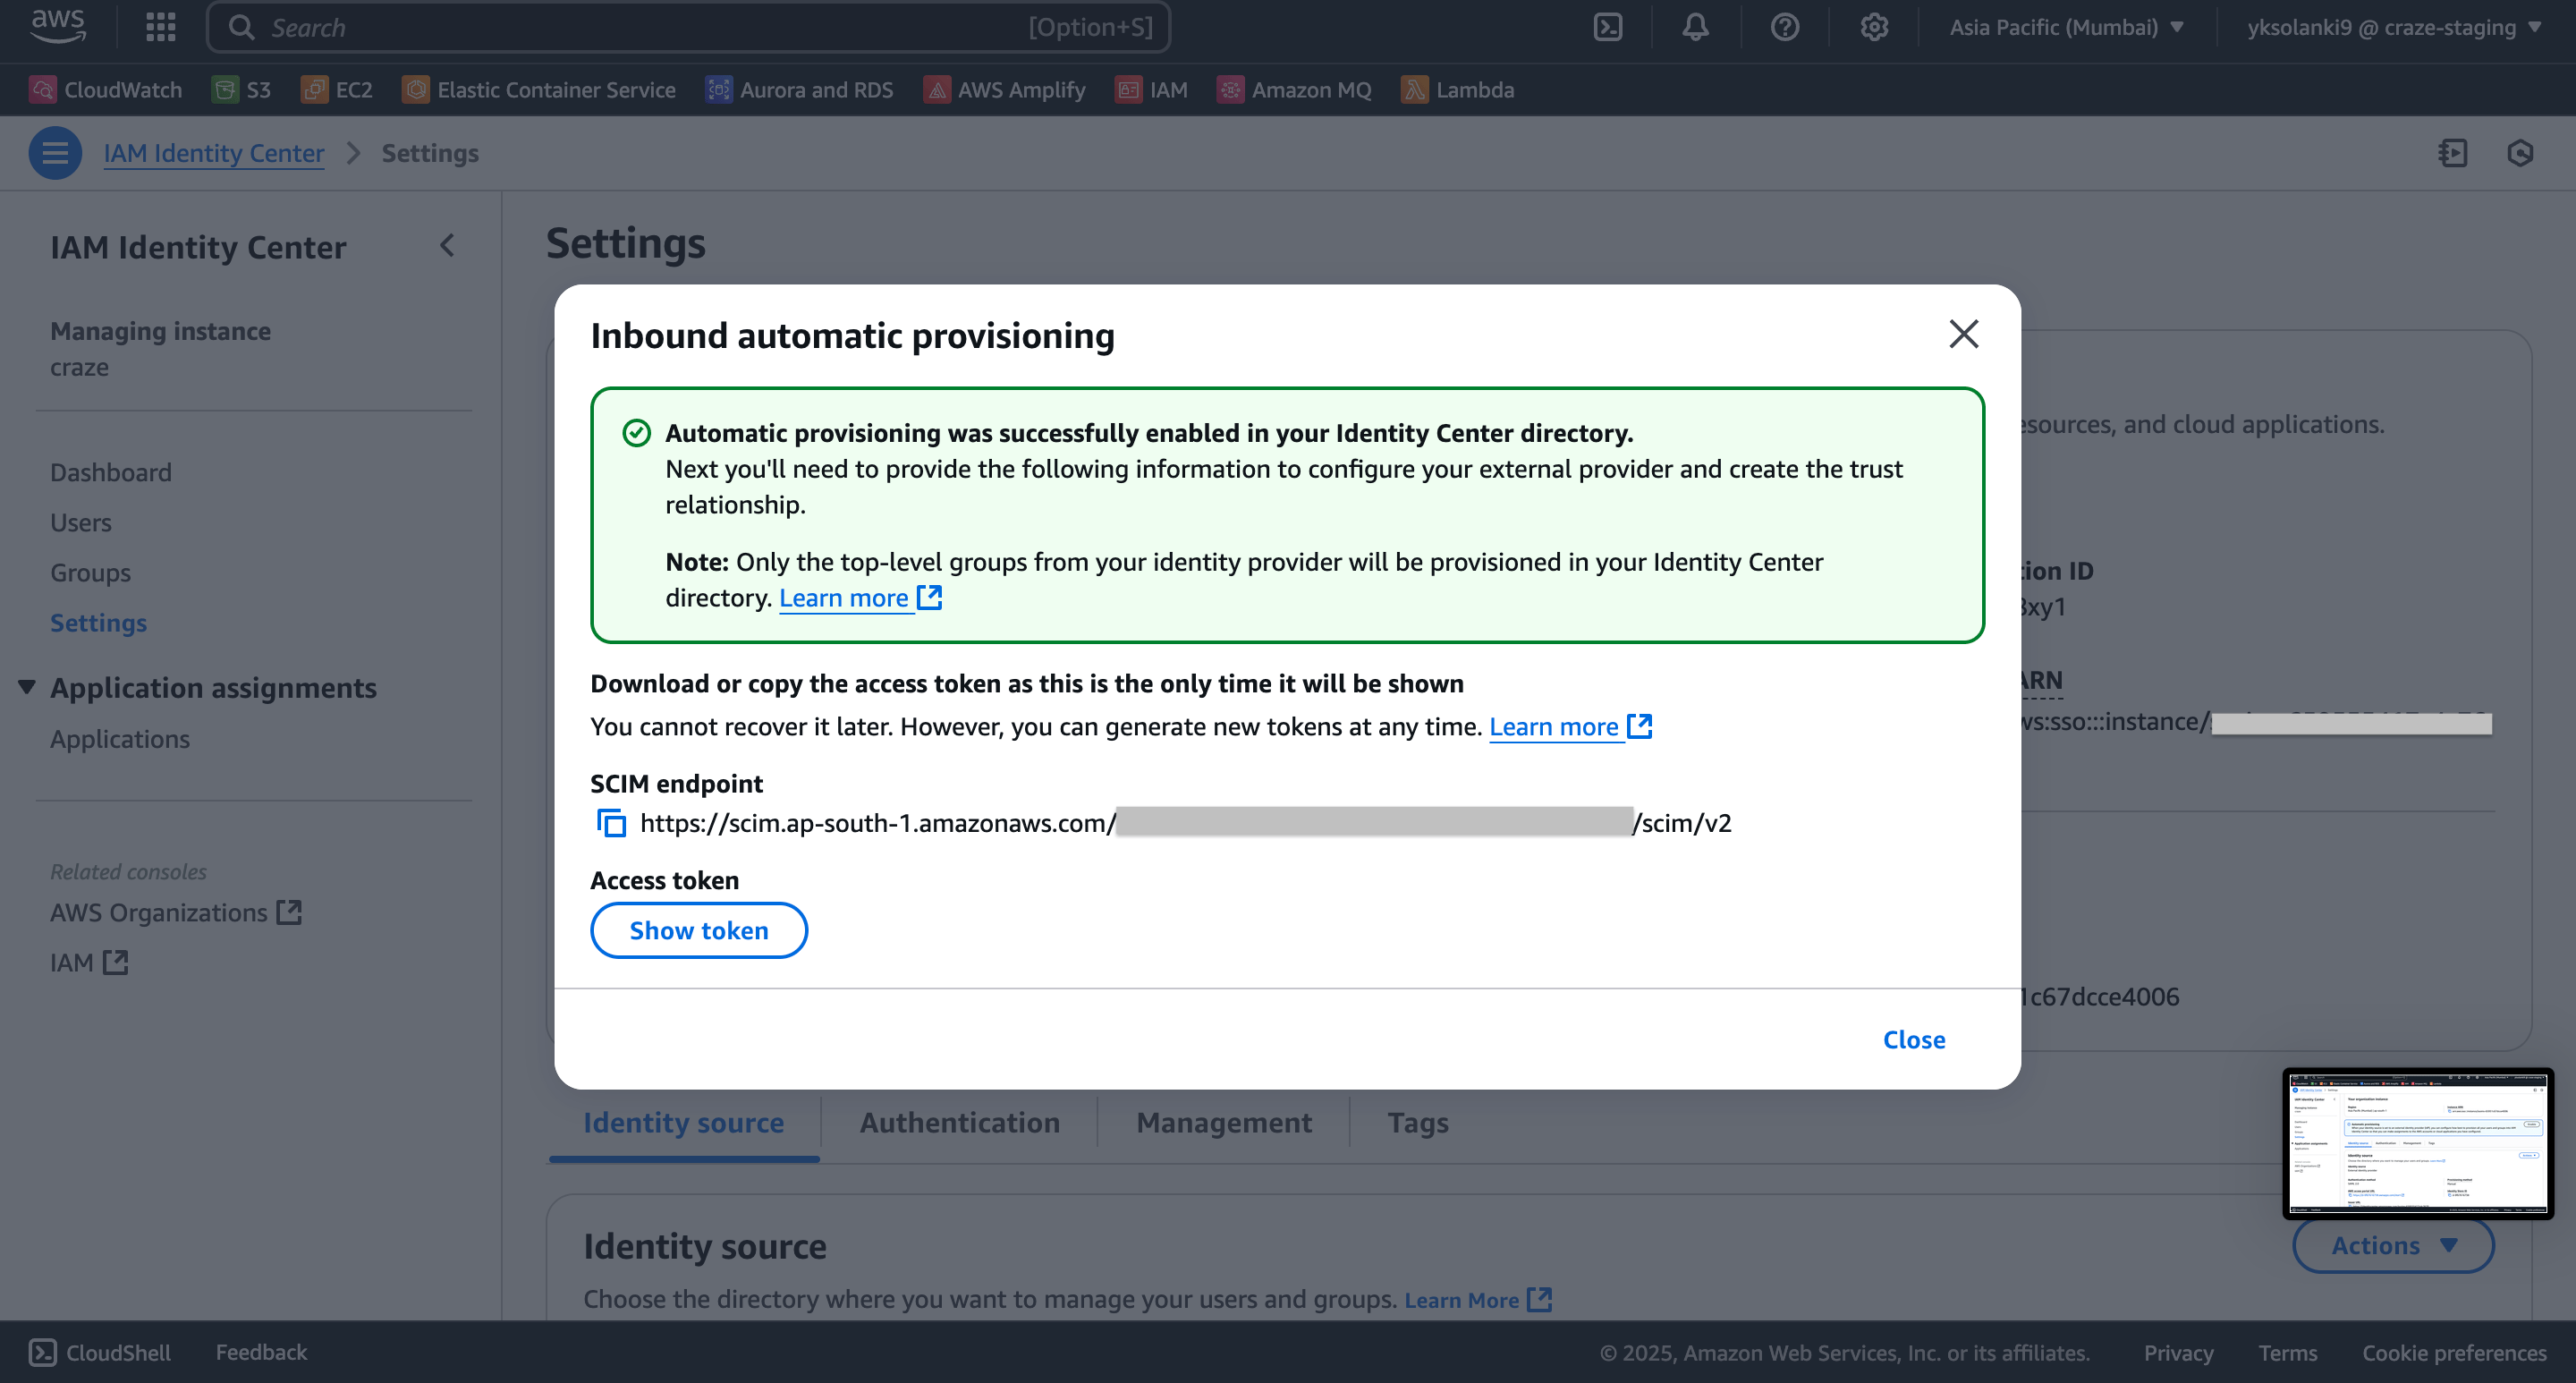 **Important**: Copy and store your Access Token securely.
## Step 3: Connect Your AWS Account
To authenticate using your Access Token, navigate to the AWS (SCIM) authentication form in Nango and enter the SCIM endpoint and Access Token.
**Important**: Copy and store your Access Token securely.
## Step 3: Connect Your AWS Account
To authenticate using your Access Token, navigate to the AWS (SCIM) authentication form in Nango and enter the SCIM endpoint and Access Token.
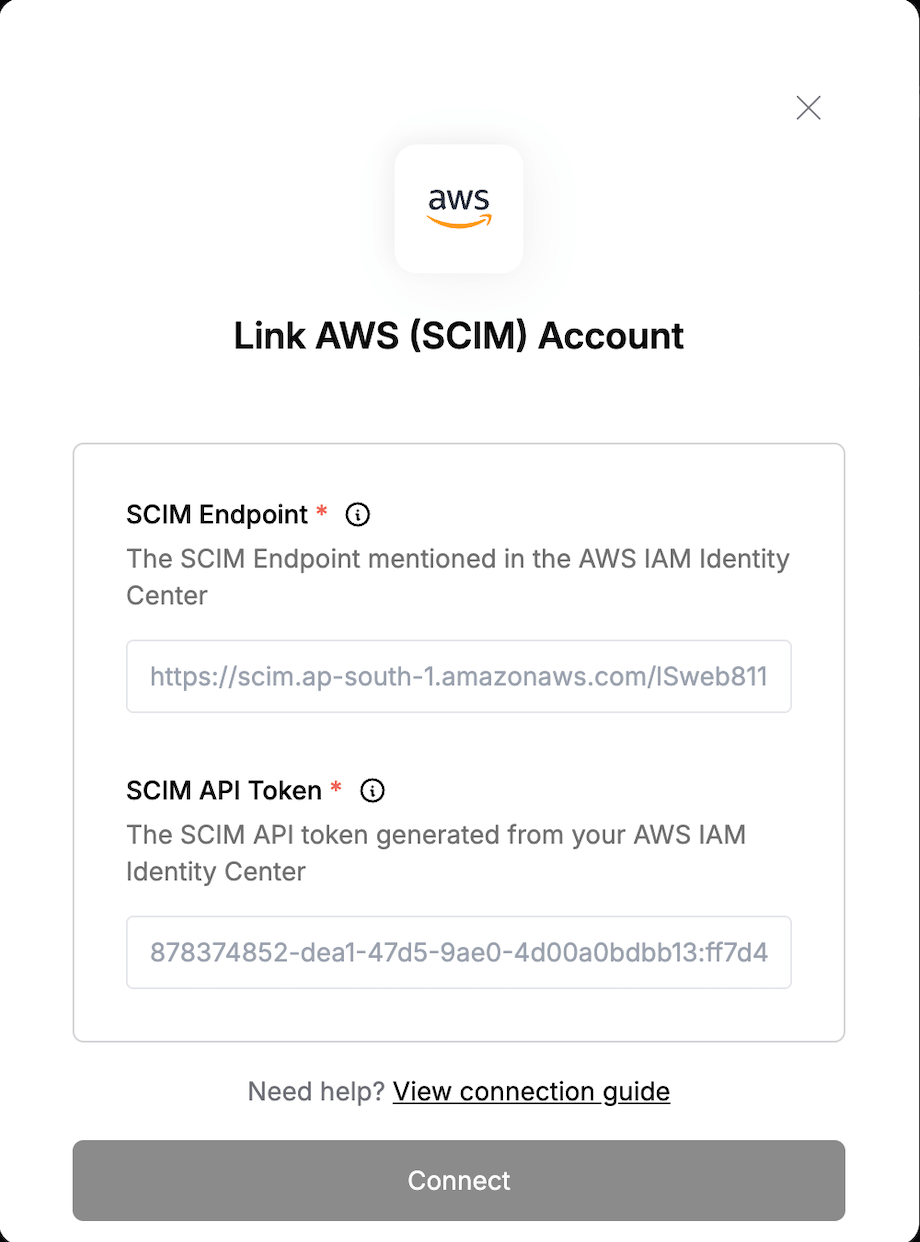 Click "Connect" to complete the authentication.