> ## Documentation Index
> Fetch the complete documentation index at: https://nango-marcin-get-deployments-docs.mintlify.site/llms.txt
> Use this file to discover all available pages before exploring further.
# Microsoft (Client Credentials - Certificate) - How do I link my account?
# Overview
To connect Microsoft (Client Credentials - Certificate) in Nango, you need to provide:
1. **Tenant ID** — The unique identifier for your organization in Azure.
2. **Scope** — The resource you want to access, suffixed with `.default` (e.g. `https://graph.microsoft.com/.default`).
3. **Client ID** — The unique identifier Azure assigns to your registered application.
4. **Private Key** — The RSA private key (PEM format) matching the certificate you uploaded to your app registration.
5. **Certificate Thumbprint (x5t#S256)** — The base64url-encoded SHA-256 thumbprint of your certificate, used to identify it in the JWT assertion.
This guide walks you through generating and finding these credentials in Azure.
### Prerequisites
* An active Azure account with the appropriate Microsoft product subscription.
* OpenSSL or equivalent tooling to generate a certificate and private key.
### Step 1: Finding your Tenant ID
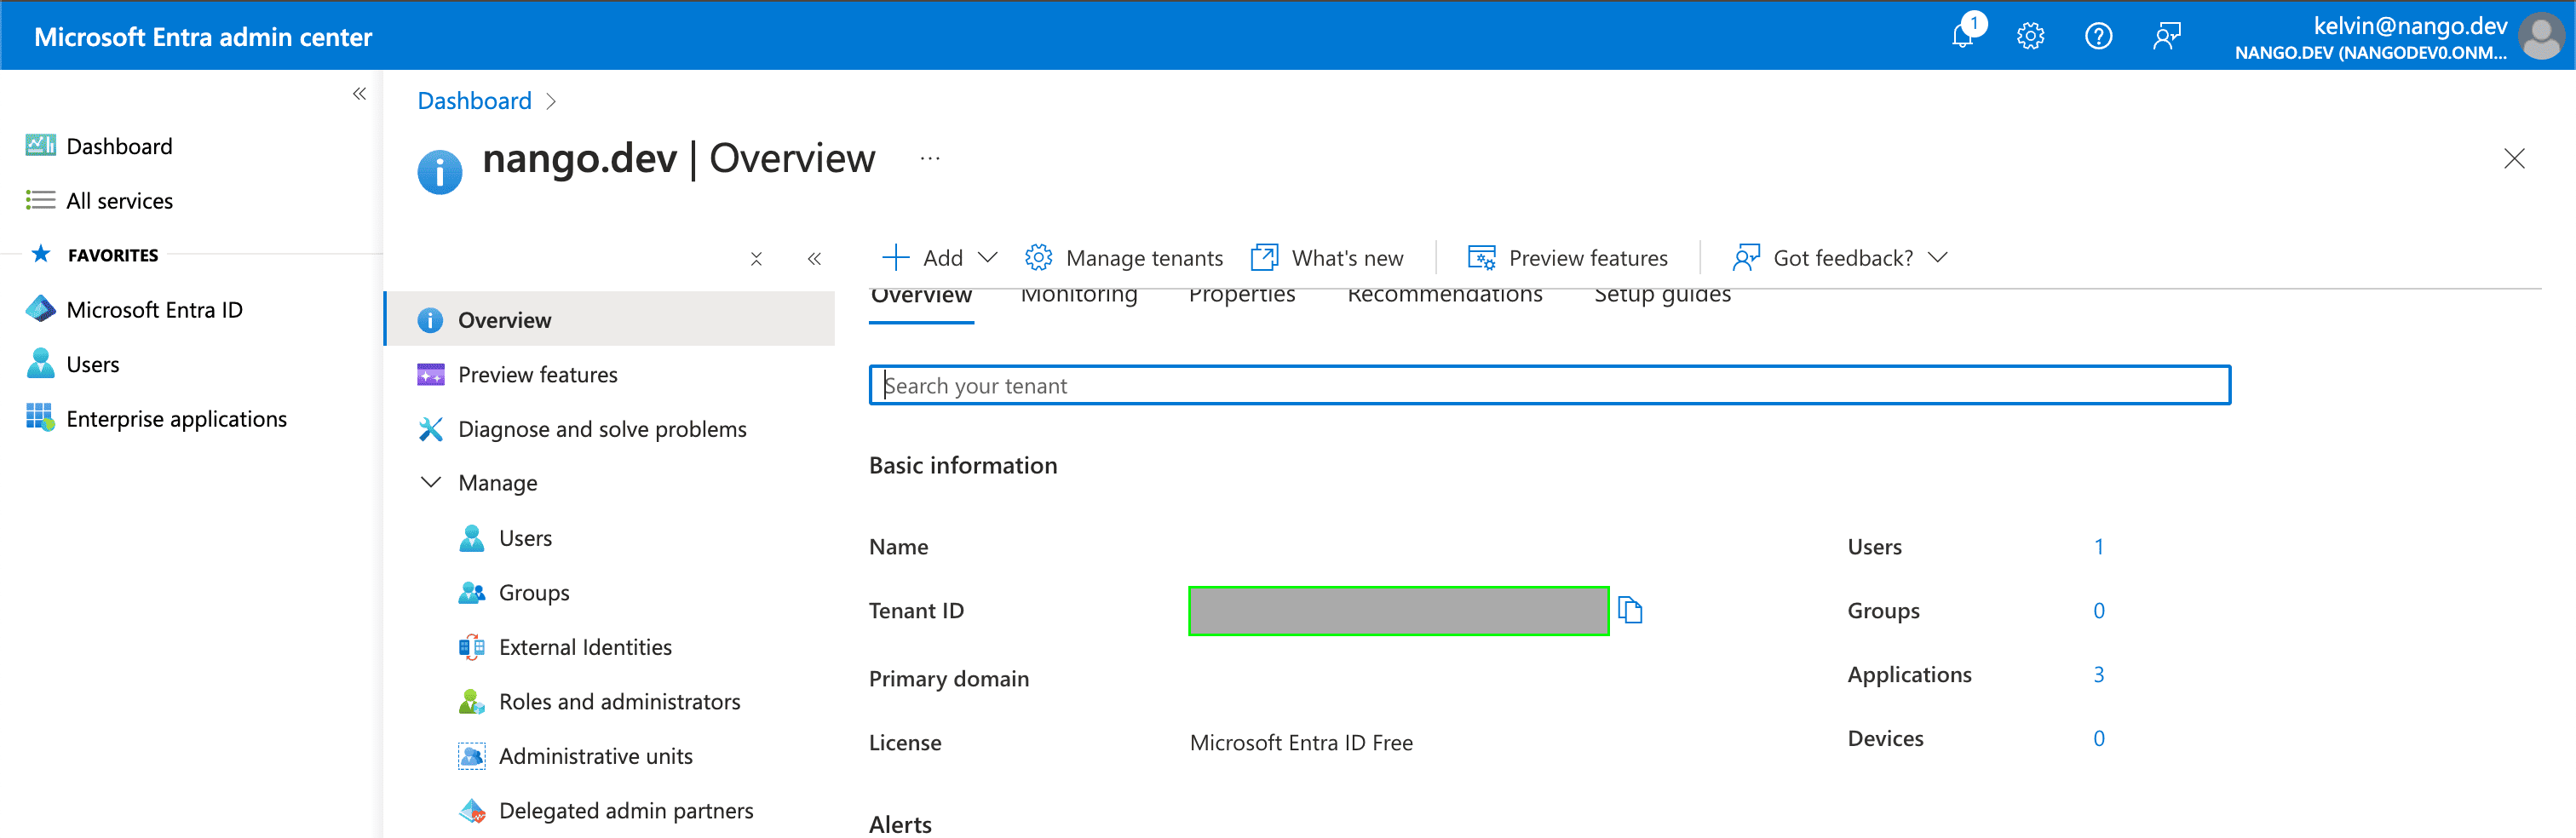
Your Tenant ID is shown in the **Tenant ID** field on the [Azure Active Directory Overview page](https://aad.portal.azure.com/#view/Microsoft_AAD_IAM/ActiveDirectoryMenuBlade/~/Overview).
 ### Step 2: Registering your application and finding your Client ID
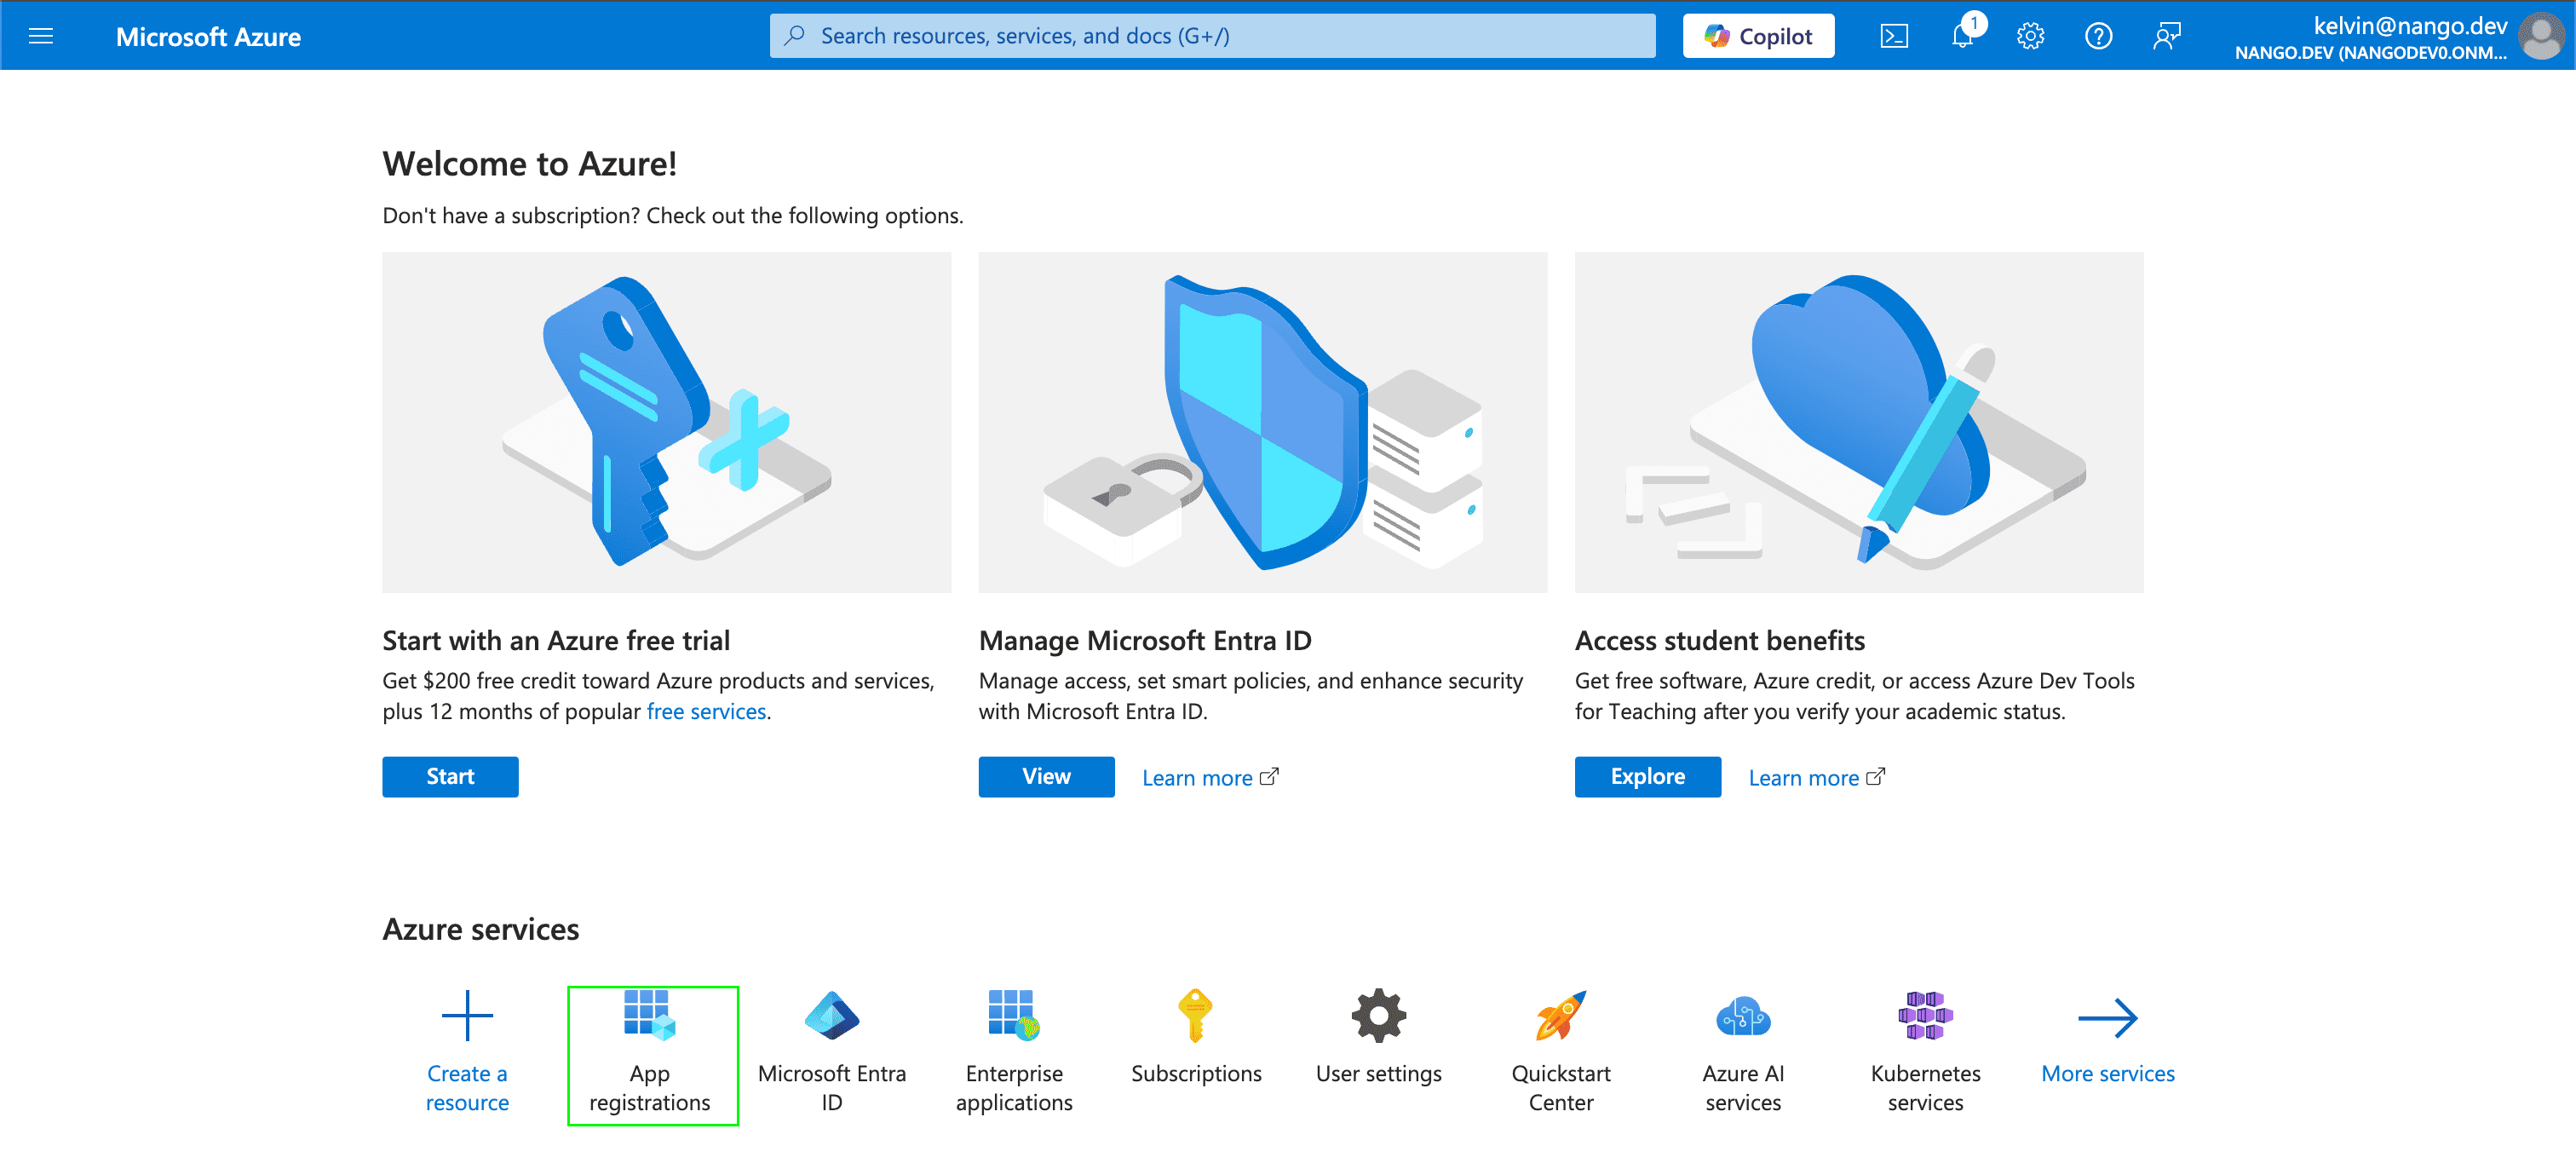
1. Go to the [Azure portal](https://portal.azure.com/#home) and select **App registrations**.
### Step 2: Registering your application and finding your Client ID
1. Go to the [Azure portal](https://portal.azure.com/#home) and select **App registrations**.
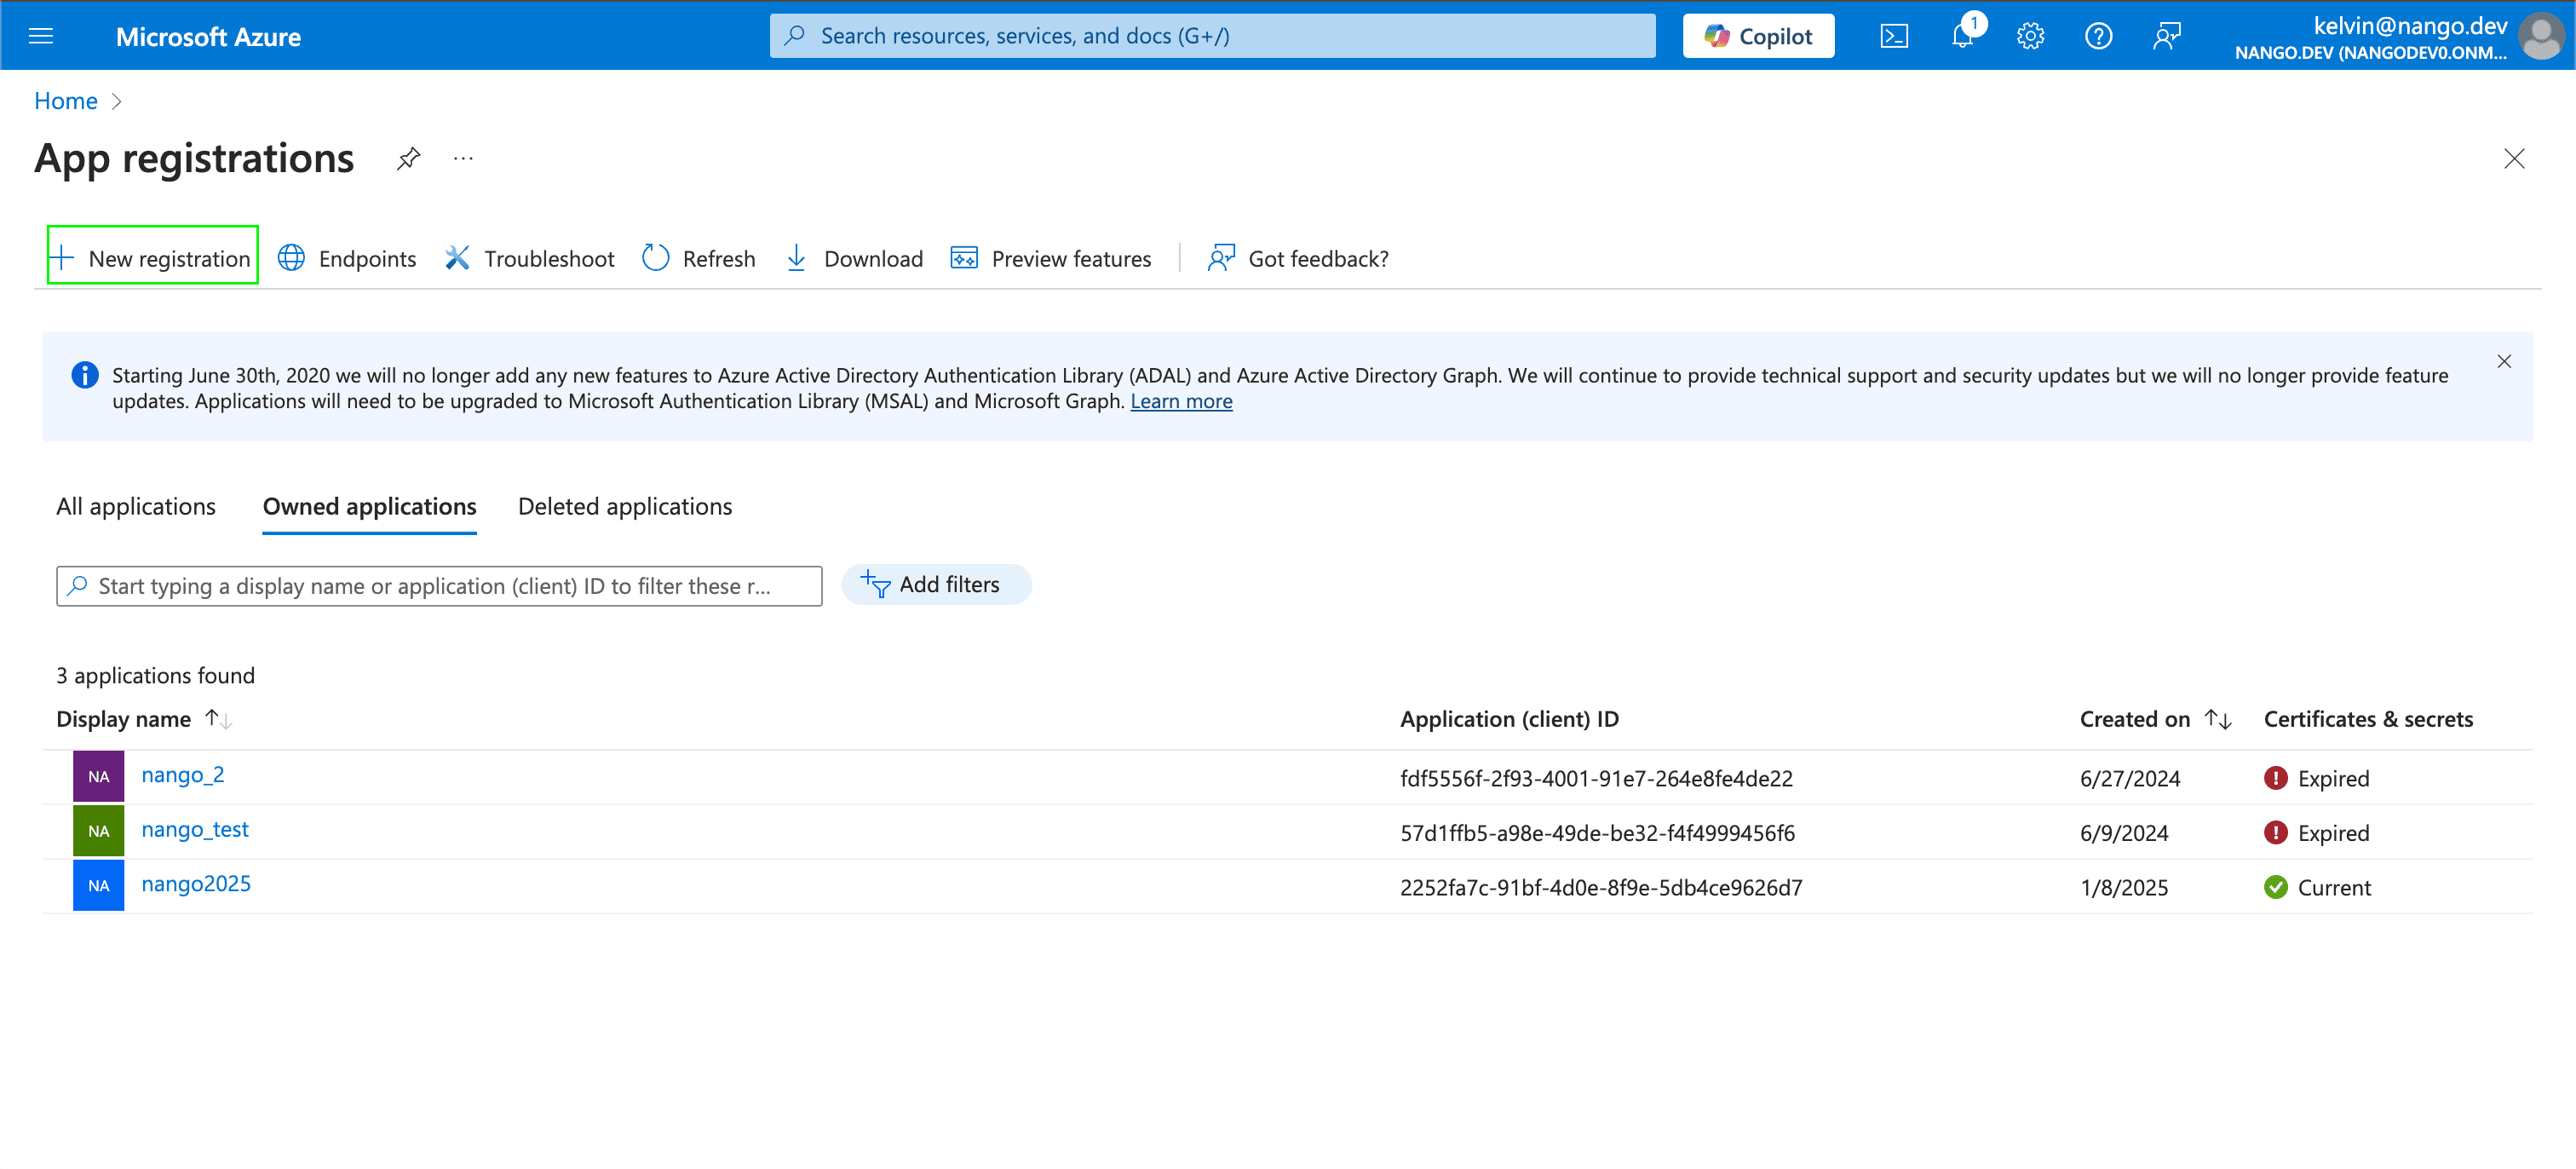
 2. Select **New registration**, give your application a name, and click **Register**.
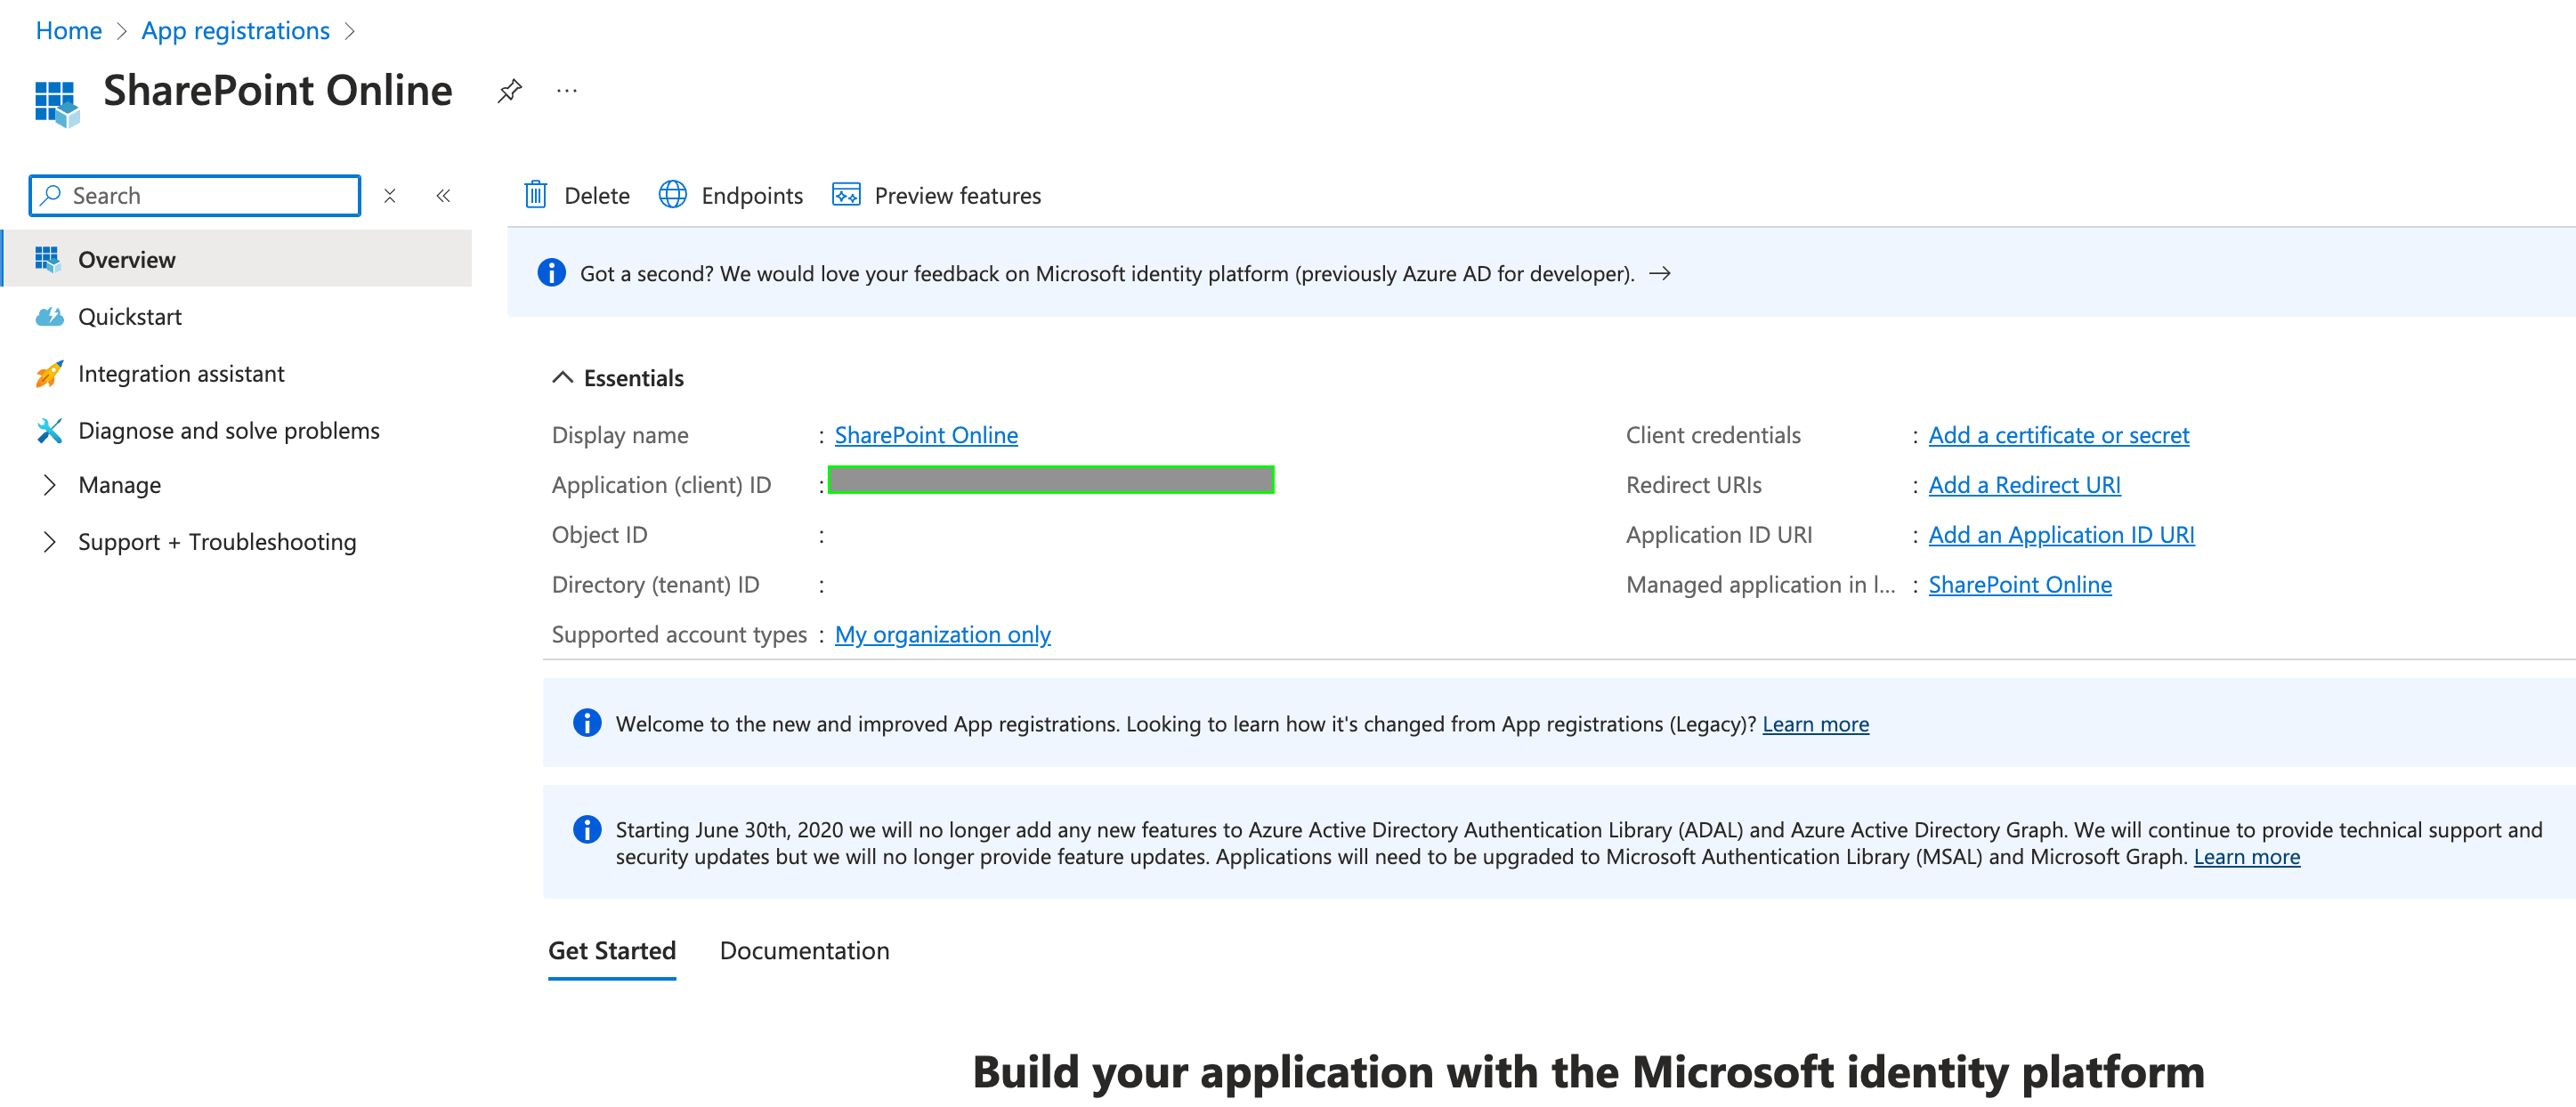
 3. Once registered, your **Client ID** is shown in the **Application (client) ID** field under **Essentials**.
 ### Step 3: Generating a certificate and uploading it to Azure
1. Generate an RSA private key and a self-signed certificate using OpenSSL:
```bash theme={null}
openssl req -x509 -newkey rsa:2048 -keyout private_key.pem -out certificate.pem -days 365 -nodes \
-subj "/CN=MyNangoApp"
```
This produces `private_key.pem` (your private key) and `certificate.pem` (your certificate).
2. In your app registration, navigate to **Certificates & secrets** → **Certificates** → **Upload certificate**, and upload `certificate.pem`.
### Step 3: Generating a certificate and uploading it to Azure
1. Generate an RSA private key and a self-signed certificate using OpenSSL:
```bash theme={null}
openssl req -x509 -newkey rsa:2048 -keyout private_key.pem -out certificate.pem -days 365 -nodes \
-subj "/CN=MyNangoApp"
```
This produces `private_key.pem` (your private key) and `certificate.pem` (your certificate).
2. In your app registration, navigate to **Certificates & secrets** → **Certificates** → **Upload certificate**, and upload `certificate.pem`.
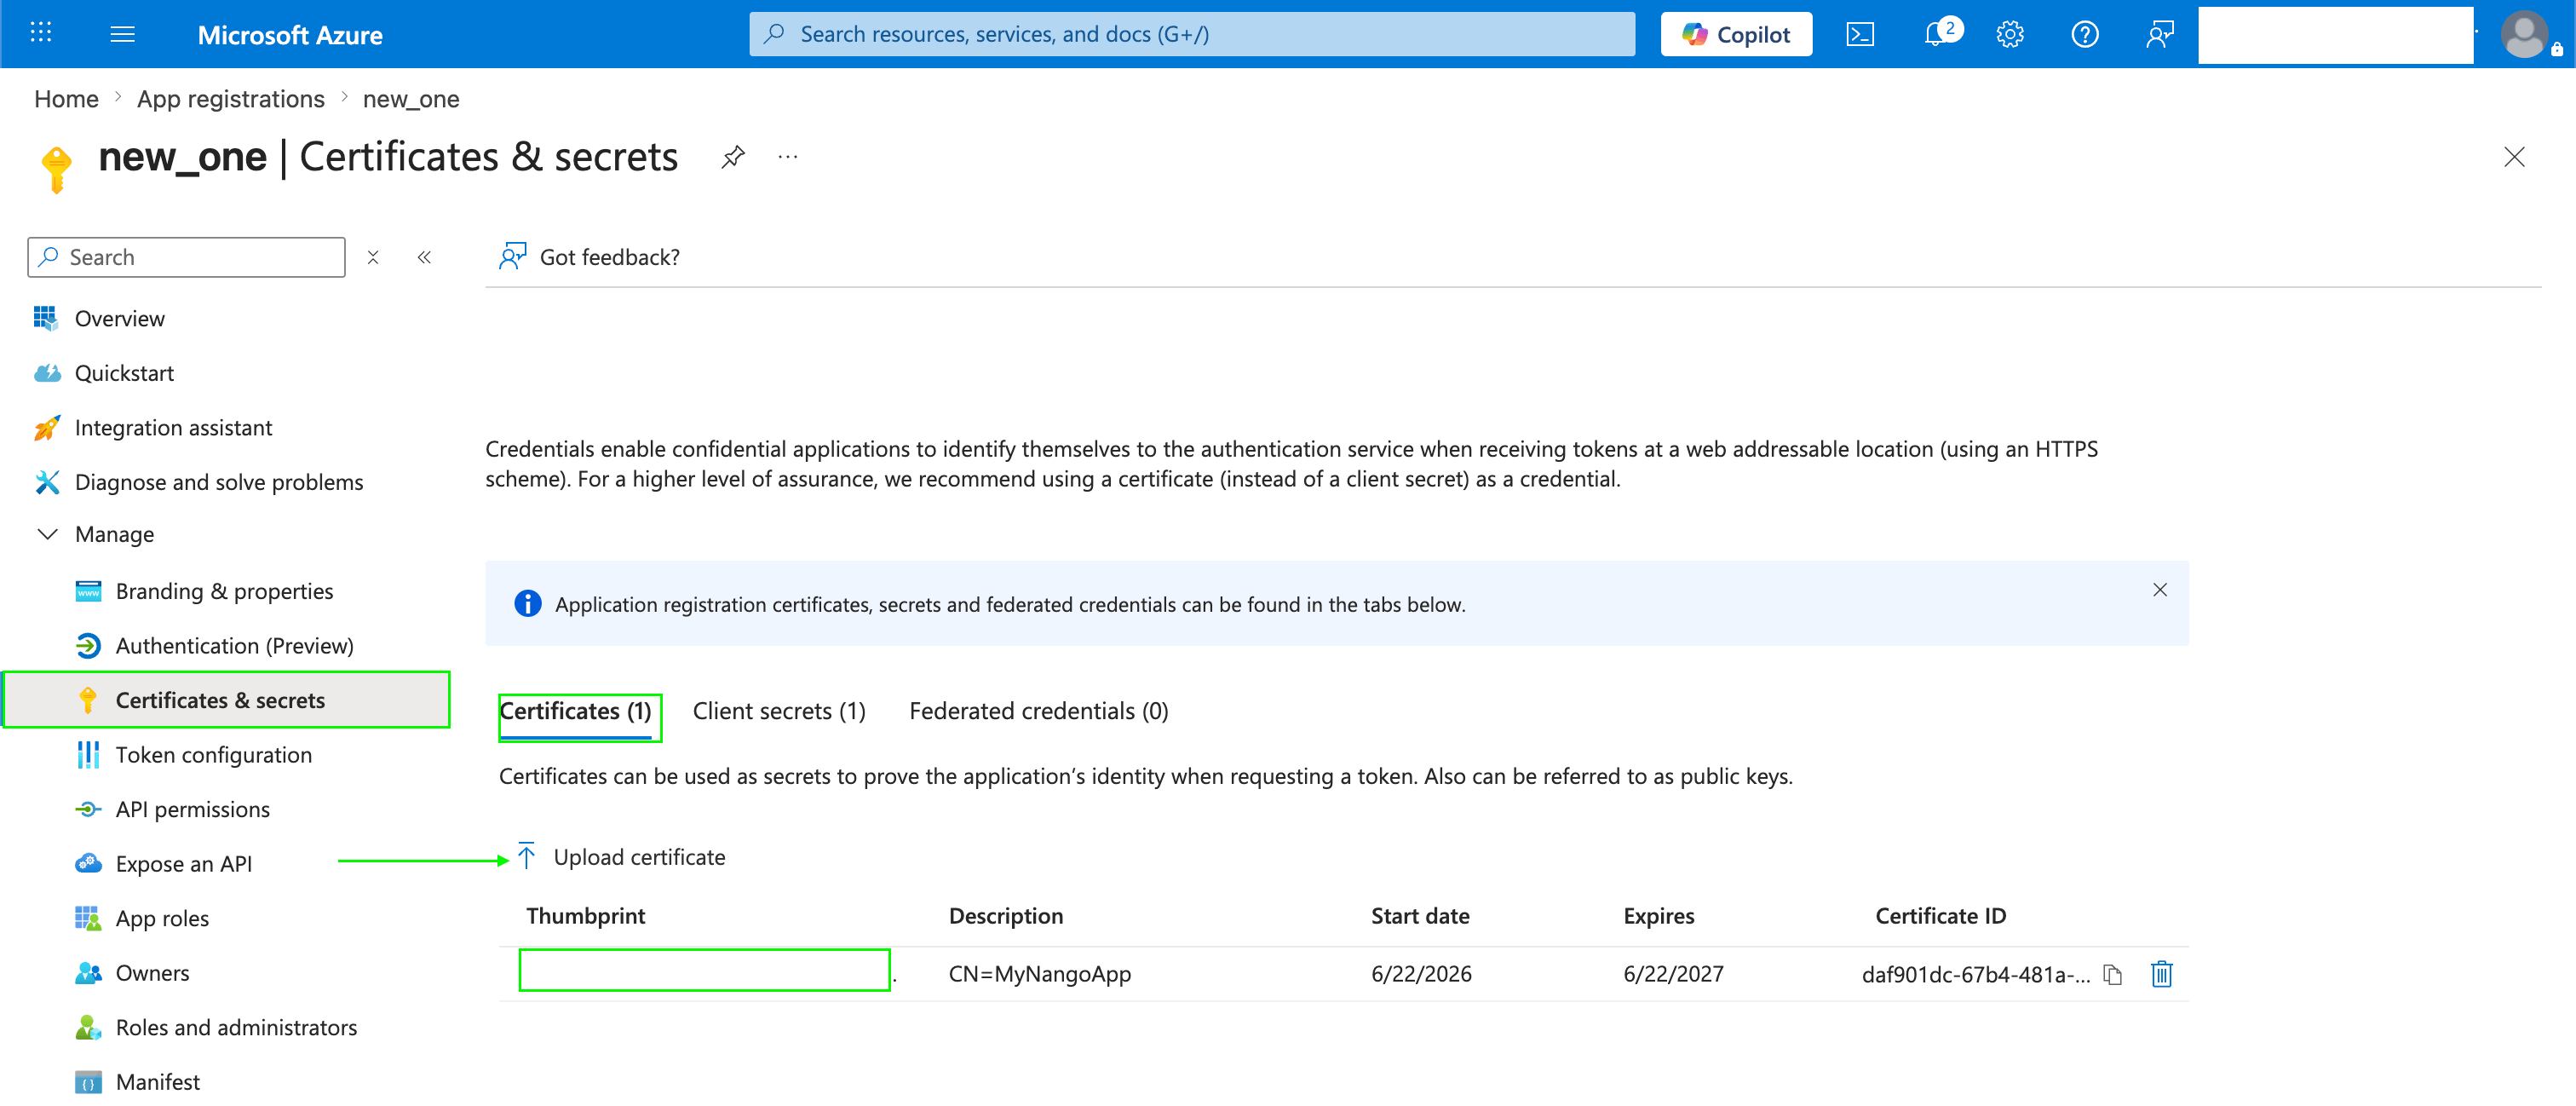 3. After uploading, Azure confirms the certificate was registered.
### Step 4: Computing the Certificate Thumbprint (x5t)
The `x5t#S256` value is the base64url-encoded SHA-256 thumbprint of your certificate. Run this command against your local `certificate.pem` to compute it:
```bash theme={null}
openssl x509 -in certificate.pem -fingerprint -sha256 -noout \
| sed 's/.*Fingerprint=//;s/://g' \
| xxd -r -p \
| base64 \
| tr '+/' '-_' \
| tr -d '='
```
The output is your **Certificate Thumbprint (x5t#S256)** value.
### Step 5: Granting API permissions
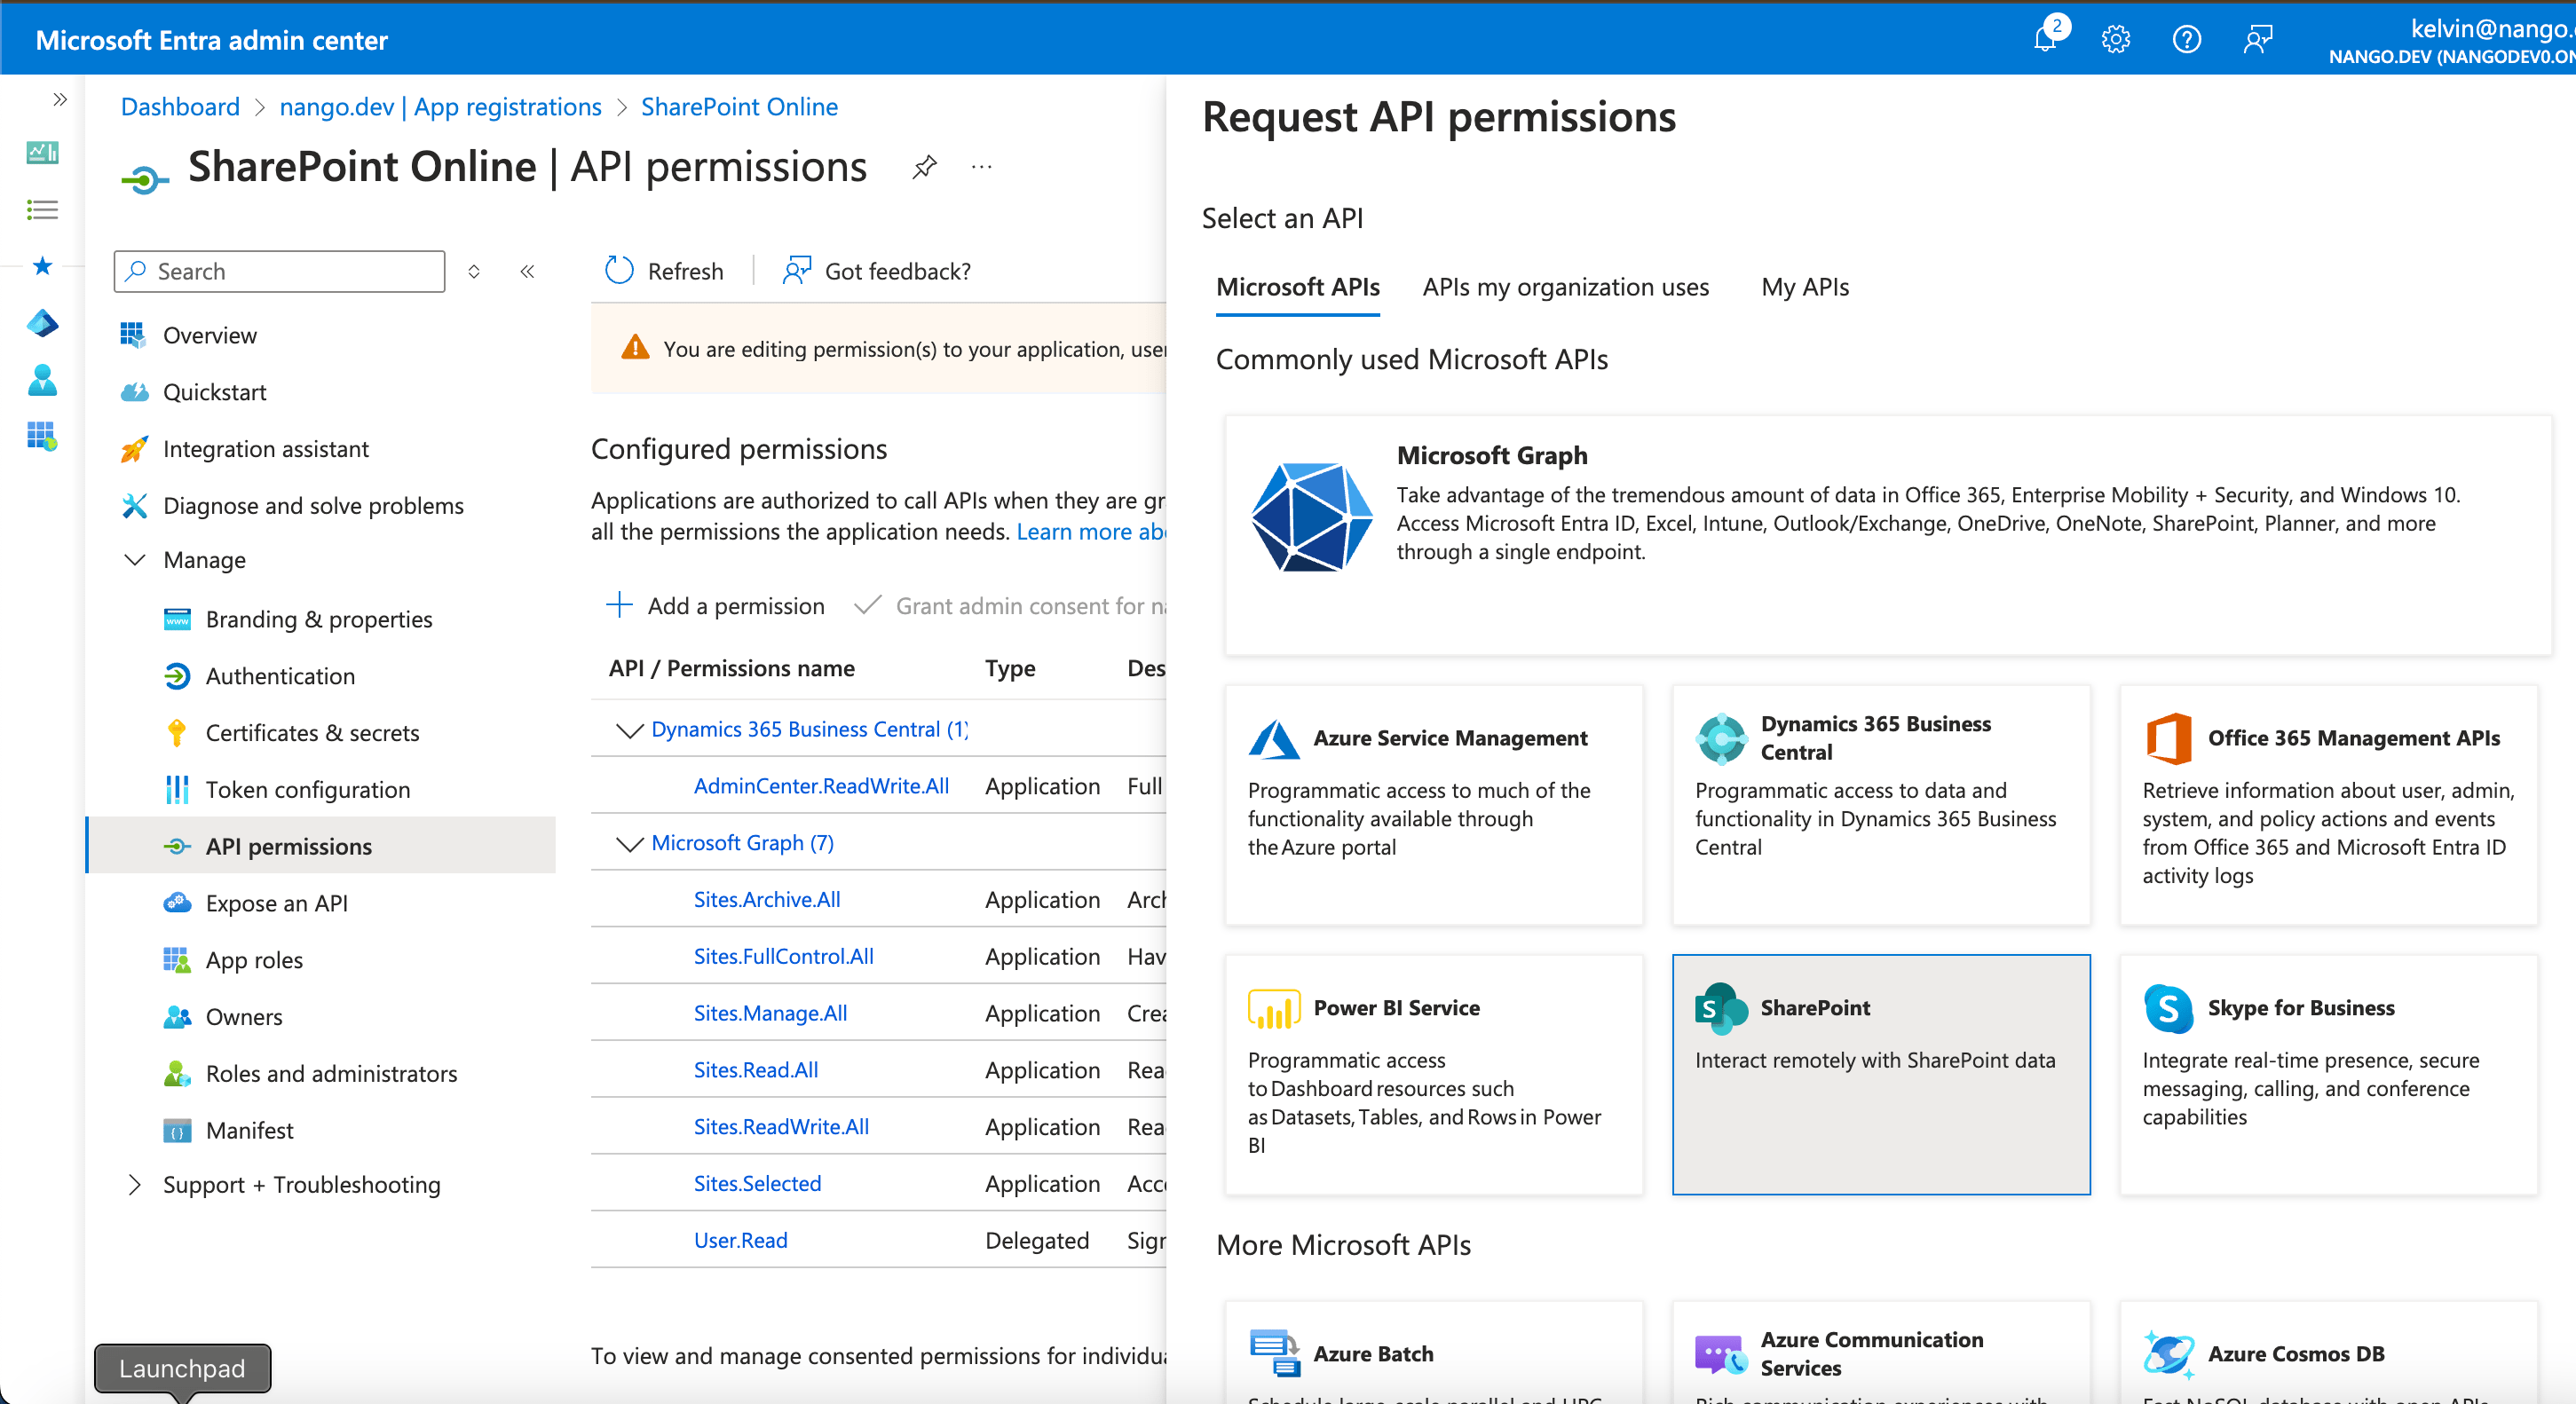
1. In your app registration, go to **API permissions** → **Add a permission** → **Microsoft Graph**.
2. Select **Application permissions**, choose the permissions your app requires, and click **Add permissions**.
3. Click **Grant admin consent** to activate the permissions.
3. After uploading, Azure confirms the certificate was registered.
### Step 4: Computing the Certificate Thumbprint (x5t)
The `x5t#S256` value is the base64url-encoded SHA-256 thumbprint of your certificate. Run this command against your local `certificate.pem` to compute it:
```bash theme={null}
openssl x509 -in certificate.pem -fingerprint -sha256 -noout \
| sed 's/.*Fingerprint=//;s/://g' \
| xxd -r -p \
| base64 \
| tr '+/' '-_' \
| tr -d '='
```
The output is your **Certificate Thumbprint (x5t#S256)** value.
### Step 5: Granting API permissions
1. In your app registration, go to **API permissions** → **Add a permission** → **Microsoft Graph**.
2. Select **Application permissions**, choose the permissions your app requires, and click **Add permissions**.
3. Click **Grant admin consent** to activate the permissions.
 ### Step 6: Enter credentials in the Connect UI
Once you have all credentials:
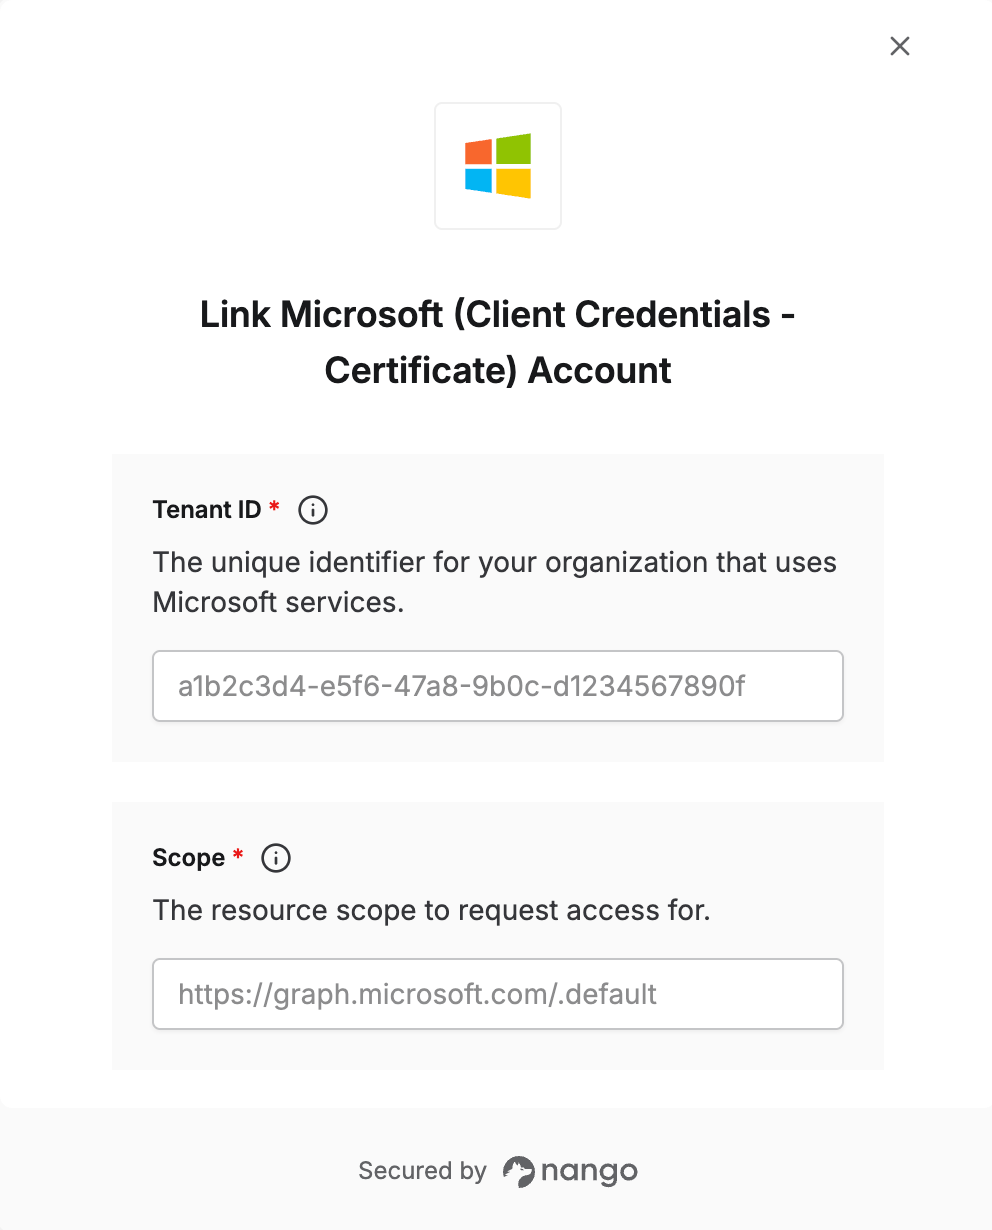
1. Open the connection form in Nango.
2. Enter the **Tenant ID**, **Scope**, **Client ID**, the contents of `private_key.pem` as **Private Key**, and the computed value as **Certificate Thumbprint (x5t#S256)**.
3. Submit the form to authenticate.
### Step 6: Enter credentials in the Connect UI
Once you have all credentials:
1. Open the connection form in Nango.
2. Enter the **Tenant ID**, **Scope**, **Client ID**, the contents of `private_key.pem` as **Private Key**, and the computed value as **Certificate Thumbprint (x5t#S256)**.
3. Submit the form to authenticate.
 You are now connected to Microsoft (Client Credentials - Certificate).